nesco turkey roaster manual

Welcome to the Nesco Turkey Roaster Manual! This guide provides essential information for optimal performance, safety, and care. Discover key features, cooking techniques, and maintenance tips to enhance your culinary experience with the Nesco ITR-01 model.

Overview of the Nesco Turkey Roaster

The Nesco Turkey Roaster is a versatile kitchen appliance designed for efficient and flavorful cooking. With a 17L capacity and 1425W power, it ensures even heating and moist results. Ideal for roasting turkeys, it also accommodates other meats and dishes. The removable pan and rack simplify food placement and cleanup. Its compact design saves space while delivering professional-grade performance, making it a perfect addition for home cooks and special occasions.

Importance of Using the Manual

Using the Nesco Turkey Roaster manual is crucial for safe and effective operation. It provides detailed instructions for setup, cooking, and maintenance, ensuring optimal performance. The manual highlights safety precautions, such as avoiding improper use and electrical hazards, to prevent accidents. It also offers troubleshooting tips and warranty information, helping users resolve common issues. By following the manual, you can maximize the longevity of your roaster and achieve perfectly cooked meals every time. Referencing the guide ensures you utilize all features correctly and maintain your appliance in top condition.

Key Features of the Nesco Turkey Roaster

The Nesco Turkey Roaster offers a powerful 1425W motor and a spacious 17L capacity, ideal for large meals. It features self-basting functionality for even cooking and includes a removable pan for easy cleaning. The appliance is designed for versatility, allowing users to roast, bake, and steam with precision. Its compact design and user-friendly controls make it a convenient addition to any kitchen, ensuring delicious and moist results every time.

Capacity and Power

The Nesco Turkey Roaster boasts an impressive capacity of 17 liters, making it ideal for large gatherings and family meals. With a powerful 1425W motor, it ensures efficient and consistent cooking performance. This combination allows for roasting turkeys up to 22 pounds, providing ample space for even the biggest feasts. The high power output ensures quick preheating and uniform heat distribution, while the spacious interior accommodates whole birds and additional sides, making it a versatile and reliable kitchen appliance for various cooking needs.

Design and Construction

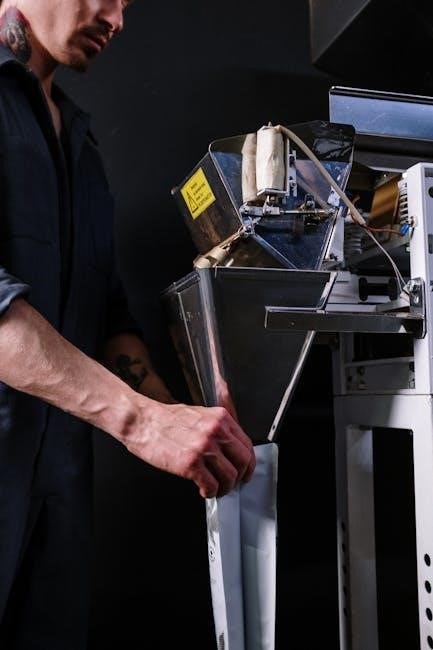
The Nesco Turkey Roaster is designed with durability and functionality in mind. Featuring a stainless steel exterior and porcelain-coated interior, it ensures even heat distribution and easy cleaning. The upright design saves counter space while allowing for easy access to the roasting pan. A removable rack and pan facilitate seamless food preparation and cleanup. The roaster also includes a viewing lid for monitoring cooking progress without interrupting the process. Its sturdy construction and user-friendly design make it a practical addition to any kitchen, perfect for roasting turkeys and other dishes with ease.

Special Functions and Settings

The Nesco Turkey Roaster offers versatile cooking options with adjustable temperature controls and a built-in timer for precise cooking. It features a self-basting lid to keep meat moist and a keep-warm setting for serving. The roaster also includes specific settings for pre-basted and stuffed turkeys, ensuring optimal results. With its advanced functions, this appliance simplifies the cooking process while delivering delicious, evenly cooked dishes every time.

Safety Precautions and Guidelines

Always read the manual before use and follow electrical safety tips. Proper handling and storage are crucial to prevent accidents and ensure longevity of your Nesco Turkey Roaster.

General Safety Tips

  • Always read the manual thoroughly before using the Nesco Turkey Roaster to ensure safe operation.
  • Avoid using the appliance for purposes other than its intended use, as described in the manual.
  • Keep children away from the roaster while it is in operation.
  • Ensure the roaster is placed on a stable, heat-resistant surface to prevent accidents.
  • Never leave the roaster unattended during cooking.
  • Use oven mitts or tongs when handling hot components to avoid burns.

Electrical Safety Considerations

To ensure safe operation of your Nesco Turkey Roaster, always follow these electrical guidelines:

  • Never submerge the roaster or its components in water or liquid.
  • Keep the power cord away from water and heat sources to prevent damage.
  • Avoid using extension cords, as they may cause power issues.
  • Ensure the appliance is properly plugged into a grounded electrical outlet.
  • Do not operate the roaster if the cord is damaged or frayed.
  • Replace any damaged electrical components immediately to prevent hazards.

Adhering to these precautions will help prevent electrical accidents and ensure safe cooking.

Proper Handling and Storage

Always handle the Nesco Turkey Roaster with care to maintain its functionality and longevity. Use oven mitts or tongs to avoid direct contact with hot surfaces. After cooking, allow the roaster to cool down completely before cleaning or storing. Store the roaster in a dry, secure location, away from children and pets. Ensure all components, including the pan and rack, are clean and dry before storage. Avoid stacking heavy items on the roaster to prevent damage. Regularly inspect the power cord and connections for wear or damage. Proper handling and storage will ensure optimal performance and extend the life of your Nesco Turkey Roaster.

Preparing Your Turkey for Roasting

Thaw the turkey completely, pat dry, and season generously. Stuff loosely if desired, adding 30 minutes to cooking time. Place the turkey in the roaster pan, breast side up, ensuring even roasting and proper air circulation for a golden finish.

Thawing and Cleaning the Turkey

Proper thawing and cleaning are crucial for safe and flavorful roasting. Thaw the turkey completely in the refrigerator or cold water, allowing 24 hours for every 4-5 pounds. Once thawed, rinse the turkey under cold water, pat dry with paper towels to remove excess moisture, and remove giblets. This ensures even cooking and prevents bacterial growth. Cleaning and drying the turkey thoroughly is essential for achieving a crispy skin and enhancing seasoning absorption. Avoid rushing this step, as it directly impacts the final result.

Seasoning and Stuffing Guidelines

Seasoning enhances flavor, while stuffing adds moisture and aroma. Rub the turkey with salt, pepper, and herbs under the skin for maximum flavor penetration. For stuffing, use bread-based mixtures lightly moistened with broth. Avoid overstuffing, as this can hinder even cooking. If stuffing, add 30 minutes to the roasting time. Always ensure the turkey reaches a safe internal temperature of 165°F. Tenting the turkey with foil during roasting prevents over-browning and promotes even cooking. Follow these guidelines for a perfectly seasoned and stuffed turkey every time.

Placement in the Roasting Pan

Place the turkey in the removable roasting pan, positioning it breast-side up for even cooking. Ensure the turkey is centered and not touching the pan’s edges. Tuck the wings and legs securely to prevent burning. Pat the turkey dry with paper towels before placing it in the pan to promote browning. Position the rack in the pan first, then gently lower the turkey onto it. Avoid overcrowding, as this hinders air circulation. Proper placement ensures uniform cooking and prevents the turkey from sticking to the pan.

Cooking Your Turkey to Perfection

Preheat the Nesco Roaster to 400°F for the first hour, then reduce heat to 350°F for even browning and moist results. Monitor cooking time carefully.

Recommended Roasting Times and Temperatures

For optimal results, preheat the Nesco Turkey Roaster to 400°F for the first hour, then reduce to 350°F. A 10-14 lb unstuffed turkey roasts in 9-14 hours, while stuffed turkeys require an additional 30 minutes. Always use a meat thermometer to ensure the internal temperature reaches 165°F for safety. Browning can be enhanced by maintaining higher temperatures initially. Follow these guidelines for perfectly cooked, moist, and flavorful turkey every time.

Browning Methods and Techniques

Achieve perfect browning by preheating the Nesco Turkey Roaster to 400°F. Place the turkey in the roasting pan and roast at this temperature for the first hour to enhance browning. For stuffed turkeys, cover loosely with foil to prevent over-browning. Baste the turkey periodically to ensure even browning and moisture retention. These techniques promote a golden, crispy skin while keeping the meat tender and flavorful. Follow the manual’s guidelines for ideal results.

Monitoring and Adjusting Cooking Settings

Monitor the turkey’s internal temperature using a meat thermometer to ensure it reaches 165°F for safe consumption. Adjust the roaster’s temperature settings based on the turkey’s size and stuffing. Check the turkey periodically to avoid overcooking. For stuffed turkeys, add 30 minutes to the roasting time. Use the roaster’s features to maintain consistent heat and browning. If browning occurs too quickly, reduce the temperature slightly. Cover loosely with foil if needed; Refer to the manual for troubleshooting and optimal cooking results.

Cleaning and Maintenance

Regular cleaning ensures optimal performance and hygiene. Wipe the roaster with a damp cloth after use, removing food residue. Use warm soapy water for deeper cleans, avoiding abrasive cleaners. Dry thoroughly to prevent rust. For tough stains, soak removable parts before scrubbing. Regular maintenance extends the appliance’s longevity and efficiency.

Post-Cooking Cleanup Tips

After cooking, allow the roaster to cool slightly before cleaning; Remove large food particles and wipe the interior with a damp cloth. For tough stains, soak the removable pan and rack in warm, soapy water. Avoid using abrasive cleaners or scrubbers, as they may damage the finish. Dry all parts thoroughly with a soft cloth to prevent rust. Regular cleaning ensures optimal performance and hygiene, while also maintaining the longevity of your Nesco Turkey Roaster.

Regular Maintenance for Longevity

Regular maintenance ensures your Nesco Turkey Roaster performs optimally and lasts longer. After cleaning, dry all parts thoroughly to prevent rust. Store the roaster in a cool, dry place, away from direct sunlight. Check cords and plugs for wear and tear, and avoid using damaged components. Lubricate hinges and moving parts periodically to maintain smooth operation. Follow these steps to preserve your appliance’s condition and ensure years of reliable service.

Troubleshooting Common Issues

If your Nesco Turkey Roaster isn’t performing as expected, check for common issues. Ensure the roaster is properly plugged in and the outlet is functioning. If the roaster doesn’t heat, verify the temperature settings and timer; For uneven cooking, ensure the turkey is centered and the pan is level. If the turkey browns too quickly, reduce the temperature or cover loosely with foil. Refer to the manual for detailed solutions or contact Nesco support for assistance with persistent problems.

Additional Recipes and Cooking Ideas

Explore beyond turkey with the Nesco Roaster! Try roasting beef, pork, or vegetables. Experiment with marinades and seasonings for unique flavors. Perfect for side dishes too!

Alternative Cooking Methods

Beyond roasting turkey, the Nesco Roaster excels in slow cooking, baking, and steaming. Try marinating beef or pork for tender results. Experiment with vegetable medleys or hearty stews. For crispy textures, use the browning function. You can also steam seafood or cook soups. Its versatility allows for homemade bread or even cookies. Explore these methods to maximize your roaster’s potential and create diverse, delicious meals for every occasion. Let your creativity shine with endless possibilities!

Side Dishes and Complementary Recipes

The Nesco Turkey Roaster is perfect for creating delicious side dishes to complement your meal. Try roasting vegetables like Brussels sprouts or carrots for a crispy finish. Mashed potatoes or stuffing can be prepared alongside the turkey for added convenience. Steam green beans or asparagus for a healthy option. For desserts, bake sweet potato casserole or cinnamon apples using the roaster’s versatile settings. These recipes enhance your turkey roast, offering a well-rounded and satisfying dining experience for family and guests alike.

Using the Roaster for Other Meats and Dishes

Beyond turkey, the Nesco Roaster excels with other meats like beef, pork, and chicken. Achieve perfectly roasted ham or tender pot roast with ease. Slow-cook stews or chili for hearty meals. Steam vegetables or cook seafood like salmon or shrimp for a healthy option. Even bake casseroles, lasagna, or bread. The roaster’s versatility makes it ideal for a variety of dishes, ensuring moist and flavorful results every time. Explore countless possibilities beyond turkey for a diverse culinary experience.

exploring the brain 4th edition pdf

Acclaimed for its clear style and excellent illustrations, the 4th Edition of Neuroscience: Exploring the Brain offers a fresh, student-friendly approach, emphasizing the biological basis of behavior.

1.1 Overview of the Book

Neuroscience: Exploring the Brain, 4th Edition provides a comprehensive introduction to brain anatomy, function, and behavior. Written by Mark F. Bear, Barry W. Connors, and Michael A. Paradiso, it emphasizes the biological basis of behavior, offering clear explanations and engaging visuals. The book covers updated research, enhanced illustrations, and animations, making it a valuable resource for students and educators in neuroscience. Its contemporary approach ensures relevance and accessibility.

1.2 Importance of the 4th Edition

The 4th Edition of Neuroscience: Exploring the Brain is notable for its updated research, enhanced visuals, and expanded coverage of key topics like taste, smell, and brain development. It incorporates new animations and digital tools, making it more accessible and engaging for students. This edition reflects the latest advancements in neuroscience, ensuring a comprehensive and modern understanding of brain function and behavior for both students and educators.

Authors and Contributors

Mark F. Bear, Barry W. Connors, and Michael A. Paradiso are the renowned authors, bringing expertise from neuroscience and education to create an engaging, comprehensive resource.

2.1 Mark F. Bear

Mark F. Bear, a prominent neuroscientist, is the Picower Professor of Neuroscience at MIT. His research focuses on synaptic plasticity and its role in learning and memory. Bear’s contributions to the field have significantly influenced the understanding of brain function and development, making him a leading voice in the textbook’s authorship.

2.2 Barry W. Connors

Barry W. Connors is a distinguished neuroscientist and professor at Brown University. His work explores the cellular and molecular mechanisms of brain function, particularly in synaptic communication and neural circuits. Connors’ expertise enriches the textbook with a deep understanding of brain anatomy and physiology, making complex concepts accessible to students and researchers alike.

2.3 Michael A. Paradiso

Michael A. Paradiso is a renowned neuroscientist and educator, known for his research on visual perception and brain function. His contributions to the field bring a dynamic perspective to the textbook, ensuring that students gain a comprehensive understanding of neuroscience principles and their practical applications in research and clinical settings.

Key Features of the 4th Edition

The 4th Edition features updated research, enhanced visuals, and new topics like taste and smell, along with digital resources, offering a comprehensive and engaging neuroscience resource.

3.1 Updated Research and Advances

The 4th Edition incorporates cutting-edge findings in neuroscience, including advancements in brain development, sensory systems, and developmental disorders. These updates reflect the latest discoveries, ensuring students access current and comprehensive knowledge in the field. Enhanced coverage of emerging topics provides a deeper understanding of the brain’s intricate functions and its dynamic nature.

3.2 Enhanced Illustrations and Animations

The 4th Edition features striking new illustrations and animations, enhancing visual learning and engagement. These tools clarify complex concepts, such as neural mechanisms and brain structures, making them easier to understand. The animations provide dynamic visualizations of processes like synaptic transmission and neural signaling, enriching the learning experience for students and instructors alike.

Digital and Print Editions

The 4th Edition is available in both digital and print formats. Digital ISBNs: 9781284403022, 1284403025; Print ISBNs: 9781284211283, 1284211282. Digital offers cost savings and convenience.

4.1 ISBN Details

The 4th Edition of Neuroscience: Exploring the Brain has specific ISBNs for both digital and print versions. The digital ISBNs are 9781284403022 and 1284403025, while the print ISBNs are 9781284211283 and 1284211282. These identifiers ensure accurate access to the correct edition, whether purchasing digitally or in print. They also help in verifying the authenticity of the textbook.

4.2 Digital Accessibility and Formats

The 4th Edition is available in various digital formats, including PDF, ePub, and MOBI, ensuring accessibility across devices. The digital version is optimized for easy navigation and includes interactive features like animations. Compression reduces file size, making it easier to download and share. Additionally, the PDF format allows users to fill out forms and annotate text using compatible editors like Adobe Acrobat.

Content and Structure

The book is structured to emphasize the biological basis of behavior, covering brain anatomy, neuron function, and disorders. Chapters progress logically, offering a comprehensive understanding of neuroscience concepts.

5.1 Brain Anatomy and Function

The 4th Edition provides a detailed exploration of brain anatomy, including neural structures and their functions. It delves into the complexities of brain development, synaptic plasticity, and the neural basis of behavior, offering a comprehensive understanding of the human brain’s intricate systems and their roles in controlling bodily functions and cognitive processes.

5.2 Biological Basis of Behavior

The 4th Edition thoroughly examines the biological basis of behavior, linking neural mechanisms to psychological processes. It covers topics such as sensory systems, motivation, emotion, and memory, emphasizing how brain structures and neurotransmitters influence behavior, providing students with a foundational understanding of the biological underpinnings of human actions and cognitive functions.

Learning Resources

The 4th Edition offers comprehensive learning resources, including study guides, online ancillary materials, and interactive animations, designed to enhance understanding and engagement for both students and instructors.

6.1 Study Guides and Supplements

The 4th Edition provides comprehensive study guides and supplements, including detailed chapter summaries, practice questions, and concept reviews. These resources are designed to reinforce key concepts, such as brain anatomy and neuron function, and offer additional support for students to master the biological basis of behavior. The guides are available in both digital and print formats for flexibility and accessibility.

6.2 Online Ancillary Materials

The 4th Edition offers extensive online resources, including animations, interactive simulations, and cross-platform access to digital content. These materials complement the textbook by providing visual and interactive learning tools, accessible via PDF, ePub, and MOBI formats. The online suite enhances understanding of complex topics like brain development and function, making it an invaluable resource for both students and educators. ISBN: 9781284211283 ensures access to these materials.

Updates and Improvements

The 4th Edition includes updated research on brain development, taste, smell, and circadian rhythms. Enhanced illustrations and animations provide a more engaging and interactive learning experience.

7.1 New Topics Covered

The 4th Edition introduces new chapters on brain development, taste, smell, and circadian rhythms. These additions reflect the latest advancements in neuroscience, providing students with a comprehensive understanding of recent discoveries in these areas.

7.2 Revisions in Previous Editions

The 4th Edition incorporates extensive revisions, including updated research, enhanced illustrations, and improved clarity. Complex topics are now presented in a more accessible manner, with additional animations to aid understanding. These revisions ensure the text remains current and engaging, reflecting the latest advancements in neuroscience while maintaining its focus on the biological basis of behavior.

Target Audience

Primarily designed for students and educators, the 4th Edition is also valuable for researchers and professionals seeking a comprehensive understanding of neuroscience and its applications.

8.1 Students and Educators

The 4th Edition is tailored for students seeking a clear, engaging introduction to neuroscience, while educators appreciate its updated research, enhanced illustrations, and comprehensive supplements, making it an ideal resource for both teaching and learning in academic settings.

8.2 Researchers and Professionals

The 4th Edition serves as a valuable resource for researchers and professionals, offering updated research on topics like taste, smell, and brain development. Its comprehensive coverage and accessible PDF format make it a reliable reference for staying current in the field of neuroscience and advancing professional knowledge effectively.

Reviews and Reception

Acclaimed for its clear, friendly style, excellent illustrations, and fresh approach, the 4th Edition is praised by both students and professionals, making it a top choice in neuroscience education and research.

9.1 Academic Feedback

Academics praise the 4th Edition for its contemporary approach and updated research, noting its effectiveness in engaging students while maintaining scientific rigor. The enhanced illustrations and animations are particularly commended for aiding complex concept visualization, making it a valuable resource for both undergraduate and graduate neuroscience programs.

9.2 Student Testimonials

Students highlight the 4th Edition’s clarity, engaging style, and excellent visuals, which simplify complex concepts. Many appreciate the updated animations and real-world applications, making neuroscience more accessible and interesting. The book’s organized structure and student-friendly approach are frequently praised, enhancing overall learning experiences and deeper understanding of brain function and behavior.

Availability and Downloads

Neuroscience: Exploring the Brain, 4th Edition is available as a PDF, eBook, or print copy. Digital versions can be downloaded from platforms like Amazon or VitalSource.

10.1 PDF and eBook Options

The 4th Edition of Neuroscience: Exploring the Brain is accessible in PDF and eBook formats, ensuring versatility for digital learners. The PDF version offers a clean, searchable layout, while eBooks provide interactive features. Both formats are available for purchase through major retailers like Amazon and VitalSource, making it easy to access the content on various devices.

10.2 Purchase and Access Platforms

The 4th Edition of Neuroscience: Exploring the Brain can be purchased through major online retailers like Amazon, Barnes & Noble, and VitalSource. Digital access is available via platforms such as RedShelf and eBookit, offering flexible learning options. Additionally, the textbook can be accessed through institutional subscriptions or direct purchase from the publisher, ensuring availability for both individual and classroom use.

Related Publications and Resources

Companion textbooks and supplementary study guides enhance learning, offering in-depth insights and practical exercises to support the 4th Edition’s comprehensive coverage of neuroscience.

11.1 Companion Textbooks

Supplementary textbooks and study guides complement the 4th Edition, offering detailed exercises, review questions, and interactive tools to deepen understanding of brain anatomy, neuron function, and disorders. These resources are designed to enhance retention and application of key concepts, making them invaluable for both students and educators seeking comprehensive study materials.

11.2 Additional Study Materials

Additional study materials, such as downloadable PDF guides and online resources, provide in-depth chapter outlines, review questions, and interactive tools. These supplements, including the “NeuExpTheBra4thEdi.pdf” guide, enhance understanding of brain anatomy and function, offering practical exercises to reinforce learning and retention for both students and educators seeking comprehensive study support.

The 4th Edition of Neuroscience: Exploring the Brain remains a vital resource for understanding brain function and behavior, offering a comprehensive and engaging approach to neuroscience education.

12.1 Final Thoughts on the 4th Edition

The 4th Edition of Neuroscience: Exploring the Brain stands out as a comprehensive and engaging textbook, offering updated research, enhanced visuals, and a student-friendly approach. Its focus on the biological basis of behavior, along with new topics like taste and smell, makes it an indispensable resource for both students and professionals in the field of neuroscience.

12.2 Future Prospects for Neuroscience

Advancements in neuroscience promise groundbreaking discoveries, with emerging research in brain development, regenerative medicine, and neuroplasticity.Technological innovations, such as advanced imaging techniques and brain-machine interfaces, will deepen our understanding of the brain. The integration of neuroscience with artificial intelligence and genetics offers exciting possibilities for future exploration and applications in health and cognition.

Posted in PDF

the witch of the blackbird pond pdf

The Witch of Blackbird Pond, a Newbery Medal-winning novel by Elizabeth George Speare, is a captivating tale of tolerance and courage in colonial Connecticut. The PDF version offers a convenient way to explore Kit Tyler’s journey, blending historical fiction with timeless themes, making it an essential read for both students and literature enthusiasts.

1.1 Overview of the Novel

The Witch of Blackbird Pond is a historical fiction novel that follows 16-year-old Kit Tyler as she navigates life in colonial Connecticut after leaving her home in Barbados. The story explores themes of tolerance, prejudice, and self-discovery, set against the backdrop of witch trials in 17th-century America. Kit’s journey highlights her courage and resilience as she faces accusations of witchcraft, making the novel a timeless exploration of societal fears and individual strength. The PDF version captures these elements vividly.

1.2 Importance of the PDF Version

The PDF version of The Witch of Blackbird Pond offers unparalleled accessibility, allowing readers to engage with the novel anytime, anywhere. Its digital format ensures clarity and readability, making it ideal for academic purposes. The complete 212-page document provides an immersive experience, preserving the original narrative’s depth. Free and instantly downloadable, the PDF is a convenient resource for students and literature enthusiasts, fostering deeper exploration of Kit Tyler’s journey and the novel’s historical context. Its availability enhances study and enjoyment.

Plot and Characters

The Witch of Blackbird Pond follows Kit Tyler, a young girl accused of witchcraft in colonial Connecticut. The story unfolds with Kit navigating a new life, facing suspicion, and discovering courage amidst trials, supported by a cast of vivid characters shaped by the era’s tensions and superstitions.

2.1 Protagonist: Kit Tyler

Kit Tyler, the 16-year-old protagonist, is a resilient and independent girl from Barbados who moves to colonial Connecticut. Her unconventional background and fiery spirit spark suspicion, leading to accusations of witchcraft. Kit’s ability to swim, a rare skill, further fuels mistrust, as swimming was believed to signify a pact with the devil. Despite these challenges, her courage, kindness, and determination to clear her name drive the story, making her a compelling and memorable character in Elizabeth George Speare’s timeless tale of tolerance and prejudice.

2.2 Setting: Colonial Connecticut

The story unfolds in 1687 colonial Connecticut, a rigid Puritan community governed by strict traditions and superstitions. The setting reflects the era’s distrust of outsiders and fear of witchcraft, which escalates tensions as Kit Tyler’s unconventional background draws suspicion. The contrast between Kit’s tropical upbringing in Barbados and the stark, conservative life in Connecticut heightens her isolation and the community’s mistrust, creating a backdrop of conflict and misunderstanding that drives the narrative forward.

2.3 Key Conflicts and Themes

The novel explores Kit Tyler’s struggle against accusations of witchcraft, fueled by the community’s fear and misunderstanding. Central themes include tolerance, prejudice, and self-discovery, as Kit navigates a society hostile to outsiders. Her courage and resilience highlight the importance of standing against injustice, while the story underscores the dangers of unchecked fear and false accusations, resonating with universal themes of acceptance and the fight for truth.

Themes and Symbolism

The novel delves into themes of tolerance, prejudice, and self-discovery, with Kit’s journey symbolizing resilience and courage. The Blackbird Pond embodies isolation and transformation, reflecting Kit’s struggles and growth in a hostile environment.

3.1 Tolerance and Prejudice

Tolerance and prejudice are central themes in The Witch of Blackbird Pond. Kit Tyler faces accusations of witchcraft due to misunderstandings and fear. The community’s suspicion highlights the dangers of prejudice, while Kit’s resilience and kindness exemplify tolerance. The PDF version captures these themes vividly, allowing readers to explore how fear and superstition shape relationships in colonial Connecticut. These elements make the novel a powerful exploration of human nature and societal judgment.

3.2 Self-Discovery and Courage

Kit Tyler’s journey in The Witch of Blackbird Pond is a profound exploration of self-discovery and courage. As she navigates life in colonial Connecticut, Kit faces accusations of witchcraft, forcing her to confront societal fears and her own identity; Her bravery in standing up for herself and others, despite overwhelming prejudice, showcases her growth and resilience. The PDF version of the novel highlights these themes, offering readers a deeper understanding of Kit’s transformative experience and the power of courage in the face of adversity.

3.4 The Symbolism of the Blackbird Pond

The Blackbird Pond serves as a poignant symbol in the novel, representing isolation, fear, and the unknown. Its murky waters mirror the suspicions and prejudices of the community, while also offering Kit a place of refuge and connection. The pond’s significance lies in its duality—it embodies both the marginalization Kit faces and the hope for understanding and unity. The PDF version of the book underscores this symbolism, allowing readers to reflect on how the pond’s imagery reinforces the novel’s themes of exclusion and redemption.

The PDF Version of the Book

The PDF version of The Witch of Blackbird Pond is a complete digital edition of Elizabeth George Speare’s novel, offering 212 pages of high-quality, instantly accessible text.

4.1 Features of the Digital Edition

The PDF version of The Witch of Blackbird Pond offers a high-quality, 212-page digital edition. It includes the complete text of Elizabeth George Speare’s novel, formatted for easy reading. The file is instantly downloadable, providing convenient access to the story of Kit Tyler. The digital format ensures portability and readability on various devices, making it ideal for students and enthusiasts alike. Additional resources, such as summaries and analysis, may also be included in the download;

4.2 Where to Download the PDF

The PDF version of The Witch of Blackbird Pond is widely available online. Platforms like Litres and other e-book repositories offer free or paid downloads. Users can also access it through educational websites or libraries. Ensure the source is reliable to download the complete 212-page document. The file size is approximately 1.09 MB, making it easy to store and share. Always verify the download source for authenticity and quality.

4.3 Benefits of Reading the PDF

Reading The Witch of Blackbird Pond in PDF format offers convenience and accessibility. The digital version allows for easy highlighting, note-taking, and quick navigation. It’s environmentally friendly, reducing the need for physical copies. The PDF is also portable, enabling readers to access the story on multiple devices. Additionally, the high-quality format ensures clarity, making it ideal for both leisurely reading and academic purposes. This version is particularly beneficial for students and educators seeking a reliable digital resource.

Elizabeth George Speare, a Newbery Medal-winning author, crafted The Witch of Blackbird Pond with historical precision and emotional depth, leaving a lasting legacy in children’s literature.

5.1 Biography of the Author

Elizabeth George Speare was born on November 21, 1908, in Melrose, Massachusetts. She developed a passion for history and writing early in life. Speare taught English before pursuing a career in writing, drawing inspiration from historical events. Her novels, such as The Witch of Blackbird Pond and The Sign of the Beaver, reflect her meticulous research and ability to weave compelling stories. Speare passed away on November 15, 1994, leaving a legacy as a master of historical fiction for young readers.

5.2 Her Writing Style and Legacy

Elizabeth George Speare’s writing style is renowned for its vivid storytelling and meticulous historical research. Her ability to weave engaging narratives with well-developed characters has captivated readers of all ages. Speare’s legacy as a Newbery Medal winner highlights her impact on children’s literature. Her works, such as The Witch of Blackbird Pond and The Sign of the Beaver, remain timeless, blending historical accuracy with universal themes of courage and resilience, ensuring her enduring influence on the genre.

Historical Context

The Witch of Blackbird Pond is set in 1687 Connecticut, a time of witch trials and colonial superstition. The novel reflects the era’s social and religious tensions, blending historical accuracy with fictional drama to explore themes of fear, misunderstanding, and resilience in early American life.

6.1 Witch Trials in Colonial America

The witch trials in colonial America, particularly in Connecticut, reflect a period of intense superstition and fear. The trials, fueled by religious beliefs and misunderstanding, targeted individuals deemed “different,” often women. The Witch of Blackbird Pond captures this era, highlighting societal hysteria and the dangers of unchecked fear. Kit Tyler’s ordeal mirrors real-life accusations, showcasing the devastating impact of such trials on communities and individuals. The novel underscores the importance of justice and humanity amid chaos.

6.2 Life in 17th-Century Connecticut

Life in 17th-century Connecticut was shaped by a strict Puritan lifestyle, agrarian economy, and tight-knit communities. The novel portrays the rigid social norms, limited education, and religious influences that governed daily life. Families relied on farming and trade, with women managing households and children learning trades. The setting reflects the challenges of frontier living, where survival depended on community support and adherence to societal expectations. This backdrop is crucial to understanding Kit Tyler’s experiences and the tensions she faced.

Study Resources and Guides

The PDF version of The Witch of Blackbird Pond includes student handouts, discussion questions, and teacher guides, offering comprehensive tools for deeper understanding and engagement with the novel.

7.1 Summary and Analysis

The PDF version of The Witch of Blackbird Pond provides a detailed summary and analysis of the novel, highlighting Kit Tyler’s journey, themes of tolerance, and colonial life. It includes character insights, plot breakdowns, and historical context, aiding readers in understanding the story’s depth. The analysis explores Kit’s courage, the community’s prejudice, and the symbolism of Blackbird Pond, offering a comprehensive guide for students and educators.

7.2 Discussion Questions and Assignments

The PDF version of The Witch of Blackbird Pond includes engaging discussion questions and assignments to deepen understanding of the novel. Questions explore themes like tolerance, prejudice, and courage, while assignments encourage critical thinking, such as analyzing Kit’s character development or writing a reflective essay on colonial superstitions. These resources help students connect with the story emotionally and intellectually, fostering meaningful classroom discussions and individual reflection.

7.3 Teacher’s Guide and Lesson Plans

The PDF version of The Witch of Blackbird Pond is accompanied by a comprehensive teacher’s guide, offering detailed lesson plans and activities. These resources help educators explore themes like tolerance and courage, with structured discussions and assignments. The guide includes vocabulary lists, historical context, and hands-on projects, aligning with educational standards. It provides teachers with tools to engage students deeply, fostering a rich understanding of the novel and its relevance to colonial history and modern-day lessons.

Adaptations and Related Works

The novel has been adapted into a stage play by Y York. Readers may also enjoy similar books like The Witch of Blackbird Pond for further exploration.

8;1 Stage Adaptations

The Witch of Blackbird Pond has been adapted into a stage play by Y York, transforming the beloved novel into a dynamic theatrical experience. This adaptation captures the essence of Kit Tyler’s journey, offering a fresh perspective for audiences. The stage version remains faithful to the original story while incorporating elements that enhance the narrative. For fans of the PDF version, the play provides a new way to engage with the characters and themes they love, making it a valuable companion to the digital edition.

8.2 Similar Books and Recommendations

Readers who enjoyed The Witch of Blackbird Pond may appreciate similar historical fiction novels like The Witch House and The Haunted House. These books share themes of mystery, tolerance, and self-discovery, set against rich historical backdrops. For fans of Elizabeth George Speare, works like The Sign of the Beaver and The Bronze Bow offer comparable storytelling. These recommendations provide engaging narratives with strong protagonists, making them excellent choices for those who loved Kit Tyler’s journey in the PDF version of The Witch of Blackbird Pond.

The Witch of Blackbird Pond is a timeless Newbery Medal-winning novel that captivates readers with its themes of tolerance, courage, and self-discovery. Kit Tyler’s journey resonates deeply, making the PDF version a popular choice for easy access. This historical fiction masterpiece, set in colonial Connecticut, continues to enchant both students and literature enthusiasts, offering a blend of rich history and compelling storytelling that ensures its enduring appeal.

Additional Resources

The availability of The Witch of Blackbird Pond in PDF format has led to a variety of additional resources for readers. These include study guides, discussion questions, and teacher’s lesson plans that can be downloaded alongside the eBook. Many educational websites offer summaries and analyses to deepen understanding of the novel. Furthermore, adaptations and related works provide alternative perspectives on the story, enriching the reading experience for both students and enthusiasts alike.

About the PDF

The PDF version of The Witch of Blackbird Pond is a high-quality digital format of Elizabeth George Speare’s novel. It is available for instant download and consists of 212 pages, making it easily accessible for readers. The document is fully searchable and compatible with various devices, ensuring a seamless reading experience. This PDF is ideal for students, educators, and enthusiasts, providing a convenient way to explore the story of Kit Tyler and her journey in colonial Connecticut.

Posted in PDF

starry sky projector instructions

Welcome to the comprehensive guide for your starry sky projector! This manual will help you set up, operate, and troubleshoot your device for an enchanting experience. Learn how to customize projections, ensure safety, and maintain your projector for lasting enjoyment.

Safety Precautions When Using a Starry Sky Projector

Keep the projector away from open flames, water, and children. Avoid direct eye contact with lasers to prevent vision damage. Do not point the light near airports or fly zones to ensure safety and compliance with regulations.

Important Safety Measures to Avoid Hazards

Ensure the projector is placed on a stable, heat-resistant surface away from flammable materials. Avoid exposing it to water or moisture to prevent electrical damage. Keep the device out of direct sunlight and extreme temperatures. Always unplug it during cleaning or maintenance. Handle the projector with care to avoid physical damage. Follow all instructions provided in the user manual to ensure safe operation. Regularly inspect the power cord and adapter for signs of wear. Never overload the power outlet or use damaged cables.

Setting Up Your Starry Sky Projector

Begin by carefully unpacking your projector and ensuring all components are included. Connect it to a power supply using a 5V adapter and position it for optimal projection quality.

Unpacking and Initial Setup

Start by carefully unpacking your starry sky projector to ensure all components are included. Check for the projector unit, remote control, power cord, and any additional accessories; Before powering on, locate a suitable indoor space away from direct sunlight to preserve projection quality. Ensure the surface is flat and stable for optimal performance. Always follow the manufacturer’s guidelines for initial setup to avoid damage and ensure safety.

Connecting to the Power Supply

To power your starry sky projector, use a 5V USB cable and a compatible adapter (5V/2A or higher). Connect the adapter to a nearby power outlet and attach the USB cable to the projector. Ensure the connection is secure to avoid interruptions. Always use the recommended power specifications to prevent damage. Keep the projector away from water and avoid outdoor use to maintain functionality and safety. Proper power connection is essential for optimal performance and longevity of your device.

Choosing the Optimal Placement for Projection

Place your starry sky projector in a dark room for the best results. Position it on a stable, flat surface away from direct sunlight or bright lights. Adjust the angle to project onto a smooth, light-colored ceiling or wall for a clear, sharp image. Ensure the lens is unobstructed for optimal projection quality. Keep the projector away from windows to minimize light interference. Experiment with different distances and heights to achieve the desired coverage and effect. Proper placement enhances the immersive experience of your starry sky display.

Assembling the Projector (If Required)

If your starry sky projector requires assembly, start by attaching the astronaut head and body, which are magnetically connected. Rotate the body 360 degrees to achieve the desired angle for projection. Ensure all components are securely fitted. Connect the USB cable to the power adapter (typically 5V/2A) and plug it into the projector. Double-check that all parts are aligned and tightened properly. Refer to the manual for specific assembly instructions, as models may vary. Proper assembly ensures smooth operation and optimal projection quality.

Controlling the Starry Sky Projector

Control your starry sky projector effortlessly using the remote for color, brightness, and flashing adjustments. Use manual buttons for basic functions or connect to smart apps for enhanced features.

Using the Remote Control for Adjustments

The remote control allows you to easily adjust the color, brightness, and flashing frequency of your starry sky projection. Use the arrow buttons to navigate through settings and customize the display. Press the color button to cycle through different hues, while the brightness button adjusts the light intensity. The flashing frequency can be sped up or slowed down to create dynamic effects. Ensure the remote is within range for optimal performance and avoid direct exposure to moisture or extreme temperatures to maintain functionality.

Manual Controls and Button Functions

Locate the power button on the projector to turn it on or off with a single press. The switch button controls basic functions like brightness and color adjustment when pressed and held. Use the mode button to cycle through different projection patterns and effects. For music synchronization, press the music sync button to align the projection with your audio. Ensure all buttons are clean and dry for optimal performance. Refer to the manual for specific button layouts and additional functions tailored to your projector model.

Connecting to Smart Apps for Remote Control

Download and install the Tuya Smart App or other compatible apps. Ensure your smartphone and projector are connected to the same WiFi network. Open the app, follow in-app instructions to discover and connect your projector. Press and hold the power button on the projector for 6 seconds until the indicator blinks rapidly, indicating pairing mode. Once connected, the app will confirm the link, allowing you to adjust settings, toggle modes, and control the projection remotely for a seamless experience.

Customizing Your Starry Sky Projection

Personalize your starry sky experience by adjusting color, brightness, and flashing frequency using the remote or app. Sync music for immersive ambiance and tailored visual effects.

Adjusting Color and Brightness Settings

Customize your starry sky projector by adjusting color and brightness to match your ambiance. Use the remote or app to toggle between vibrant hues and soft tones. For optimal viewing, dim the brightness in darker rooms or increase it in well-lit spaces. Experiment with color modes to create a calming or dynamic atmosphere. Avoid direct eye contact with the laser to prevent discomfort. Adjust settings gradually to ensure visual comfort and consistency in lighting effects.

Changing the Flashing Frequency and Patterns

Easily customize the flashing effects of your starry sky projector by adjusting the frequency and patterns. Use the remote control or smart app to cycle through preset modes. Press the “Speed” button to increase or decrease the flashing rate, creating dynamic or calming effects. Experiment with different patterns, such as twinkling stars or flowing nebulae, to enhance the visual experience. For synced displays, connect the projector to music via Bluetooth, allowing the lights to pulse rhythmically with your favorite tracks for immersive entertainment.

Syncing Music with the Projection

Enhance your starry sky experience by syncing music with the projection. Connect your device via Bluetooth by pressing and holding the power button until the indicator blinks. Open your music app and play your favorite tracks. The projector automatically detects the rhythm, adjusting the light patterns to match the beat. For precise control, use the Tuya Smart App to customize synchronization settings. This feature creates an immersive ambiance, perfect for parties or relaxation, blending visual and auditory elements seamlessly.

Troubleshooting Common Issues

Encounter problems? Check connections, ensure the projector is powered on, and restart if necessary. Consult the manual for specific solutions to resolve issues quickly and effectively.

Resolving Connectivity Problems

If your starry sky projector isn’t connecting, ensure both the device and your phone are on the same Wi-Fi network. Restart the projector and check your internet connection. For Bluetooth models, pair the device by holding the power button until the indicator blinks rapidly. If issues persist, reset the projector to factory settings and reconnect. Always refer to the user manual for specific troubleshooting steps tailored to your model.

Fixing Projection Quality Issues

For optimal projection quality, ensure the lens is clean and free from dust. Adjust the projector’s focus for a sharp image. Position it on a stable surface and aim it directly at the desired surface. Avoid obstructions and ensure the room is dark for better visibility. If issues persist, check for firmware updates or consult the user manual for advanced calibration settings.

Addressing Remote Control Malfunctions

If the remote control isn’t functioning, replace the batteries with new ones and ensure they’re correctly inserted. Check that the remote is properly paired with the projector and within range. Reset the remote by pressing and holding the power button for a few seconds. Ensure no obstructions block the signal. If issues persist, consult the user manual or contact customer support for assistance.

Maintenance and Storage Tips

Regularly clean the lens with a soft cloth and store the projector in a dry, cool place. Avoid exposing it to extreme temperatures or moisture to ensure longevity.

Cleaning the Projector Lens and Components

Regular cleaning is essential for maintaining your starry sky projector’s performance. Use a soft, dry cloth to gently wipe the lens and remove dust or smudges. Avoid harsh chemicals or damp cloths, as they may damage the components. For stubborn spots, lightly dampen the cloth with distilled water, but ensure it is completely dry before wiping. Always handle the lens by the edges to prevent fingerprints. Clean the exterior with a mild detergent solution, then dry thoroughly. This will ensure clear and vibrant projections.

Check for dust or smudges regularly to maintain optimal projection quality. Proper cleaning will extend the lifespan of your projector and keep your starry sky displays breathtaking.

Proper Storage to Maintain Functionality

To ensure your starry sky projector remains in excellent condition, store it in a cool, dry place away from direct sunlight. Use the original packaging or a protective case to safeguard the lens and components from dust and damage. Avoid extreme temperatures or humidity, as this may affect performance. When not in use for extended periods, disconnect the power supply and store the cable separately. Proper storage will help maintain your projector’s functionality and ensure it continues to deliver stunning starry displays for years to come.

Keep the projector away from children and pets to prevent accidental damage during storage.

Advanced Features of Starry Sky Projectors

Explore timer functions, multiple projection modes, and music synchronization for a personalized experience. Use smart app connectivity to control settings and enjoy automated operations effortlessly anywhere.

Using Timer Functions for Automated Use

The timer function allows you to schedule when your starry sky projector turns on or off. Set a timer via the remote control or smart app to automate your experience. For example, program it to start before bedtime or during a party. This feature enhances convenience, ensuring your starry sky display begins and ends exactly when you want it to, without manual intervention. It’s perfect for creating a seamless and enjoyable atmosphere in any setting, every time.

Exploring Multiple Projection Modes

Your starry sky projector offers various projection modes to enhance your experience. Switch between static starry nights, dynamic cosmic effects, and colorful nebula displays. Many models include a combination mode that blends lights and colors for a mesmerizing show. Customize the projection by adjusting speed, brightness, and color intensity to match your mood or environment. Explore these modes using the remote control or app to create unique ambiance for relaxation, parties, or themed events. Experiment with different settings to find your perfect cosmic display.

Congratulations! You’re ready to enjoy your starry sky projector. Follow instructions for optimal use, customize settings for unique experiences, and ensure safety for lasting enjoyment.

Final Tips for Enjoying Your Starry Sky Projector

To enhance your experience, experiment with different settings and modes to create a unique ambiance. Regularly clean the lens for clear projections and update software for optimal performance; Pair music with your projections for a immersive experience. Always follow safety guidelines and store the projector properly when not in use. Explore advanced features like timers and multiple projection modes to maximize enjoyment. With proper care and creativity, your starry sky projector will bring endless delight to any space.

p365 manual safety when you slide the slide

The Sig Sauer P365 manual safety offers enhanced security when sliding the slide, ensuring safe handling. It acts as an additional layer of protection against accidental discharge, providing peace of mind during operation. This feature is particularly crucial when racking the slide, as it prevents unintended firing, making it a vital component for responsible gun ownership and safe firearm practices.

1.1 Overview of the P365 Pistol and Its Safety Features

The Sig Sauer P365 is a compact, high-capacity pistol designed for concealed carry and self-defense. Its sleek design houses a robust safety system, including internal mechanisms like the double-surfaced striker lug, which acts as a drop safety. The optional manual safety feature provides an additional layer of control, particularly when sliding the slide. This feature is engineered to prevent accidental discharge, offering shooters enhanced confidence during handling. The P365’s safety mechanisms are integral to its reputation as a reliable and user-friendly firearm. By combining internal safeguards with optional manual controls, the P365 ensures a secure shooting experience, aligning with best practices for firearm safety and responsible ownership;

1.2 Importance of Manual Safety When Sliding the Slide

The manual safety on the Sig Sauer P365 plays a critical role when sliding the slide, as it provides an additional layer of security against accidental discharge. Engaging the manual safety ensures the pistol cannot fire, even if the trigger is inadvertently activated, offering enhanced control during slide manipulation. This feature is particularly beneficial for shooters who prioritize an extra level of safety or are new to handling firearms. By preventing unintended firing, the manual safety promotes confidence and adherence to safe gun-handling practices, making it an essential component for responsible firearm operation.

Understanding the Manual Safety Mechanism

The P365’s manual safety mechanism prevents the slide from cycling and stops the striker from releasing, ensuring safe operation when sliding the slide or handling the firearm.

2.1 Location and Function of the Manual Safety on the P365

The manual safety on the Sig Sauer P365 is strategically located on the frame, designed for easy thumb access. Its primary function is to physically block the slide’s movement and prevent the striker from releasing when engaged. This mechanism ensures the firearm cannot discharge accidentally, even when the slide is cycled or manipulated. The safety lever is intuitive to operate, allowing users to engage or disengage it with a deliberate thumb movement. Its placement and design enhance safe handling, particularly when sliding the slide during reloads or clearing malfunctions. The manual safety adds an extra layer of control, providing peace of mind for shooters who prefer an additional safety feature on their P365 pistol.

2.2 How the Manual Safety Interacts with the Slide

The manual safety on the Sig Sauer P365 interacts with the slide by mechanically blocking its movement when engaged. When activated, the safety lever prevents the slide from cycling, ensuring the striker cannot release and fire a round. This direct interaction provides a physical barrier, enhancing safety during slide manipulation. The safety’s design ensures it only disengages when deliberately moved, preventing accidental discharges. Its interaction with the slide is seamless, offering a reliable layer of protection without interfering with the pistol’s functionality. This mechanism is especially critical when racking the slide, as it ensures the firearm remains in a safe state until the user intentionally disengages the safety.

Engaging and Disengaging the Manual Safety

The Sig Sauer P365’s manual safety is effortlessly engaged and disengaged with an intuitive thumb lever, ensuring easy access even with a partially open slide.

3.1 Step-by-Step Guide to Activating the Manual Safety

To activate the P365’s manual safety, ensure the firearm is unloaded and the slide is in the forward position. Locate the manual safety lever, typically positioned on the frame for easy thumb access. Gently push the lever upward until it clicks into place, ensuring it is fully engaged. This action blocks the trigger mechanism, preventing accidental discharge. Always verify the safety is engaged by attempting to pull the trigger, which should not move when the safety is on. When ready to disengage, simply push the lever downward. Proper technique ensures safe handling, especially when sliding the slide or performing other operations.

3.2 Best Practices for Safe Handling When Sliding the Slide

When sliding the slide on your P365, always ensure the manual safety is engaged to prevent accidental discharge. Keep your finger outside the trigger guard and maintain control of the firearm. Use your dominant hand to rack the slide while keeping the muzzle pointed in a safe direction. Avoid touching the trigger during this process. If the safety is disengaged, ensure the firearm is unloaded before proceeding. Always verify the chamber is empty by visually inspecting it. Proper technique and adherence to safety protocols are essential for responsible gun handling. This ensures a safe and controlled environment when manipulating the slide or engaging the manual safety.

Safety Considerations When Manipulating the Slide

Always ensure the manual safety is engaged before sliding the slide. Keep fingers away from the trigger and maintain muzzle awareness. Verify the chamber is empty.

4.1 Proper Technique for Racking the Slide with the Safety Engaged

When racking the slide with the manual safety engaged on your Sig Sauer P365, ensure the safety lever is fully activated to prevent accidental discharge. Grip the slide firmly but carefully, avoiding the rear sight for better control. Use your dominant hand to pull the slide back while keeping your non-dominant hand clear of the ejection port. Maintain muzzle awareness, pointing the firearm in a safe direction. Ensure your finger stays off the trigger throughout the process. After racking, release the slide smoothly to chamber a round. Always verify the chamber is empty before manipulating the slide, and avoid using excessive force, which could lead to unintended consequences. Proper technique ensures safety and reliability when handling the P365 with the manual safety engaged.

4.2 Avoiding Accidental Discharge When Sliding the Slide

Avoiding accidental discharge when sliding the slide on the Sig Sauer P365 requires careful attention to safety protocols. Always ensure the manual safety is engaged before manipulating the slide, as this prevents the firearm from firing unintentionally. Keep your finger off the trigger and outside the trigger guard throughout the process. Use a holster that fully covers the trigger to prevent accidental activation. Additionally, maintain control of the slide to avoid rapid or uncontrolled movement, which could lead to an unintended discharge. Always be aware of your surroundings and ensure the muzzle is pointed in a safe direction. By following these practices, you minimize the risk of accidental discharge and ensure safe operation of the P365.

The Sig Sauer P365 manual safety emphasizes the importance of safe handling practices when sliding the slide. Proper techniques and awareness ensure responsible gun ownership and operational safety.

5.1 Summary of Key Points for Safe Handling

Safe handling of the Sig Sauer P365 with a manual safety requires attention to proper techniques and awareness. Always engage the safety before sliding the slide to prevent accidental discharge. Keep your finger off the trigger and maintain a firm grip. Ensure the safety is disengaged only when ready to fire. Understanding the safety mechanism and its interaction with the slide is critical for responsible ownership. Proper training and practice are essential to avoid mishaps. Always use a holster designed for the P365 with a manual safety to ensure secure carry; By following these guidelines, you can maintain safety and control while operating the firearm.

5.2 Final Thoughts on Manual Safety and Slide Operation

The manual safety on the Sig Sauer P365 is a critical feature that enhances safe handling, especially when sliding the slide. Proper engagement and disengagement techniques are vital to prevent accidental discharge. Always ensure the safety is activated before manipulating the slide and keep your finger away from the trigger. The P365’s design, combined with the manual safety, provides a reliable platform for responsible firearm ownership. Regular practice and adherence to safety protocols will build confidence and proficiency. By mastering the manual safety and slide operation, you can enjoy a secure and efficient shooting experience with the P365.