exercises for lower back pain and sciatica pdf

Lower back pain and sciatica are common issues affecting millions, often manageable with targeted exercises. These exercises improve flexibility, strengthen muscles, and enhance posture, helping alleviate discomfort and promote recovery. Consulting a healthcare professional for personalized advice is crucial for effective management.

Understanding the Basics of Lower Back Pain

Lower back pain often results from muscle strain, poor posture, or underlying conditions like herniated discs. Gentle exercises, such as single knee to chest stretches and pelvic tilts, can help alleviate tension and improve posture. Strengthening core muscles and enhancing flexibility are crucial for managing symptoms. It’s important to listen to your body and avoid overexertion, as this can worsen the condition. Consulting a healthcare professional provides personalized guidance for effective management.

Importance of Exercise in Managing Symptoms

Exercise plays a vital role in managing lower back pain and sciatica by reducing inflammation, strengthening muscles, and improving posture. Gentle stretches, like the single knee to chest stretch, and strengthening exercises, such as pelvic tilts, help relieve tension and enhance core stability. Regular activity promotes blood flow, aiding nerve recovery and preventing further discomfort. Consistency is key, as it helps maintain muscle strength and flexibility, reducing the risk of recurrence.

Understanding Sciatica and Its Causes

Sciatica refers to pain radiating along the sciatic nerve, often caused by nerve compression or irritation. Exercises targeting the lower back and hips can alleviate symptoms effectively.

What is Sciatica?

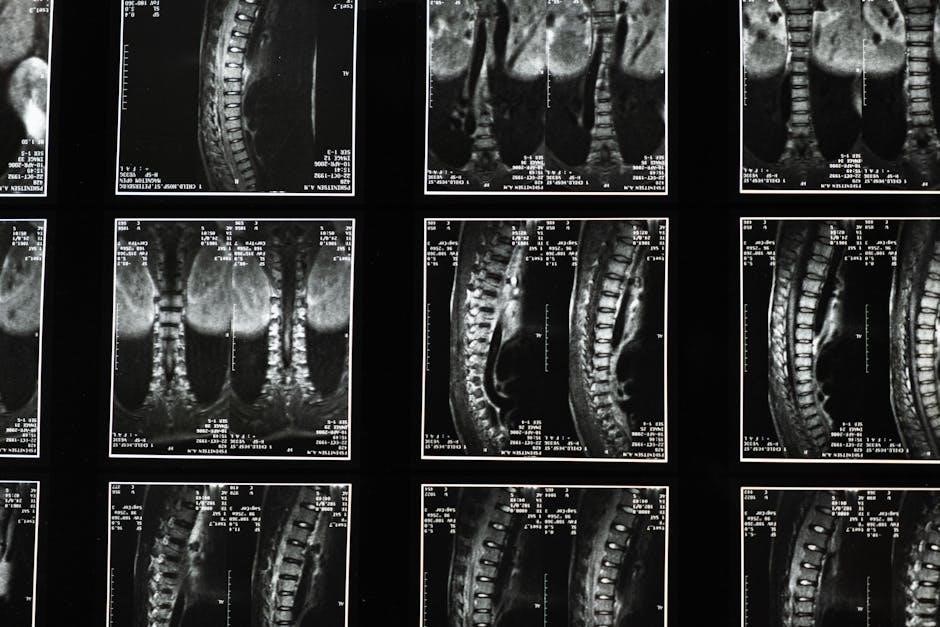
Sciatica is a condition characterized by pain radiating along the sciatic nerve, which runs from the lower back down to the legs. It occurs when the sciatic nerve is compressed or irritated, often due to a herniated disc, spinal stenosis, or piriformis syndrome. Symptoms include lower back pain, numbness, tingling, and weakness in the affected leg. Exercises and stretching can help alleviate these symptoms by reducing nerve compression and improving mobility.

Causes and Risk Factors of Sciatica

Sciatica primarily results from compression or irritation of the sciatic nerve, often caused by a herniated disc, spinal stenosis, spondylolisthesis, or piriformis syndrome. Risk factors include aging, obesity, sedentary lifestyles, and improper lifting techniques. These conditions can weaken spinal structures, leading to nerve compression and pain. Understanding these causes helps in developing targeted exercises to address the root of the problem and alleviate symptoms effectively.

Benefits of Exercises for Lower Back Pain and Sciatica

Exercises reduce inflammation, strengthen muscles, and improve mobility, providing relief from pain. Regular activity helps prevent future discomfort and supports long-term spinal health effectively.

How Exercise Reduces Inflammation and Pain

Exercise enhances blood flow, reducing inflammation and promoting healing in the lower back. Activities like stretching and strengthening movements relieve pressure on the sciatic nerve, decreasing pain. Regular movement improves circulation, which helps reduce swelling and accelerates recovery. Gentle exercises, such as pelvic tilts and knee-to-chest stretches, are particularly effective in alleviating discomfort while strengthening supportive muscles. Consistency in exercise routines is key to long-term pain management and improved mobility.

Improving Posture and Core Strength

Strengthening the core and improving posture are essential for reducing lower back pain and sciatica. Exercises like pelvic tilts and press-ups help stabilize the spine, reducing strain on the sciatic nerve. Strong abdominal and back muscles enhance posture, preventing excessive curvature and alleviating discomfort. Regular core-strengthening routines promote better alignment, reducing the risk of further injury and improving overall spinal stability for long-term relief.

Specific Exercises for Lower Back Pain

Exercises like knee-to-chest stretches, pelvic tilts, and press-ups target the lower back, improving flexibility and reducing strain. These movements help alleviate discomfort and promote spinal stability.

Knee to Chest Stretch

Lie on your back, knees bent, and feet flat on the floor. Gently pull one knee toward your chest, holding for 20-30 seconds. This stretch alleviates lower back tension by targeting the lumbar muscles and improving flexibility. It is essential to perform the movement slowly and avoid bouncing to prevent strain. Repeat on the other side to ensure balanced relief and enhanced spinal mobility.

Pelvic Tilts and Press-Ups

Pelvic tilts and press-ups are effective exercises for relieving lower back pain. Lie on your back with knees bent and feet flat. Tilt your pelvis upwards, flattening your lower back against the floor, and hold for 5 seconds. For press-ups, arch your back and lift your chest, holding briefly. These movements strengthen core muscles and improve spinal alignment, providing relief from tension and discomfort. Perform 5-10 repetitions for optimal benefits.

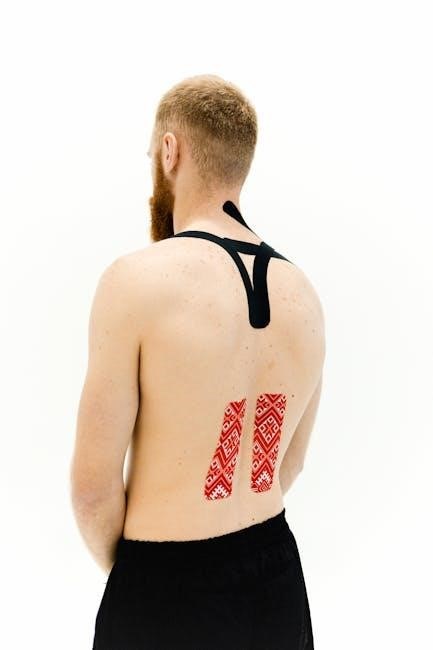
Stretching Exercises for Sciatica Relief

Stretching exercises target tight muscles, improving flexibility and reducing nerve compression. Techniques like piriformis stretches and seated stretches help alleviate sciatic pain, enhancing mobility and comfort.

Piriformis Stretches

Piriformis stretches target the piriformis muscle, which runs from the base of the spine to the thighbone. Tightness in this muscle can compress the sciatic nerve, causing pain. To perform, lie on your back, cross the affected ankle over the opposite knee, and gently pull the unaffected leg toward your chest until a stretch is felt. Hold for 20-30 seconds and repeat 2-3 times. This stretch helps relieve tension and reduce sciatica symptoms. Adjust the stretch based on comfort and avoid movements that worsen pain.

Seated and Standing Stretching Techniques

Seated stretches, such as crossing one ankle over the opposite knee and gently leaning forward, can help relieve sciatica by targeting tight hip muscles. Standing stretches, like bending forward at the hips to touch the toes or stretching hamstrings against a wall, improve flexibility and reduce tension. These exercises promote blood flow and relax tightened muscles, aiding in pain relief. Perform each stretch for 20-30 seconds, 2-3 times daily, and avoid bouncing or forcing beyond comfort.

Strengthening Exercises for Long-Term Relief

Strengthening core, abdominal, and glute muscles enhances spinal stability, reducing pain and preventing future strain. Targeted exercises improve posture and provide long-term relief from lower back discomfort.

Abdominal and Hip Flexor Strengthening

Strengthening abdominal and hip flexor muscles is crucial for spinal stability and posture improvement. Exercises like abdominal curl-ups and hip flexor stretches target these areas, reducing strain on the lower back. These muscles play a key role in supporting the spine, making them essential for long-term pain relief and preventing future discomfort. Regular practice enhances core strength and promotes overall back health.

Glute and Back Muscle Strengthening Exercises

Strengthening glute and back muscles is vital for alleviating lower back pain and sciatica. Exercises like bridging, superman stretches, and bird-dog poses target these areas, improving posture and reducing nerve compression. Stronger glutes and back muscles provide better spinal support, enhancing stability and reducing discomfort. Regular practice helps prevent muscle imbalances and promotes long-term relief from sciatica symptoms, fostering overall lower back health and functionality.

Safe Exercise Practices

Always listen to your body and avoid overexertion. Stop exercises if pain worsens. Move slowly, avoid rapid movements, and never force positions. Modify exercises based on pain levels to ensure safety and effectiveness.

Listening to Your Body and Avoiding Overexertion

Stop exercises if pain increases. Avoid rapid or forced movements, as they can worsen symptoms. Gauge intensity by pain levels, aiming for 4-5/10. Focus on slow, controlled movements. If discomfort arises, modify or rest. Prioritize comfort and safety to prevent aggravation and ensure effective, sustainable progress in managing lower back pain and sciatica.

Modifications for Different Fitness Levels

  • Beginners can start with gentle, supported versions of exercises, such as seated stretches, to avoid strain.
  • Advanced individuals can gradually increase intensity or add resistance for more challenging workouts.
  • Using props like chairs or rails for support during exercises helps maintain proper form and reduce injury risk.
  • Progressions allow individuals to slowly move to more complex exercises as strength and flexibility improve.
  • Consulting a healthcare professional ensures exercises are tailored to individual fitness levels, promoting safe and effective routines.

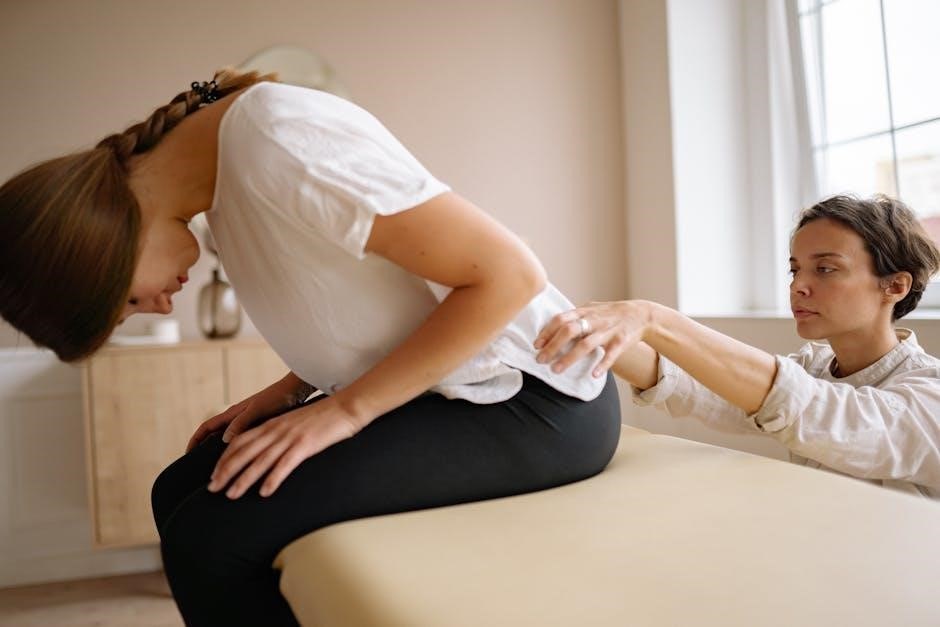
When to Consult a Healthcare Professional

Consult a healthcare professional if pain persists or worsens, especially with red flags like severe pain, numbness, or difficulty moving. Seek personalized advice for safe, effective exercise routines.

Red Flags for Severe Pain

Severe pain accompanied by numbness, tingling, or weakness in the legs may indicate serious conditions like disc herniation or nerve compression. Sudden loss of bladder or bowel control, fever, or unrelenting pain warrants immediate medical attention. These red flags suggest underlying issues requiring prompt evaluation and treatment, ensuring proper management and preventing further complications.

Creating a Personalized Exercise Plan

A personalized exercise plan for lower back pain and sciatica should be tailored to individual needs, focusing on gentle stretches and strengthening exercises. Start with assessments to identify specific areas of discomfort and set realistic goals. Incorporate exercises like single knee-to-chest stretches or pelvic tilts, gradually increasing intensity. Regular reassessment ensures progress and safety, fostering long-term relief and improved mobility. Professional guidance is key to developing an effective plan.

Advanced Exercises for Sciatica and Lower Back Pain

Advanced exercises include dynamic stretching, foam rolling, and progressive resistance to improve mobility and strength. These techniques target the sciatic nerve and lower back, enhancing flexibility and reducing strain without causing further injury. Proper form is essential to maximize benefits and prevent discomfort.

Dynamic Stretching and Foam Rolling

Dynamic stretching involves gentle, controlled movements to improve flexibility and blood flow, while foam rolling targets muscle tension. For sciatica, rolling the piriformis and hamstrings can relieve pressure on the sciatic nerve. Dynamic stretches like cat-cow and side bends enhance spinal mobility. Start slowly, focusing on smooth movements, and avoid bouncing to prevent discomfort. These techniques are effective for improving circulation and reducing muscle tightness, promoting long-term relief from lower back pain and sciatica symptoms.

Progressive Resistance Exercises

Progressive resistance exercises involve gradually increasing the intensity of workouts to build strength. For lower back pain and sciatica, these exercises focus on strengthening abdominal, hip, and glute muscles. Examples include straight leg raises and back flexion. Start with light resistance and gradually increase as strength improves. These exercises enhance spinal stability and posture, reducing pain and improving overall function. Regular practice promotes long-term relief and prevents recurrence of symptoms.

Exercises for lower back pain and sciatica offer effective relief and long-term management. Consistency and patience are key to achieving lasting benefits. Always consult a healthcare professional for personalized guidance and to ensure exercises are performed safely and appropriately for your condition.

Summarizing the Key Points

Exercises for lower back pain and sciatica focus on improving flexibility, strength, and posture. Stretching, strengthening, and aerobic exercises are essential for alleviating symptoms. Consistency is crucial for long-term relief, and listening to your body prevents overexertion. A well-rounded routine, including core exercises and gentle stretches, helps reduce pain and improve mobility. Always consult a healthcare professional to tailor exercises to your specific needs for safe and effective results.

Regular exercise not only reduces stiffness but also enhances overall well-being. Patience and gradual progress are key to achieving lasting benefits and avoiding discouragement. By combining these approaches, individuals can effectively manage lower back pain and sciatica, leading to a healthier, more active lifestyle.

Encouraging Consistency and Patience

Consistency is key when managing lower back pain and sciatica through exercise. Gentle, regular movements help reduce stiffness and strengthen muscles over time. Patience is essential, as progress may be gradual. Avoid overexertion, as this can worsen symptoms. Celebrate small achievements to stay motivated, and remember that steady effort leads to lasting relief. Balancing persistence with patience ensures a safe and effective journey toward healing and improved mobility.

Posted in PDF

t-shirt ruler guide pdf free

T-shirt ruler guides are essential tools for achieving perfect design alignment on apparel. Available as free PDF downloads‚ they help creators ensure professional-looking results effortlessly.

What is a T-Shirt Ruler Guide?

A T-shirt ruler guide is a tool designed to help align designs accurately on apparel. Typically available as free PDF downloads‚ these guides provide measurements and markers to ensure precise placement of graphics‚ logos‚ or text. They are versatile‚ catering to various shirt sizes‚ from adult to infant‚ and can be printed on materials like cardstock or vinyl. By using a T-shirt ruler guide‚ creators can achieve professional-looking results‚ saving time and reducing errors in design placement.

Why You Need a T-Shirt Ruler Guide

A T-shirt ruler guide is indispensable for ensuring precise design alignment‚ eliminating guesswork‚ and achieving professional results. It helps reduce errors‚ saving time and materials. Proper alignment enhances readability and comfort‚ making designs look polished and well-placed. Whether for DTF transfers‚ vinyl‚ or embroidery‚ a ruler guide ensures consistency across projects. By using one‚ you can create perfectly centered graphics‚ boosting customer satisfaction and protecting your brand’s reputation. It’s a simple yet essential tool for any apparel crafting project.

Understanding the Importance of Alignment in T-Shirt Designs

Proper alignment is crucial for creating visually appealing and professional T-shirt designs. It ensures designs are centered‚ evenly spaced‚ and balanced‚ enhancing the overall aesthetic and readability. Misaligned designs can look unprofessional and uncomfortable to wear‚ making alignment tools like T-shirt ruler guides indispensable for achieving polished results. By using these guides‚ creators can ensure designs are perfectly placed‚ catering to various shirt sizes and styles for a consistent‚ high-quality finish.

How Proper Alignment Enhances the Appearance of Designs

Proper alignment ensures designs are visually balanced‚ enhancing the overall aesthetic of T-shirts. It guarantees text and graphics are centered and evenly spaced‚ improving readability and professional appeal. Misaligned elements can make designs look amateurish‚ while correct placement ensures a polished‚ cohesive look. Using tools like T-shirt ruler guides helps maintain consistency‚ especially across different shirt sizes and styles‚ ensuring designs are both attractive and wearable. Proper alignment is key to creating high-quality‚ professional-looking apparel that stands out and meets customer expectations. It simplifies the design process‚ reducing errors and saving time while elevating the final product’s visual impact.

Common Mistakes to Avoid When Aligning Designs

One common mistake is not printing rulers at actual size‚ leading to inaccurate measurements. Another error is placing designs too low or high‚ disrupting the visual balance. Forgetting to account for shirt styles‚ such as crew necks versus V-necks‚ can also misalign graphics. Additionally‚ ignoring fabric grain lines or stretching shirts during printing can distort designs. Using improper tools or neglecting to laminate rulers reduces durability and precision; Avoiding these pitfalls ensures professional-quality results and extends the life of your T-shirt ruler guides.

Available Formats for T-Shirt Ruler Guides

T-shirt ruler guides are available in various formats like PDF‚ SVG‚ DXF‚ and PNG. These formats cater to different needs‚ from home printing to precision cutting with machines like Cricut.

PDF‚ SVG‚ DXF‚ and PNG Files Explained

T-shirt ruler guides come in multiple formats to suit various needs. PDF files are ideal for home printing and maintaining scale. SVG files offer scalability for custom designs‚ while DXF files are perfect for precision cutting with machines like Cricut. PNG files provide clear visuals‚ ensuring measurements are easy to read. Each format ensures accurate alignment‚ whether you’re working on adult‚ youth‚ or infant shirts‚ making the design process efficient and professional.

How to Choose the Right Format for Your Needs

Choosing the right format depends on your project requirements. PDF files are ideal for home printing and maintaining scale. SVG files are best for custom designs due to their scalability. DXF files are recommended for precision cutting with machines like Cricut. PNG files are great for clear visuals and easy measurement reading. Consider your tools and desired outcome to select the most suitable format‚ ensuring accurate alignment and professional results for your T-shirt designs.

DIY T-Shirt Ruler Guide: A Step-by-Step Guide

Create a custom T-shirt ruler guide using cardstock or vinyl. Print‚ cut‚ and laminate for durability. Use it to align designs perfectly on any shirt size effortlessly.

Materials Needed for Creating a Custom Ruler

To create a custom T-shirt ruler guide‚ you’ll need cardstock‚ vinyl‚ or plastic sheets for durability. Print your design using a home printer or cutting machine like Cricut. Additional materials include scissors‚ a laminator‚ and laminating pouches for protection. A ruler or measuring tape ensures accuracy‚ while markers can enhance visibility. Optional tools include a craft knife or a cutting mat for precise cuts. These materials will help you craft a long-lasting‚ reusable ruler guide tailored to your needs.

Using Cricut or Other Cutting Machines for Precision

For precise cuts‚ use a Cricut or similar cutting machine with your T-shirt ruler guide SVG or DXF files. Upload the design to your machine’s software‚ ensuring measurements are accurate. Cut the ruler from cardstock‚ vinyl‚ or plastic sheets for durability. Use a cutting mat to prevent material shifting during cutting. After cutting‚ transfer the design to a sturdy base like cardboard or PVC for long-term use. This method ensures sharp‚ clean edges and professional-quality results for your custom ruler guide.

Printing and Using Your T-Shirt Ruler Guide

Print your T-shirt ruler guide at 100% size on sturdy materials like cardstock or vinyl. Use a home printer or cutting machine for precision. Laminate the ruler for durability and reuse. Ensure accurate alignment by placing the guide on a flat surface. This tool helps achieve professional-level results for DTF transfers‚ vinyl applications‚ and embroidery. Store it neatly after use to maintain its shape and functionality for future projects.

Best Practices for Printing at Home

For optimal results‚ print your T-shirt ruler guide at 100% size using a home printer. Choose sturdy materials like cardstock or vinyl for durability. Ensure the printer settings are set to “actual size” to maintain accuracy. Consider printing the first 0.6 inches in one color and changing colors for better visibility of markings. Laminate the ruler after printing to protect it from wear and tear. This ensures the guide remains precise and reusable for future projects‚ providing consistent alignment every time.

How to Laminate and Reuse Your Ruler

To laminate your T-shirt ruler guide‚ start by printing and cutting it to size. Place the ruler in a laminator pouch‚ ensuring it’s centered and smooth. Feed it through a laminator at the correct temperature setting. For a no-laminator option‚ apply clear vinyl or contact paper evenly‚ avoiding air bubbles. Once laminated‚ trim the edges and clean with a damp cloth. This process makes the ruler durable and reusable‚ ensuring precise alignment for multiple projects while maintaining its clarity and effectiveness over time.

T-Shirt Ruler Guides for Different Sizes

T-shirt ruler guides are available for adult‚ youth‚ toddler‚ and infant sizes‚ ensuring accurate alignment for every shirt style. Download free templates tailored to your needs.

Adult‚ Youth‚ Toddler‚ and Infant T-Shirt Rulers

T-shirt ruler guides are available in various sizes‚ catering to adults‚ youth‚ toddlers‚ and infants. Each ruler is specifically designed to measure and align designs according to the shirt size‚ ensuring proper placement and proportions. Whether you’re working on a standard adult tee or a tiny infant shirt‚ these guides help maintain consistency and accuracy. Download free templates tailored for each size to achieve professional-quality results for any project. Perfect for crafters and designers‚ these rulers simplify the alignment process for all ages.

Adjusting the Ruler for Various Shirt Styles

Shirt styles vary‚ and your ruler guide should adapt to ensure accurate design placement. For crew necks‚ measure the neckline width‚ while for V-necks‚ align the ruler with the lowest point of the “V.” Sleeves‚ pockets‚ and hemlines also require specific adjustments. By customizing the ruler to fit the shirt style‚ you ensure designs are centered and proportionate. Print the guide on cardstock or vinyl for durability and laminate it for repeated use across different projects and shirt types. This versatility ensures flawless alignment every time.

Downloading Free T-Shirt Ruler Guides

Easily access free T-shirt ruler guides online through platforms like Pinterest‚ Etsy‚ and craft websites. These reliable resources offer downloadable PDFs and SVGs for perfect alignment.

Where to Find Reliable Free Resources

Reliable free T-shirt ruler guides can be found on platforms like Pinterest‚ Etsy‚ and crafting websites. These sources offer a variety of downloadable formats‚ including PDF‚ SVG‚ and DXF‚ ensuring compatibility with tools like Cricut or Silhouette. Many creators share these resources in their free libraries‚ making it easy to access templates for adult‚ youth‚ toddler‚ and infant shirts. Additionally‚ online marketplaces and community forums often provide high-quality‚ printable guides designed to enhance your DIY projects.

How to Access Free T-Shirt Ruler Templates

To access free T-shirt ruler templates‚ visit reputable crafting websites or platforms like Pinterest and Etsy. Many creators offer downloadable PDF‚ SVG‚ and DXF files in their free resource libraries. Simply browse‚ select your preferred template‚ and download. Some sites may require sign-up or email subscription for access. Ensure to print at actual size for accuracy and compatibility with tools like Cricut or Silhouette. These templates are ideal for DIY projects‚ offering precise alignment for various shirt sizes and styles.

Customizing Your T-Shirt Ruler Guide

Customize your ruler guide by adding specific measurements and markings. Personalize the design for unique projects‚ ensuring precise alignment and professional results for all your T-shirt designs.

Adding Measurements and Markings

Enhance your ruler guide by adding precise measurements and clear markings. Use a PDF template to include centimeter or inch scales‚ ensuring accurate alignment. Customize markings for specific projects‚ such as neckline curves or design placements. Print on durable materials like cardstock or vinyl for long-term use. Laminate your ruler for added protection and easy cleaning. This customization ensures your tool meets your unique needs‚ making it indispensable for perfectly aligned T-shirt designs every time.

Personalizing the Design for Specific Projects

Tailor your T-shirt ruler guide for unique projects by incorporating custom measurements and markings. Use free PDF templates to create rulers for adult‚ youth‚ toddler‚ or infant sizes. Adjust markings for different shirt styles‚ such as crew necks or V-necks. Add specific alignment guides for designs like logos or text‚ ensuring they fit perfectly on various garment types. This customization allows you to adapt your ruler to any project‚ making it a versatile tool for achieving professional results consistently. Personalization enhances efficiency and accuracy in your creative process.

Using a T-shirt ruler guide ensures perfectly aligned designs‚ enhancing both professionalism and creativity. Download free PDF templates today and start crafting flawless‚ custom apparel with confidence and precision.

Final Tips for Using Your T-Shirt Ruler Guide

Always laminate your ruler for durability and reuse. Ensure accurate measurements by calibrating your cutter or heat press. Print at 100% size for precision. For consistent results‚ align designs with the ruler’s center marks. Store your ruler flat to prevent bending. Experiment with materials like vinyl or cardstock for added longevity. Customize measurements for specific projects to enhance versatility. By following these tips‚ you’ll achieve professional-grade alignment every time‚ making your DIY projects stand out with ease and efficiency.

Start Creating Perfectly Aligned Designs Today

With a free T-shirt ruler guide PDF‚ you can instantly elevate your crafting. Download and print the guide‚ then use it to center designs flawlessly. Whether you’re working with vinyl‚ DTF transfers‚ or screen printing‚ this tool ensures every project looks professional. Laminate it for reuse and adjust it for different shirt sizes. Say goodbye to alignment guesswork and hello to precision. Start your next project confident‚ knowing your designs will be perfectly centered and visually appealing every time.

Posted in PDF

2016 chevrolet malibu manual

The 2016 Chevrolet Malibu manual provides comprehensive guidance for owners, covering vehicle operation, maintenance, and troubleshooting․ It ensures optimal performance and safety, highlighting key features like advanced infotainment and fuel efficiency․

1․1 Overview of the Manual Structure

The 2016 Chevrolet Malibu manual is structured logically, covering essential topics like controls, maintenance, safety, and troubleshooting․ It includes detailed sections for easy navigation, ensuring users can find information quickly․ The manual also provides supplementary guides and resources for enhanced understanding and vehicle care․

1․2 Importance of the Owner’s Manual for Vehicle Maintenance

The owner’s manual is crucial for maintaining the 2016 Chevrolet Malibu, providing detailed guidelines for routine checks, oil changes, and fluid levels․ It ensures proper care, prevents potential issues, and helps owners understand their vehicle’s specific needs for optimal performance and longevity․

1․3 Key Features of the 2016 Chevrolet Malibu

The 2016 Chevrolet Malibu boasts a sleek design, advanced MyLink infotainment system, and impressive fuel efficiency․ It features a spacious interior, intuitive controls, and cutting-edge safety technologies, making it a stylish and reliable choice for drivers seeking a blend of comfort, performance, and modern connectivity․

Understanding the Controls and Instruments

The 2016 Chevrolet Malibu features an intuitive dashboard with clear instrumentation, including a digital display and steering wheel controls for easy access to settings and infotainment functions․

2․1 Dashboard Layout and Instrument Cluster

The 2016 Chevrolet Malibu’s dashboard is designed for clarity and convenience, featuring a central infotainment screen, analog gauges for speed and RPM, and a digital display for vital vehicle information, ensuring drivers can monitor performance and settings efficiently while maintaining focus on the road․

2․2 Steering Wheel Controls and Infotainment System

The 2016 Chevrolet Malibu features intuitive steering wheel controls for cruise control, audio, and voice commands, complementing the MyLink infotainment system․ This system offers Bluetooth connectivity, USB ports, and optional navigation, providing seamless integration of entertainment and driver-assistance features for a connected and enjoyable driving experience․

2․3 Climate Control and Seat Adjustments

The 2016 Chevrolet Malibu offers dual-zone automatic climate control for personalized comfort․ Seats feature power adjustments, including lumbar support and optional heating/ventilation․ The system ensures a comfortable driving environment, with intuitive controls for temperature, airflow, and seat settings, enhancing overall driver and passenger convenience and satisfaction․

Maintenance and Service Schedule

Regular maintenance is crucial for the 2016 Chevrolet Malibu’s performance and longevity․ Schedule oil changes, tire rotations, and fluid checks as recommended․ Replace filters and inspect belts regularly․

3․1 Recommended Maintenance Intervals

Regular maintenance for the 2016 Chevrolet Malibu includes oil changes every 5,000 to 7,500 miles, tire rotations every 7,500 miles, and brake pad inspections every 12,000 miles․ Spark plugs should be replaced at 100,000 miles, and the timing belt at approximately 105,000 miles to ensure optimal vehicle performance and longevity․

3․2 Oil Change and Fluid Check Guidelines

The 2016 Chevrolet Malibu requires 4․5 quarts of synthetic oil (dexos1™ certified) during an oil change․ Replace the oil filter each time․ Check brake fluid, coolant, and transmission fluid levels regularly, topping off as needed․ Ensure fluids meet GM specifications for optimal performance and longevity․

3․3 Tire Pressure and Rotation Recommendations

The 2016 Chevrolet Malibu manual recommends checking tire pressure monthly and before long trips, ensuring it matches the specifications on the tire placard․ Rotate tires every 7,500 to 10,000 miles, following the recommended pattern for even tread wear․ Refer to the manual for the exact schedule and details;

Safety Features and Precautions

The 2016 Chevrolet Malibu manual emphasizes advanced safety features like airbags, ABS, and electronic stability control․ It also provides guidelines for child seat installation and proper seat belt usage to ensure passenger safety and compliance with safety regulations․

4․1 Airbag System and Safety Belts

The 2016 Chevrolet Malibu manual details the airbag system, including front, side, and knee airbags for enhanced protection․ It emphasizes proper safety belt usage, ensuring all passengers are securely fastened to maximize safety and reduce injury risk in collisions, aligning with Chevrolet’s commitment to occupant protection;

4․2 Anti-Lock Braking System (ABS) and Electronic Stability Control

The 2016 Chevrolet Malibu manual explains the Anti-Lock Braking System (ABS), which prevents wheel lockup during hard braking, and Electronic Stability Control (ESC), which enhances vehicle stability by adjusting engine power and braking․ Both systems work together to improve traction and reduce skidding, ensuring safer driving conditions for all passengers․

4․3 Child Safety and Seat Installation

The 2016 Chevrolet Malibu manual provides detailed guidelines for child safety, including proper installation of child seats using LATCH anchors․ It emphasizes the importance of securing children correctly to ensure their safety while traveling, with clear instructions to help owners install seats accurately and confidently․

Troubleshooting Common Issues

The manual provides guidance for diagnosing and resolving common issues, such as warning lights and error codes, to help owners address problems efficiently and maintain their vehicle’s performance․

5․1 Diagnosing Warning Lights and Error Codes

The manual helps identify and interpret dashboard warning lights and error codes, enabling owners to understand issues promptly․ It provides detailed explanations for codes, such as “Service StabiliTrak” or “Check Engine,” guiding drivers on necessary actions to resolve problems effectively and maintain vehicle safety and performance․

5․2 Resolving Common Electrical and Mechanical Problems

The manual offers step-by-step solutions for addressing common electrical and mechanical issues, such as faulty sensors, electrical connectivity problems, or transmission concerns․ It provides troubleshooting tips and repair guidance, ensuring owners can identify and resolve issues efficiently to maintain optimal vehicle performance and reliability․

5․3 Jump-Starting the Vehicle and Battery Care

The manual provides detailed instructions for jump-starting the 2016 Chevrolet Malibu, including safety precautions and proper cable connections․ It also offers tips for maintaining battery health, such as checking terminals, charging levels, and avoiding deep discharges to ensure reliable vehicle operation and longevity․

Downloading and Accessing the Manual

The 2016 Chevrolet Malibu manual can be downloaded from Chevrolet’s official website or third-party resources like ManualsLib․ It’s available in PDF format for easy access and reference․

6․1 Official Chevrolet Websites for Manual Download

The 2016 Chevrolet Malibu manual can be downloaded directly from Chevrolet’s official website at https://www․chevrolet․com/support/owner-manuals․ Visit the support page, select your vehicle model, and access the PDF manual for free․ It’s available in English and provides detailed information for easy reference․

6․2 Third-Party Resources for PDF Manuals

Third-party websites like ManualsOnline and CarManualsOnline․info offer free PDF downloads of the 2016 Chevrolet Malibu manual․ Sites such as OwnersManuals2․com also provide easy access to the manual, ensuring drivers can find and download the guide without visiting official Chevrolet websites, though reliability should be verified․

6․3 Tips for Navigating the Digital Manual

Downloading the 2016 Chevrolet Malibu manual as a PDF allows easy navigation․ Use the search function to quickly locate topics like maintenance or troubleshooting․ Bookmark important sections for fast access, and utilize zoom features for clear viewing․ Printing specific pages ensures convenient reference without carrying the entire manual․

Additional Resources and Guides

Supplementary materials, online forums, and dealer support provide further assistance for 2016 Chevrolet Malibu owners, ensuring comprehensive understanding and maintenance of their vehicle․

7․1 Supplementary Manuals and Guides Available

The 2016 Chevrolet Malibu offers supplementary manuals, including reference guides and specialized instructions, available for download from Chevrolet’s official website or third-party resources, ensuring comprehensive support for drivers seeking detailed information․

7․2 Online Communities and forums for Malibu Owners

7․2 Online Communities and Forums for Malibu Owners

Active online forums and communities dedicated to the 2016 Chevrolet Malibu provide a platform for owners to share experiences, ask questions, and access advice from experienced drivers and enthusiasts, fostering a supportive environment for troubleshooting and customization ideas․

7․3 Dealer Support and Customer Service Contact Information

The 2016 Chevrolet Malibu manual directs owners to Chevrolet’s official support channels, including customer service contact information and dealer networks, ensuring easy access to assistance for maintenance, repairs, and inquiries, while providing peace of mind through reliable support․

Advanced Features and Technologies

The 2016 Chevrolet Malibu features advanced technologies such as the MyLink infotainment system, offering seamless connectivity options like Bluetooth and USB․ It also includes driver-assistance features for enhanced safety and convenience․

8․1 MyLink Infotainment System Overview

The MyLink system in the 2016 Chevrolet Malibu offers a user-friendly interface with touchscreen navigation, Bluetooth connectivity, and compatibility with Apple CarPlay and Android Auto․ It enhances the driving experience by integrating entertainment, communication, and vehicle information seamlessly, ensuring convenience and connectivity on the go․

8․2 Navigation and Connectivity Options

The 2016 Chevrolet Malibu offers advanced navigation through the MyLink system, featuring integrated GPS and real-time traffic updates․ Connectivity options include Bluetooth, Apple CarPlay, and Android Auto, enabling seamless smartphone integration․ Additional features like voice commands and USB ports enhance convenience, while 4G LTE Wi-Fi capability ensures reliable internet access on the go․

8․3 Driver-Assistance Technologies

The 2016 Chevrolet Malibu features advanced driver-assistance technologies, including Forward Collision Alert, Lane Departure Warning, and Adaptive Cruise Control․ Rear Cross Traffic Alert and Blind Spot Monitoring enhance safety, while automatic parking assist simplifies maneuvering․ These systems work together to prevent accidents, improve driving confidence, and provide a safer, more controlled driving experience․

Fuel Efficiency and Performance

The 2016 Chevrolet Malibu balances power and efficiency with a turbocharged engine and 8-speed transmission, offering an estimated 27 MPG city and 37 highway․ Stop/Start technology enhances fuel economy․

9;1 Fuel Economy Ratings and Driving Tips

The 2016 Chevrolet Malibu offers an estimated 27 MPG city and 37 MPG highway․ To maximize efficiency, use the Stop/Start technology, maintain consistent speeds, avoid aggressive driving, and ensure proper tire pressure․ These tips help optimize fuel consumption for better mileage and lower emissions․

9․2 Engine Specifications and Performance Features

The 2016 Chevrolet Malibu features a 1․5L turbocharged 4-cylinder engine delivering 160 HP and 184 lb-ft of torque, or an optional 2․0L turbocharged engine producing 250 HP and 260 lb-ft of torque․ Both pair with an 8-speed automatic transmission, offering smooth acceleration and responsive handling for a balanced driving experience․

9․3 Optimizing Driving Habits for Better Fuel Efficiency

Adopting smooth acceleration, maintaining consistent speeds, and using cruise control can enhance fuel efficiency․ Avoid aggressive driving and excessive idling․ Regular tire pressure checks, removing extra weight, and planning routes efficiently also contribute to better mileage․ These habits align with the Malibu’s Eco mode for optimal performance․

Customization and Personalization

The 2016 Chevrolet Malibu allows drivers to personalize settings via the MyLink infotainment system, customize preferences for comfort, and explore compatible accessories to enhance the ownership experience․

10․1 Customizing Settings and Preferences

The 2016 Chevrolet Malibu allows drivers to tailor their experience through the MyLink infotainment system, enabling customization of climate control, audio preferences, and driver-assistance features․ Users can adjust settings to suit their comfort and driving style, ensuring a personalized experience․

10․2 Accessories and Upgrades Compatible with the 2016 Malibu

The 2016 Malibu supports various accessories, including infotainment upgrades, alloy wheels, and interior trim options․ These upgrades enhance functionality, comfort, and style, ensuring compatibility with the vehicle’s advanced systems․ Owners can explore Chevrolet-approved accessories to personalize their driving experience while maintaining performance and safety standards․

10․3 Personalizing the Infotainment and Driver Experience

The 2016 Malibu’s MyLink system allows drivers to customize their infotainment experience through display settings, audio preferences, and app integration․ Voice command functionality enhances convenience, while adjustable driver modes offer tailored driving experiences, ensuring a personalized and seamless interaction with the vehicle’s advanced technologies․

Warranty and Service Information

The 2016 Chevrolet Malibu manual outlines factory warranty details, maintenance schedules, and service options․ It provides guidance on coverage periods, routine checks, and extended warranty plans for long-term protection․

11․1 Understanding the Factory Warranty

The 2016 Chevrolet Malibu factory warranty provides coverage for parts and labor, ensuring protection against defects․ It includes a 3-year/36,000-mile basic warranty and a 5-year/60,000-mile powertrain warranty, offering peace of mind for owners during the initial ownership period․

11․2 Scheduling Service Appointments

Scheduling service appointments for your 2016 Chevrolet Malibu is straightforward․ Use the MyChevrolet app, visit Chevrolet’s official website, or contact your local dealer․ Ensure regular maintenance by booking appointments for oil changes, tire rotations, and other recommended services to maintain warranty coverage and vehicle health․

11․3 Extended Warranty and Maintenance Plans

Extended warranty and maintenance plans for the 2016 Chevrolet Malibu offer added protection beyond the factory warranty; These plans cover repairs, replacements, and maintenance, providing peace of mind․ Review terms and conditions on Chevrolet’s website or through authorized dealers to select the best option for your vehicle’s needs and budget․

The 2016 Chevrolet Malibu manual is a vital resource for optimal vehicle performance and longevity․ Regular reference ensures proper maintenance, safety, and utilization of advanced features, maximizing your driving experience and preserving your investment․

12․1 Recap of Key Manual Highlights

The 2016 Chevrolet Malibu manual emphasizes regular maintenance, troubleshooting, and understanding advanced features․ It guides owners on customization, safety systems, and optimal driving practices, ensuring longevity and peak performance of their vehicle through clear, structured instructions and essential tips for personalized use․

12․2 Encouragement for Regular Manual Reference

Regularly referencing the 2016 Chevrolet Malibu manual ensures owners stay informed about maintenance, troubleshooting, and customization․ It helps prevent issues, enhances performance, and improves safety․ By staying updated with the manual’s guidance, drivers can optimize their vehicle’s longevity and enjoy a smoother, more informed driving experience․

12․3 Final Tips for Maximizing Vehicle Performance and Longevity

Adhere to scheduled maintenance, monitor fluid levels, and check tire pressure regularly․ Proper battery care and using genuine Chevrolet parts ensure reliability․ Drive smoothly, avoid extreme conditions, and refer to the manual for updates․ These practices enhance performance, extend lifespan, and keep your Malibu running optimally for years․

love to dream clothing guide

Love to Dream offers innovative, safe, and comfortable sleepwear designed for babies, focusing on practicality and style. Their clothing incorporates TOG ratings and size guides to ensure optimal comfort and safety, helping parents create a restful environment for their little ones.

Understanding the Love to Dream Brand

Love to Dream is a trusted brand specializing in baby sleepwear, prioritizing safety, comfort, and innovation. Their mission is to create products that promote better sleep for babies, with designs that support natural development. The brand is known for its thoughtfully crafted garments, ensuring optimal comfort and practicality. By focusing on quality materials and intuitive designs, Love to Dream has become a go-to choice for parents seeking reliable, stylish, and functional sleep solutions for their little ones.

Key Features of Love to Dream Clothing

Love to Dream clothing stands out for its innovative design, focusing on comfort and safety. Key features include TOG-rated fabrics for temperature regulation, size guides for proper fit, and materials that promote breathable comfort. The clothing is crafted to support a baby’s natural movements, ensuring ease and flexibility. Additionally, the brand offers transitional sleepwear solutions, making it easier for parents to help their babies adjust to different sleep stages. These features collectively enhance sleep quality and provide peace of mind for parents.

How to Choose the Right Size

Use the Love to Dream size chart to find the perfect fit for your baby. Check weight and age ranges to ensure comfort and safety in their sleepwear.

Using the Love to Dream Size Chart

Refer to the Love to Dream size chart for accurate measurements. Match your baby’s weight and age to the chart to select the best-fitting sleepwear. Ensure a comfortable and safe fit by following the guidelines provided. Proper sizing is essential for your baby’s comfort and safety, so take the time to review the chart thoroughly before making a decision. This will help you choose the ideal garment for your little one’s needs.

Importance of Proper Fit for Comfort and Safety

A proper fit ensures your baby’s comfort and safety while sleeping. Loose clothing can pose risks, while tight garments may cause discomfort. Love to Dream designs sleepwear to allow for natural movement without restricting your baby, promoting restful sleep and skin health.

Always check the size chart and consider room temperature to avoid overheating. Proper fit is crucial for your baby’s well-being and safe sleep environment.

Understanding TOG Ratings

TOG ratings measure thermal resistance, helping determine appropriate clothing layers for your baby based on room temperature, ensuring comfort and safety while sleeping.

What Are TOG Ratings?

TOG (Thermal Overall Grade) ratings measure a fabric’s thermal resistance, indicating how well it retains warmth. Ranging from 0.5 to 3.0, higher ratings mean more insulation. This system helps parents choose appropriate clothing based on room temperature, ensuring babies aren’t too hot or cold. Understanding TOG ratings is crucial for maintaining a safe and comfortable sleep environment, preventing overheating, and promoting healthy sleep patterns for infants.

How to Use TOG Ratings for Dressing Your Baby

TOG ratings help determine the right clothing for your baby based on room temperature. Start by checking the room temperature, then select garments with a TOG rating suitable for that range. For cooler rooms, choose higher TOG-rated sleepwear, while lower ratings are better for warmer spaces. Layering lightweight clothing, like a onesie, under TOG-rated items can provide extra warmth if needed. Always refer to Love to Dream’s guide for specific recommendations tailored to your baby’s needs.

Room Temperature and Clothing Layers

Room temperature and clothing layers work together to ensure your baby’s comfort. Adjust layers seasonally, using lightweight fabrics in summer and warmer ones in winter.

Guidelines for Dressing Based on Room Temperature

Dress your baby according to the room temperature to ensure comfort and safety. For rooms between 68-72°F (20-22°C), use lightweight sleepwear. In warmer rooms (above 72°F/22°C), opt for single-layer, breathable fabrics. For cooler rooms (below 68°F/20°C), add layers like footed rompers or sleep sacks. Always check your baby’s chest to ensure they’re not too hot or cold. Refer to the Love to Dream size guide for proper fit and layering options tailored to your baby’s needs.

Layering Clothing for Optimal Comfort

Layering clothing is key for your baby’s comfort. Start with a lightweight base layer, then add mid-layers like sleepers or onesies, and finish with a sleep sack or swaddle for warmth. Use TOG-rated items to balance thermal resistance with room temperature. Ensure fabrics are breathable to prevent overheating. Avoid over-layering, as this can cause discomfort. Adjust layers based on your baby’s cues, such as feeling their chest or back to gauge warmth. Proper layering ensures a cozy and safe sleep environment.

Seasonal Clothing Tips

Discover seasonal tips for dressing your baby with Love to Dream. Choose lightweight fabrics for summer and warm, breathable layers for winter to ensure comfort and safety.

Summer Sleepwear Choices

For summer, opt for lightweight, breathable fabrics that keep your baby cool and comfortable. Love to Dream offers sleepwear with moisture-wicking properties, ideal for warmer temperatures. Choose sleepers with natural fibers like cotton or bamboo, which allow for better airflow and regulate body heat. Consider the room temperature guide to determine the appropriate TOG rating for summer, ensuring your baby isn’t overdressed. Lightweight layers and breathable designs are key to preventing overheating during the warmer months.

Winter Sleepwear Choices

During winter, prioritize warmth and comfort with Love to Dream’s cozy sleepwear. Opt for higher TOG-rated garments that provide adequate insulation without overheating. Look for materials like merino wool or fleece-lined fabrics, which trap warmth and maintain breathability. Layering is essential; start with a lightweight base layer and add a thicker sleeper based on room temperature. Ensure your baby’s sleep environment stays between 68-72°F for optimal comfort and safety, using the size chart for the best fit.

Caring for Love to Dream Garments

Proper care ensures longevity. Wash garments in gentle cycles, avoid bleach, and dry flat or tumble on low heat to maintain quality and softness.

Washing Instructions

To maintain the quality of Love to Dream garments, wash them in a gentle cycle using mild detergents. Avoid bleach or fabric softeners, as they may damage the fabric. Always check the care label for specific instructions. Turn garments inside out before washing to protect any delicate designs. Reshape items while damp to retain their original form. Avoid soaking for extended periods, as this could weaken the material. Proper washing ensures durability and comfort for your baby.

Drying and Storage Tips

Air dry Love to Dream garments to preserve their quality. Avoid direct sunlight, as it may cause fading. Lay items flat or hang them to maintain shape. Store in a cool, dry place using breathable fabric bags or containers. Ensure garments are clean and dry before storing to prevent odors. Avoid using plastic bags, as they can trap moisture. Proper drying and storage extend the lifespan of your baby’s clothing, keeping it soft and comfortable for longer;

Common Mistakes to Avoid

Avoid overheating your baby by dressing them too warmly. Ensure proper fit by using the size chart. Overlayering can risk discomfort and safety issues for your baby.

Overheating Risks

Overheating is a significant risk for babies, leading to discomfort and potential health issues. Love to Dream clothing helps prevent this with breathable fabrics and appropriate TOG ratings. Parents should monitor room temperature and avoid excessive layering. Using the provided size chart ensures a proper fit, reducing the chance of overheating. Always prioritize lightweight materials and adjust clothing based on seasonal changes to maintain a safe sleeping environment for your baby.

Incorrect Sizing

Incorrect sizing can lead to discomfort and safety issues for your baby. Love to Dream clothing offers a detailed size chart to help you choose the right fit. Always check the chart and consider your baby’s weight and length for accuracy. Ill-fitting clothes can restrict movement or cause overheating, so ensuring the correct size is essential for comfort and safety. Proper sizing also extends the lifespan of the garment, making it a practical choice for your baby’s sleepwear needs.

Love to Dream Clothing offers a thoughtful approach to baby sleepwear, combining safety, comfort, and practicality. By following the guide, parents can make informed decisions to ensure their baby’s comfort and safety. Explore more to discover how Love to Dream can enhance your baby’s sleep journey with innovative designs and expert tips.

Final Tips for Using Love to Dream Clothing

Always check the TOG ratings to ensure your baby isn’t too hot or cold. Use the size chart for a perfect fit, and layer clothing according to room temperature. Avoid overheating by dressing your baby appropriately for the season. Wash garments gently and store them properly to maintain quality. By following these tips, you can create a safe and comfortable sleeping environment for your baby, promoting better sleep and overall well-being.

Encouragement to Explore More

Exploring Love to Dream’s collection offers a world of comfort and innovation for your baby. Their versatile designs cater to different needs and preferences, ensuring your little one stays cozy and safe. Dive into their seasonal ranges and discover how each piece adapts to your baby’s growth. Embrace the opportunity to enhance your baby’s sleep experience with thoughtful, high-quality garments that prioritize both style and functionality, making every moment special and restful for your child.

local guide program taylor benefits insurance

The Local Guide Program by Taylor Benefits Insurance offers tailored insurance solutions, empowering communities with customizable coverage and trusted expertise for health, financial security, and well-being.

1.1 Overview of the Program

The Local Guide Program by Taylor Benefits Insurance is a community-focused initiative designed to provide tailored insurance solutions. It offers customizable coverage options, ensuring individuals and families access to affordable health, dental, and vision plans. The program emphasizes financial security, wellness, and peace of mind, catering to diverse needs within local communities. By combining trusted expertise with flexible plan designs, it empowers participants to make informed decisions about their insurance coverage.

1.2 Importance of Insurance Benefits in Local Communities

Insurance benefits play a vital role in safeguarding local communities by providing financial protection and promoting health literacy. They ensure access to essential healthcare services, preventing medical debt and improving overall well-being. By offering customizable coverage, programs like Taylor Benefits Insurance empower individuals to manage risks effectively. This support fosters economic stability and strengthens community health, enabling residents to thrive without the burden of unforeseen expenses.

Key Benefits of the Local Guide Program

The Local Guide Program offers a range of benefits that enhance overall well-being and provide financial safety, tailored to meet the diverse needs of local communities.

2.1 Health and Wellness Benefits

Taylor Benefits Insurance offers comprehensive health plans with access to preventive care, mental health support, and wellness programs. These benefits promote long-term health, ensuring participants can maintain a high quality of life. By prioritizing wellness, the program helps individuals avoid costly treatments through early intervention and healthy habits. This focus on health and wellness is a cornerstone of the Local Guide Program, making it a valuable resource for community members seeking holistic care solutions.

2.2 Financial Security Through Insurance

The Local Guide Program by Taylor Benefits Insurance ensures financial stability through tailored insurance plans. Participants gain protection against unforeseen medical expenses, disabilities, and life events. The program offers life insurance, disability coverage, and supplemental policies to safeguard income and assets. By providing these options, it helps individuals and families maintain financial resilience, reducing the risk of economic hardship. This focus on financial security makes the program a vital resource for those seeking long-term peace of mind and stability.

2.3 Customizable Coverage Options

The Local Guide Program offers highly customizable insurance options, allowing participants to tailor coverage to their specific needs. This flexibility ensures that individuals and families can select the right level of protection for health, life, and disability coverage. By enabling personalized plans, the program empowers users to balance affordability with comprehensive benefits, ensuring they only pay for what they need. This adaptability makes the program a practical choice for diverse situations and evolving life circumstances.

How the Local Guide Program Works

The Local Guide Program operates through eligibility checks, streamlined enrollment, and dedicated management, ensuring accessible and efficient insurance solutions for participants, offering clear guidance and support throughout the process.

3.1 Eligibility Criteria for Participation

The Local Guide Program requires participants to meet specific eligibility criteria, such as residency, employment status, and affiliation with local communities or organizations. Applicants must provide necessary documentation, including proof of residence and employment verification. Taylor Benefits Insurance ensures a streamlined process, offering personalized assistance to determine eligibility and guide participants through enrollment effectively.

3.2 Enrollment Process and Requirements

The enrollment process for the Local Guide Program is straightforward, requiring participants to submit essential documents such as proof of residency, employment verification, and completed application forms. Taylor Benefits Insurance offers online platforms to simplify the process, ensuring efficiency and convenience. Applicants may also need to complete a health assessment or provide additional information to finalize their coverage. The program ensures a seamless experience, guiding participants through each step to secure their benefits effectively.

Popular Features of Taylor Benefits Insurance

Taylor Benefits Insurance offers flexible plan designs, cost-effective solutions, and customizable coverage options, ensuring comprehensive health, dental, and vision benefits. Its innovative online portals simplify benefit management, catering to diverse needs and enhancing satisfaction for employers and employees alike.

4.1 Flexible Plan Designs

Taylor Benefits Insurance provides adaptable plan designs, allowing employers to tailor coverage to meet specific needs. From medical to dental and vision benefits, plans can be customized to balance cost and comprehensiveness. This flexibility ensures that both employers and employees benefit, fostering satisfaction and retention. With options to choose levels of coverage for different benefits, the program empowers organizations to create personalized insurance packages that align with their goals and workforce requirements.

4.2 Cost-Effective Solutions for Local Guides

Taylor Benefits Insurance offers affordable insurance options tailored for local guides, ensuring access to quality coverage without excessive costs. By providing competitive rates and customizable plans, the program helps guides manage expenses while maintaining essential protection. This cost-effective approach supports financial stability, allowing guides to focus on their work securely, knowing they have reliable insurance backing their health and wellness needs.

Advantages for Employers and Employees

The program offers tax incentives for employers and enhances employee satisfaction, fostering a supportive work environment that benefits both parties effectively.

5.1 Tax Benefits and Incentives

The Local Guide Program provides employers with tax-deductible contributions, reducing taxable income while offering employees pre-tax premium payments. This dual benefit enhances financial savings for both parties, creating a win-win scenario that aligns with fiscal responsibility and employee well-being. By leveraging these incentives, businesses can optimize their budget allocation while ensuring their workforce remains protected and satisfied, fostering long-term stability and growth within the organization.

5.2 Enhanced Employee Satisfaction and Retention

The Local Guide Program fosters a positive work environment by offering tailored benefits that align with employees’ needs, boosting morale and job satisfaction. Customizable coverage options ensure employees feel valued, leading to increased loyalty and reduced turnover. Employers benefit from a more committed workforce, while employees gain peace of mind through comprehensive insurance plans. This mutual benefit strengthens workplace relationships and contributes to long-term organizational success and stability.

Participant Experiences and Testimonials

Participants praise the Local Guide Program for its tailored benefits, highlighting improved financial security and health coverage. Many share stories of enhanced peace of mind and satisfaction.

6.1 Success Stories from Program Participants

Participants in the Local Guide Program have shared inspiring stories of how the insurance benefits have positively impacted their lives. Many have highlighted improved financial stability, enhanced health coverage, and peace of mind. For instance, one participant noted how the program helped cover unexpected medical expenses, while another praised the customizable plans for fitting their specific needs. These testimonials underscore the program’s effectiveness in delivering tailored solutions that empower individuals and families within their communities.

6.2 Feedback and Reviews

Participants have consistently praised the Local Guide Program for its user-friendly enrollment process and comprehensive coverage options. Many reviewers highlight the program’s ability to adapt to individual needs, ensuring satisfaction across diverse circumstances. Feedback often emphasizes the responsiveness of Taylor Benefits Insurance support team and the clarity of provided materials. Some participants have suggested adding more educational resources for newcomers, but overall, the program receives high marks for its reliability and customer-centric approach.

Tools and Resources Provided

Taylor Benefits Insurance offers robust tools, including online portals for benefit management, educational materials, and interactive workshops, empowering participants with knowledge and control over their coverage.

7.1 Online Portals for Managing Benefits

The Taylor Benefits Insurance program provides user-friendly online portals, allowing participants to efficiently manage their benefits. These platforms offer features such as claim tracking, policy details, and coverage customization. Members can access their ID cards, find in-network healthcare providers, and estimate procedure costs. The portals are designed to enhance transparency and convenience, ensuring that participants have complete control over their insurance plans. This digital solution streamlines benefit management, making it accessible and straightforward for all users.

7.2 Educational Materials and Workshops

Taylor Benefits Insurance provides comprehensive educational materials and workshops to empower participants with knowledge about their insurance plans. These resources include detailed guides, webinars, and interactive tools to help individuals and employers understand coverage options, cost-effective solutions, and how to maximize benefits. Workshops are conducted by experts, offering insights into health literacy, financial planning, and navigating the insurance landscape. These educational initiatives ensure that participants are well-informed and equipped to make informed decisions about their insurance needs.

Future Directions and Program Expansion

Taylor Benefits Insurance plans to expand its Local Guide Program nationally, enhancing coverage options and technological support. This initiative aims to improve accessibility and community impact.

8.1 Upcoming Enhancements and Updates

Taylor Benefits Insurance is introducing advanced digital tools for easier benefits management. These updates include mobile app enhancements for claim tracking, personalized health resources, and AI-driven recommendations. Expanded coverage options for mental health and wellness programs are also planned, ensuring comprehensive support for participants. Additionally, real-time customer support features will be integrated to improve user experience and accessibility.

8.2 Potential for National Implementation

The Local Guide Program shows strong potential for national implementation due to its adaptable framework. Success in regional markets suggests scalability, with tailored solutions for diverse communities. Enhanced health literacy initiatives and cost-effective insurance options could benefit populations nationwide; Interest from other states highlights the program’s viability for broader reach, making it a model for national health and financial security strategies.

The Local Guide Program by Taylor Benefits Insurance has proven effective in enhancing community well-being through tailored insurance solutions, fostering financial security and health for all participants.

9.1 Final Thoughts on the Program’s Impact

The Local Guide Program by Taylor Benefits Insurance has demonstrated significant positive impact by addressing health literacy, offering cost-effective solutions, and fostering financial stability. Participants have reported improved health outcomes and enhanced peace of mind, highlighting the program’s success in aligning insurance benefits with community needs; Its focus on customizable coverage ensures tailored support, making it a valuable resource for local guides seeking reliable and adaptable insurance options.

9.2 Encouragement for Participation

Joining the Local Guide Program by Taylor Benefits Insurance is a proactive step toward securing your future and enhancing your community’s well-being. With its flexible, cost-effective solutions and user-friendly management tools, the program makes it easy to tailor coverage to your needs. Don’t miss the opportunity to experience improved health outcomes and financial stability. Participate today and be part of a supportive community that values comprehensive insurance solutions for a brighter tomorrow.

power of attorney in spanish pdf

A Power of Attorney (POA) is a legal document authorizing someone to act on your behalf in financial‚ legal‚ or property matters. It ensures convenience and legal security‚ particularly in Spanish-speaking countries‚ and can be obtained through notarial processes. Downloadable templates in PDF format are widely available for ease of use.

Types of Power of Attorney

A Power of Attorney can be general‚ special‚ or durable‚ each granting different levels of authority. General POAs cover broad powers‚ while special POAs are limited to specific tasks. Durable POAs remain valid even if the grantor becomes incapacitated‚ ensuring ongoing representation in legal and financial matters.

2.1. General Power of Attorney

A general Power of Attorney grants broad authority to manage financial‚ legal‚ and property matters‚ offering flexibility and convenience. It is often used for everyday transactions‚ allowing the attorney-in-fact to handle tasks like bank account management and real estate decisions. This type of POA is ideal for individuals seeking comprehensive representation in various aspects of their affairs.

2.2. Special Power of Attorney

A special Power of Attorney is tailored for specific tasks or situations‚ such as managing real estate transactions‚ handling legal disputes‚ or overseeing business operations. It grants limited authority‚ ensuring the attorney-in-fact can only act within predefined boundaries. This type of POA is ideal for individuals requiring targeted representation in particular matters without broader powers.

2.3. Durable Power of Attorney

A durable Power of Attorney remains effective even if the grantor becomes incapacitated‚ ensuring continuous representation in financial or legal matters. It is often used for future planning‚ allowing a trusted individual to manage affairs if the grantor cannot act themselves.

This type of POA is ideal for long-term planning and provides peace of mind‚ as it persists beyond the grantor’s capacity to make decisions.

Obtaining a Power of Attorney in Spanish-Speaking Countries

Obtaining a Power of Attorney in Spanish-speaking countries involves notarization‚ legal requirements‚ and specific documentation. Templates are available for download‚ ensuring ease and compliance with local laws.

3.1. Process of Obtaining a Power of Attorney

Obtaining a Power of Attorney involves preparing the document with necessary details‚ notarization by a public notary‚ and submitting required identification documents. Templates can be downloaded from official sources‚ ensuring compliance with legal standards and simplifying the process for individuals.

3.2. Required Documentation

Obtaining a Power of Attorney requires presenting identification documents‚ such as a DNI‚ passport‚ or residency card‚ for both the grantor and the attorney. A completed application form‚ available for download from official sources‚ must also be submitted to ensure the process is legally valid and streamlined.

Legal Requirements and Authentication

A Power of Attorney must be certified by a notary public‚ ensuring the document’s authenticity and legal compliance. Proper witnessing and adherence to specific legal formalities are essential.

4.1. Role of the Notary Public

A notary public verifies the identities of all parties involved‚ ensuring the authenticity of the Power of Attorney document. They witness signatures‚ confirm the grantor’s understanding‚ and validate the document’s legal compliance. The notary’s official seal adds credibility‚ preventing fraud and ensuring the POA is legally binding in Spanish-speaking countries.

  • Verifies identities and signatures
  • Ensures legal compliance
  • Adds official seal for authenticity

4.2. Language Requirements

In Spanish-speaking countries‚ the Power of Attorney must be in Spanish to ensure legal validity. The document should be clear and precise‚ avoiding ambiguities. A notary public ensures the language complies with legal standards. If the grantor is non-Spanish speaking‚ a professional translation may be required to validate the document.

  • Must be written in Spanish
  • Notary verifies language accuracy
  • Translations may be needed

4.3. Authentication Process

The authentication process involves a notary public verifying the identities and signatures of the grantor and attorney-in-fact. The document is then stamped with an official seal‚ ensuring its legality. In some cases‚ an apostille may be required for international recognition. This process guarantees the document’s authenticity and enforceability in Spanish-speaking jurisdictions.

  • Notary verifies identities and signatures
  • Official stamp or seal is applied
  • Apostille may be needed for international use

Templates and Forms

Templates and forms for Power of Attorney in Spanish are available in Word and PDF formats‚ facilitating easy creation and legal compliance. Downloadable models streamline the process.

5.1. How to Download Templates

To download Power of Attorney templates in Spanish‚ visit official legal websites or platforms like government portals. Select the appropriate template‚ such as a “Carta Poder Notarial‚” and download it in PDF or Word format. Ensure the template is legally valid and tailored to your specific needs before use.

5.2. Key Elements of a Power of Attorney Template

A Power of Attorney template in Spanish should include the grantor’s and attorney’s identification details‚ a clear statement of powers‚ revocation clauses‚ and a notary signature section. It must also specify the scope of authority‚ such as financial or property transactions‚ and include spaces for witnesses and official stamps to ensure legality and authenticity.

5.3. Advantages of Using Templates

Using Power of Attorney templates saves time and ensures compliance with legal requirements. They are cost-effective‚ reducing the need for legal fees. Templates provide clarity and reduce errors‚ ensuring all necessary details are included. They are widely available in PDF and Word formats‚ making them easily accessible and customizable for specific needs.

Usage Scenarios

A Power of Attorney is essential for financial transactions‚ real estate sales‚ and legal proceedings. It allows appointed representatives to manage bank accounts‚ property‚ and legal affairs efficiently and securely.

6.1. Financial Transactions

A Power of Attorney is crucial for managing financial transactions‚ including bank accounts‚ investments‚ and tax matters. It enables the appointed representative to make payments‚ transfer funds‚ and handle financial obligations on your behalf‚ ensuring continuity in financial management‚ especially when you are unable to act personally.

6.2. Real Estate Transactions

A Power of Attorney is essential for handling real estate transactions‚ such as buying‚ selling‚ or leasing properties. It grants the attorney-in-fact authority to represent the grantor in negotiations and signings‚ ensuring smooth processes. This is particularly beneficial for individuals unable to attend in person‚ providing legal security and convenience in managing property affairs.

6.3. Legal Proceedings

A Power of Attorney is crucial in legal proceedings‚ enabling the attorney-in-fact to represent the grantor in court cases‚ appeals‚ or settlements. It allows the designated person to make decisions‚ file documents‚ and act on behalf of the grantor‚ ensuring legal matters are handled efficiently. This provides convenience and peace of mind when the grantor cannot personally attend legal proceedings.

Revocation of a Power of Attorney

A Power of Attorney can be revoked by the grantor at any time‚ provided they are mentally capable. Legal implications must be considered‚ and documentation must be notarized;

7.1. Process of Revocation

Revoking a Power of Attorney involves a legal process where the grantor formally revokes the authorization. A written declaration must be signed‚ often notarized‚ and delivered to the attorney-in-fact. It’s essential to follow local legal procedures and seek advice to ensure the revocation is enforceable and recognized.

7.2. Legal Implications

Revoking a Power of Attorney has significant legal implications‚ ensuring the attorney-in-fact ceases all actions immediately. It protects the grantor’s rights and prevents unauthorized decisions. Proper documentation and notification are crucial to avoid legal disputes and maintain clarity in financial and property matters.

Benefits of Having a Power of Attorney

A Power of Attorney provides convenience‚ legal security‚ and peace of mind. It allows trusted individuals to manage affairs‚ ensuring continuity in financial and legal matters efficiently.

8.1. Convenience

A Power of Attorney offers significant convenience by allowing a trusted individual to handle legal‚ financial‚ or property matters on your behalf. This eliminates the need for your physical presence in transactions‚ saving time and streamlining processes. With downloadable templates in Spanish‚ creating a POA is straightforward‚ ensuring efficiency in managing affairs.

8.2. Legal Security

A Power of Attorney ensures legal security by providing a legally binding document. Notarization authenticates the agreement‚ guaranteeing its validity and enforceability in court. This protects the grantor’s interests and ensures the agent acts within the defined scope‚ offering peace of mind and compliance with legal standards in Spanish-speaking jurisdictions.

8.3. Peace of Mind

A Power of Attorney provides peace of mind by ensuring trusted representation in legal and financial matters. Knowing that a reliable individual can act on your behalf reduces stress and guarantees stability in critical situations. The notarized document assures authenticity‚ offering reassurance that your interests are protected and decisions are made responsibly.

Common Mistakes to Avoid

Common errors include not understanding the scope‚ improper execution‚ and lack of communication. These mistakes can lead to legal and financial complications‚ emphasizing the need for careful preparation and professional advice.

9.1. Not Understanding the Scope

Many individuals fail to comprehend the extent of authority granted in a Power of Attorney. This can lead to overstepping boundaries or missing essential permissions. To prevent this‚ ensure the document clearly defines the scope of powers‚ whether general or specific‚ and consult legal professionals to avoid misunderstandings and potential legal issues.

9.2. Improper Execution

Improper execution of a Power of Attorney often results from errors in notarization‚ missing signatures‚ or lack of witness verification. This can render the document invalid‚ leading to legal complications. Ensure all legal requirements are met‚ including proper notarization and witness signatures‚ to maintain the POA’s validity and enforceability in Spanish-speaking jurisdictions.

9.3. Lack of Communication

Lack of communication between the grantor and agent can lead to misunderstandings and conflicts. Clearly defining the scope and expectations is essential to avoid misinterpretation. Poor communication may result in the agent acting beyond their authority or failing to fulfill obligations‚ potentially causing legal disputes. Regular updates and transparent dialogue ensure alignment with the grantor’s intentions.

Frequently Asked Questions

Frequently Asked Questions address common concerns about Power of Attorney in Spanish‚ such as how to download templates‚ notarial requirements‚ and legal implications. They provide clarity and guidance for those seeking to establish a POA.

10.1. Can I Create My Own POA?

Yes‚ you can create your own Power of Attorney using downloadable templates in Spanish. However‚ consulting a notary or legal expert is recommended to ensure legality and compliance with local regulations. Templates are available online‚ but proper execution and authentication are crucial for validity.

10.2. How Long Does It Take?

Obtaining a Power of Attorney typically takes a few days to a week‚ depending on the complexity. Simple POAs can be completed quickly‚ while more detailed ones may require legal review. Notarial processes and document preparation are key factors affecting the timeline. Ensure all documents are ready to expedite the process.

10.3. Can I Revoke a POA?

Yes‚ you can revoke a Power of Attorney at any time. To do so‚ notify the attorney-in-fact in writing and inform relevant third parties. Revocation is typically documented notarially for legal validity and to prevent misunderstandings or unauthorized actions. It is advisable to consult a legal professional to ensure the revocation process is executed correctly.

A Power of Attorney is a vital legal tool offering convenience‚ security‚ and peace of mind. It ensures your interests are represented in various transactions and legal matters. Utilizing downloadable templates and professional guidance can simplify the process. Always consult a notary or legal expert to ensure everything is executed correctly and meets all requirements. Understanding its implications is essential for its effective use.

Role of the Notary Public

The notary public certifies the identities of parties and validates the authenticity of the Power of Attorney‚ ensuring legal compliance and proper execution of the document.

12.1. Ensuring Legality

The notary public verifies identities‚ validates signatures‚ and ensures the Power of Attorney meets legal standards‚ preventing fraud and guaranteeing the document’s authenticity. This process ensures the POA is legally binding and adheres to all relevant laws‚ making it officially recognized and secure for use in legal and administrative proceedings.

12.2. Witnessing Signatures

The notary public ensures the authenticity of signatures by verifying the identity of the signatories. This legal oversight guarantees the legitimacy of the Power of Attorney document‚ preventing fraud and ensuring compliance with legal requirements. The notary’s presence and certification add an extra layer of security and official recognition to the document.

12.3. Providing Legal Advice

The notary public offers guidance on the legal implications of the Power of Attorney‚ ensuring the grantor understands its scope and consequences. They verify that the document aligns with the individual’s intentions and complies with legal standards‚ providing reassurance and clarity throughout the process.

Additional Resources

Recommended websites‚ legal consultation services‚ and downloadable PDF guides provide comprehensive support for understanding and executing a Power of Attorney in Spanish.

13.1. Recommended Websites

Visit official government websites like Mexican Consulate for downloadable POA forms. Scribd offers free templates and guides. These resources provide reliable templates and instructions to create a valid Power of Attorney in Spanish‚ ensuring legal compliance and ease of use.

13.2. Legal Consultation

Consulting a lawyer ensures your Power of Attorney complies with Spanish legal standards. Legal experts can guide you through complex processes‚ such as real estate or financial transactions. They help prevent future legal issues and ensure the document aligns with your intentions; Professional legal advice is crucial for clarity and enforceability‚ especially in cross-border matters.

13.3. Downloadable PDF Guides

Downloadable PDF guides provide step-by-step instructions for creating and using a Power of Attorney in Spanish. These guides often include templates‚ examples‚ and legal terminology explanations. They are accessible from official websites and legal resources‚ ensuring clarity and compliance with Spanish legal standards. PDF guides are ideal for understanding the process and requirements without professional assistance;

Posted in PDF

integrated mathematics 2 answers pdf

Integrated Mathematics 2 focuses on problem-solving, critical thinking, and real-world applications. It builds on foundational concepts, offering in-depth study of algebra, geometry, and data analysis. Students develop mathematical reasoning and problem-solving strategies, essential for academic and professional success. The course emphasizes connections between math and other disciplines, preparing learners for advanced studies. With access to PDF resources, online platforms, and answer keys, students can master complex topics confidently.

1.1 Overview of the Course and Its Importance

Integrated Mathematics 2 is a comprehensive course blending algebra, geometry, and data analysis to develop critical thinking and problem-solving skills. It emphasizes real-world applications, fostering practical mathematical understanding. The course is crucial for building a strong foundation in mathematics, essential for STEM fields and everyday problem-solving. By mastering key concepts, students gain confidence in tackling complex challenges, preparing them for advanced academic and professional pursuits.

1.2 Key Topics Covered in Integrated Mathematics 2

Integrated Mathematics 2 covers essential topics such as functions, polynomial equations, factoring, quadratic functions, and trigonometric concepts. It also delves into probability, statistics, and geometric transformations. The course focuses on problem-solving strategies, real-world applications, and developing analytical skills. Students explore core mathematical principles, preparing them for advanced studies and practical challenges in STEM fields and beyond.

Structure of Integrated Mathematics 2 Content

The course content is divided into organized chapters, each focusing on specific mathematical topics. The logical structure ensures a progressive and comprehensive understanding of core concepts.

2.1 Chapters and Sections Organization

Integrated Mathematics 2 is structured into thematic chapters, each addressing specific mathematical areas. Chapters progress from foundational concepts to complex problems, ensuring a logical learning flow. Sections within chapters focus on key topics like algebra, geometry, and data analysis, with detailed explanations and practice exercises. This organization helps students build a strong understanding of each concept before advancing to the next. PDF resources and online platforms provide additional support for mastering the material.

2.2 Focus on Core Mathematical Concepts

Integrated Mathematics 2 emphasizes mastering core concepts such as algebraic manipulation, geometric principles, and functional relationships. The curriculum delves into polynomials, quadratic equations, and data analysis, ensuring a robust foundation. Detailed explanations and practice exercises in PDF resources and online platforms help students grasp these concepts deeply. The focus is on fostering problem-solving skills and logical thinking, essential for tackling complex mathematical challenges with confidence.

Accessing Integrated Mathematics 2 Answers

Students can access Integrated Mathematics 2 answers through official publisher resources, online platforms like Mathleaks and Brainly, and downloadable PDF guides. These materials provide step-by-step solutions and practice exercises, aiding in understanding and exam preparation.

3.1 Official Answer Keys and Resources

Official answer keys for Integrated Mathematics 2 are available through publisher websites and educational platforms. These resources include detailed solutions to textbook exercises, ensuring accuracy and understanding. PDF formats are commonly used for easy accessibility and printing. Additionally, official study guides provide comprehensive explanations, helping students verify their work and improve problem-solving skills. These resources are essential for self-study and exam preparation.

3.2 Popular Online Platforms for Solutions

Popular online platforms like Mathleaks, Brainly, and Chegg offer comprehensive solutions for Integrated Mathematics 2. These platforms provide step-by-step explanations, homework help, and interactive exercises. Students can access PDF answer keys, video tutorials, and forums for additional support. Platforms like Big Ideas Math and Envision Math also offer digital resources, ensuring learners can find help tailored to their curriculum and learning style.

Step-by-Step Solutions and Problem-Solving Strategies

Step-by-step solutions guide students through complex problems, fostering understanding. Strategies include factoring, graphing, and using technology tools to enhance problem-solving accuracy and mathematical comprehension.

4.1 Detailed Explanations for Complex Problems

Detailed explanations provide clarity on complex math problems, breaking them into manageable steps. Resources like PDF guides and online platforms offer in-depth solutions, ensuring students grasp concepts like factoring polynomials or solving quadratic equations. These explanations often include visual aids and real-world examples, making abstract ideas more tangible. By understanding each step, students build confidence and improve their problem-solving skills effectively.

4.2 Tips for Mastering Common Mathematical Challenges

Mastering common math challenges requires consistent practice and strategic approaches. Use PDF resources for step-by-step solutions to understand problem-solving methods. Focus on understanding core concepts rather than memorizing formulas. Break problems into smaller parts and verify each step. Regularly review mistakes to identify patterns and improve accuracy. Engage with online platforms offering hints and alternative solutions to deepen your understanding and build confidence in tackling complex problems effectively.

The Role of PDF Resources in Learning

PDF resources provide accessible, organized study materials for Integrated Mathematics 2. They offer detailed solutions, practice tests, and answer keys, helping students understand complex concepts. Portable and easy to use, PDFs enable anytime, anywhere learning, making them invaluable for mastering mathematical skills and preparing for assessments effectively.

5.1 Benefits of Using Digital Study Materials

Digital study materials, like PDFs, offer unparalleled accessibility and convenience. They are easily searchable, allowing students to quickly locate specific topics or problems. Portable and lightweight, PDFs reduce the need for physical textbooks, saving space and effort. Additionally, digital resources often include interactive elements, such as hyperlinks and embedded solutions, enhancing the learning experience. They also support environmental sustainability by reducing paper usage. Overall, digital materials provide a flexible and efficient way to study Integrated Mathematics 2, catering to diverse learning styles and preferences.

5.2 How to Effectively Utilize PDF Worksheets and Guides

To maximize the benefits of PDF worksheets and guides for Integrated Mathematics 2, start by organizing the materials into clearly labeled folders for easy access. Use digital tools to annotate and highlight key concepts. Establish a consistent study routine, dedicating specific times to work through problems and review answers. Track your progress by marking completed sections and reflecting on challenging areas. Additionally, incorporate these PDFs into group study sessions for collaborative learning and problem-solving. By systematically engaging with these resources, you can enhance your understanding and retention of mathematical concepts.

Additional Tools and Resources for Success

Utilize online platforms like Mathleaks and Brainly for step-by-step solutions. Access PDF guides from Big Ideas Math and Envision Mathematics for detailed explanations and practice problems.

6.1 Recommended Textbooks and Supplements

Recommended textbooks include Big Ideas Math Integrated Mathematics II (ISBN: 9781680330687) and Envision Integrated Mathematics II (ISBN: 9781418283353). These resources provide step-by-step solutions, detailed explanations, and practice exercises. Supplements like Mathleaks and Brainly offer additional support with hints and solutions tailored to specific textbooks. These materials help students build foundational skills and master problem-solving strategies, ensuring comprehensive understanding and academic success.

6.2 Homework Help and Learning-Focused Solutions

Mathleaks and Brainly provide homework assistance with detailed solutions and hints for Integrated Mathematics 2. These platforms offer step-by-step explanations and interactive exercises tailored to specific textbooks like Big Ideas Math and Envision Math. They cater to diverse learning styles, enabling students to grasp complex concepts effectively. Such resources enhance problem-solving skills and boost confidence in tackling challenging math problems independently.

Practice Tests and Assessment Materials

Regular practice with past papers and mock exams helps students assess their understanding and prepare for actual tests. Accessing PDF resources and answer keys enhances readiness and confidence.

7.1 Importance of Regular Practice

Regular practice is crucial for mastering Integrated Mathematics 2. It reinforces concepts, identifies weak areas, and builds problem-solving skills. Using PDF resources and answer keys, students can track progress, ensuring understanding and confidence. Consistent practice also enhances test-taking strategies, reducing exam anxiety and improving overall performance. By solving past papers and mock exams, learners gain familiarity with question formats and time management, which are vital for success. Thus, regular practice is essential for achieving academic goals in mathematics.

7.2 Accessing Past Papers and Mock Exams

Past papers and mock exams are invaluable for exam preparation. Students can access these resources through official websites, educational platforms, or PDF guides. These materials provide realistic practice, helping learners familiarize themselves with question formats, time constraints, and content coverage. Mock exams also allow students to identify strengths and areas needing improvement. By simulating actual test conditions, learners can refine their strategies and build confidence for the final assessment. Regular use of these tools enhances readiness and reduces exam-day anxiety.

Common Mistakes and How to Avoid Them

Common mistakes in Integrated Mathematics 2 include calculation errors, misapplying formulas, and misunderstanding inverse functions. To avoid these, students should double-check their work, deeply understand concepts, and use study guides for clarification and practice. Regular review and seeking help when needed can significantly improve accuracy and overall performance in the subject.

8.1 Identifying Error Patterns in Problem Solving

Common error patterns in Integrated Mathematics 2 include misapplying algebraic formulas and misunderstanding inverse functions. Students often rush through calculations, leading to avoidable mistakes. Identifying these errors requires careful review of work and comparing solutions with official answer keys. Regular practice with step-by-step explanations helps students recognize recurring mistakes, such as incorrect factoring or misinterpreting function relationships. Addressing these patterns early improves overall problem-solving accuracy and mathematical understanding.

8.2 Strategies for Improving Accuracy and Understanding

Improving accuracy in Integrated Mathematics 2 involves breaking problems into smaller steps, verifying each part, and using answer keys for self-correction. Regular practice with step-by-step solutions helps solidify concepts. Utilizing PDF guides and online platforms provides additional support. Reviewing mistakes, seeking explanations, and consistent practice are key strategies to enhance understanding and reduce errors in problem-solving.

Mastery of Integrated Mathematics 2 requires consistent practice, leveraging PDF resources, and utilizing online platforms for step-by-step solutions. Regular review and applying problem-solving strategies enhance understanding and accuracy, fostering long-term success.

9.1 Summarizing Key Takeaways

Integrated Mathematics 2 emphasizes problem-solving strategies, algebraic manipulations, and real-world applications. Key takeaways include mastering polynomial equations, factoring techniques, and data analysis. Regular practice with PDF worksheets and online resources enhances understanding. Focusing on error patterns and seeking detailed solutions improves accuracy. Continuous learning and review are essential for long-term mastery and confidence in mathematical problem-solving.

9.2 Encouragement for Continuous Learning and Improvement

Embrace challenges and persist in practicing integrated math concepts. Utilize online platforms and PDF resources for step-by-step solutions. Engage with study groups and seek help when needed. Regular review of past exams and assignments strengthens problem-solving skills. Stay motivated, as consistent effort leads to mastery. Celebrate progress and view mistakes as opportunities to grow, fostering a mindset of continuous improvement and academic success.

Posted in PDF