
A ruler is a measuring tool marked with units for length measurement, typically made of plastic, metal, or wood, used for precise measurements in various tasks, ensuring accuracy and efficiency in different fields․
1․1 What is a Ruler?
A ruler is a measuring tool marked with units, such as inches or centimeters, used to quantify length or distance․ It is typically made of materials like plastic, metal, or wood and serves as an essential instrument in various fields, including education, drafting, and crafting, to ensure precise measurements and accuracy in different tasks and projects․
1․2 Importance of Rulers in Everyday Life
Rulers are indispensable tools in everyday life, providing precise measurements for tasks requiring accuracy․ They are essential in education for teaching measurement skills, in crafting for accurate cuts, and in professional settings like drafting and engineering for creating detailed designs and blueprints․ Their versatility ensures they remain a fundamental instrument across various industries and personal projects․

Types of Rulers
Rulers come in various types, including standard rulers with inch or metric measurements and specialized rulers designed for specific tasks like sewing or carpentry, ensuring versatility in different applications․
2․1 Standard Rulers (Inch and Metric)
Standard rulers are the most common type, typically made of plastic, metal, or wood, and feature measurements in inches or millimeters/centimeters․ They are widely used for everyday tasks, offering clear markings for precise length measurements․ These rulers often include both inch and metric scales on opposite sides, making them versatile for various applications, from school projects to professional settings, ensuring accuracy and convenience․
2․2 Specialized Rulers (e․g․, Sewing, Carpenter, and Adjustable Rulers)
Specialized rulers are designed for specific tasks, offering unique features tailored to professional needs․ Sewing rulers often include measurements for fabric cutting, while carpenter rulers may have markings for precise woodworking․ Adjustable rulers, like those for sewing machines, allow customization for different projects․ These tools enhance accuracy and efficiency in specialized fields, making them indispensable for professionals and hobbyists alike․

How to Use a Ruler Effectively
Align the ruler with the object, ensure clear visibility, and measure from the correct side․ Use guide lines for precision and avoid bending the ruler for accuracy․
3․1 Basic Measuring Techniques
Start by aligning the ruler with the object, ensuring it is straight and level․ Place the ruler’s zero point at the object’s starting edge․ Read the measurement at the endpoint, using the smallest unit for precision․ Avoid tilting the ruler to prevent errors․ Always measure in a well-lit area for clarity․ This method ensures accurate and reliable results in various tasks․
3․2 Setting Up Guide Lines for Accuracy
To ensure precise measurements, draw guide lines using a pencil and straightedge․ Align the ruler with the object’s edge and secure it firmly․ Use a level to confirm the ruler is straight․ Double-check measurements by marking endpoints clearly․ For visibility, use a fine-tip pencil․ This method minimizes errors and enhances consistency in various projects, ensuring reliable outcomes every time․

Advanced Features of Modern Rulers
Modern rulers feature adjustable feet for sewing machines, ensuring accurate fabric measurements․ Digital rulers with LCD screens offer instant conversions and precise readings, enhancing efficiency in various tasks․
4․1 Adjustable Ruler Feet for Sewing Machines
Adjustable ruler feet for sewing machines enhance precision in fabric measurement․ They allow for customizable alignment, ensuring accurate cuts and stitching․ Popular in quilting, these feet are designed to glide smoothly, preventing fabric slippage․ Brands like BERNINA offer advanced models with adjustable guides, making them indispensable for sewing projects requiring exact measurements and professional finishes․
4․2 Digital Rulers and Their Benefits
Digital rulers are electronic measuring tools that offer high precision and convenience․ They often feature LCD screens, Bluetooth connectivity, and memory storage for multiple measurements․ These rulers can switch between units like inches and millimeters, making them versatile for various projects․ Their digital interface reduces errors and speeds up workflows, perfect for professionals and DIY enthusiasts seeking accuracy and efficiency․
Maintenance and Care of Rulers
Regularly clean rulers with a soft cloth and avoid harsh chemicals․ Store them in a dry, flat place to prevent warping or bending․ Handle with care to maintain accuracy and extend lifespan․
5․1 Cleaning and Storing Rulers
Clean rulers with a soft cloth to remove dirt and grime, avoiding harsh chemicals that may damage surfaces․ Store them in a dry, flat place to prevent warping or bending․ For plastic rulers, avoid exposure to extreme temperatures․ Metal rulers can be wiped with a lightly oiled cloth to prevent rust․ Proper storage ensures longevity and accuracy․
5․2 Repairing Damaged Rulers
For damaged rulers, clean the surface with a soft cloth to assess the damage․ Use adhesive tape to fix minor cracks on plastic rulers․ Metal rulers can be straightened with a flat tool․ For fabric rulers, gently clean with a damp cloth and air dry․ Replace rulers if damage is severe, as accuracy is crucial for reliable measurements․

Choosing the Right Ruler for Your Needs
Selecting the right ruler involves considering factors like material, size, and units․ Popular brands offer durable options with additional features, ensuring precision for various tasks and preferences․
6․1 Factors to Consider (Material, Size, Units)
When selecting a ruler, consider material durability, size for specific tasks, and unit compatibility․ Plastic rulers are lightweight, while metal rulers offer precision․ Choose length and width based on project needs․ Ensure units match your requirements, whether inches, centimeters, or millimeters, for accurate measurements across various applications and industries․
6․2 Popular Brands and Their Features
Popular brands like Westcott, Fiskars, and Stanley offer durable rulers with features like titanium-coated edges for longevity․ Fiskars rulers are known for vibrant colors and ergonomic handles, while Stanley provides heavy-duty options for carpentry․ Dahle rulers often feature adjustable measurements and non-slip surfaces, ensuring versatility and precision for various tasks, making them top choices for professionals and DIY enthusiasts alike․
Common Mistakes When Using Rulers
Misalignment of measurements, using incorrect units, and improper placement are common errors․ Neglecting to set guide lines and ignoring unit conversions can lead to inaccurate results and wasted time․
7․1 Misalignment of Measurements
Misalignment occurs when the ruler is not properly aligned with the object being measured, leading to inaccurate results․ This can happen due to rushed placement or poor visibility․ To avoid this, ensure the ruler is straight and parallel to the object․ Using guide lines or securing the ruler in place can improve accuracy and prevent measurement errors in various projects․
7․2 Ignoring Unit Conversions
Ignoring unit conversions is a common mistake that leads to measurement errors․ Failing to convert between inches and centimeters or millimeters can result in inaccurate cuts or placements․ Always ensure consistency in units before starting a project․ Double-checking measurements and conversions saves time and prevents mistakes, especially in tasks requiring precision like woodworking or sewing․
The Evolution of Rulers
Rulers have evolved from simple measuring sticks to precise tools with metric and imperial units, adapting to various materials and digital advancements for enhanced accuracy and functionality․
8․1 Historical Development of Rulers
The historical development of rulers traces back to ancient civilizations using marked sticks for measurements․ Over time, rulers evolved to include metric and imperial units, crafted from materials like plastic, metal, and wood․ Modern rulers feature precise markings, including millimeters, ensuring accuracy for various applications from education to professional drafting and crafting․
8․2 From Manual to Digital Measurements
The transition from manual to digital measurements revolutionized ruler usage, enhancing precision and efficiency․ Digital rulers integrate sensors for accurate readings, offering instant unit conversions and data storage․ Laser tools and mobile apps further extend measurement capabilities, reducing reliance on physical rulers․ This shift aligns with technological advancements, providing versatile solutions for modern applications in design, engineering, and everyday tasks․
Alternatives to Traditional Rulers
Laser measuring tools and mobile apps offer precise measurements without physical contact, enhancing convenience and accuracy in various tasks․ They provide versatility and efficiency, making them ideal for modern applications․
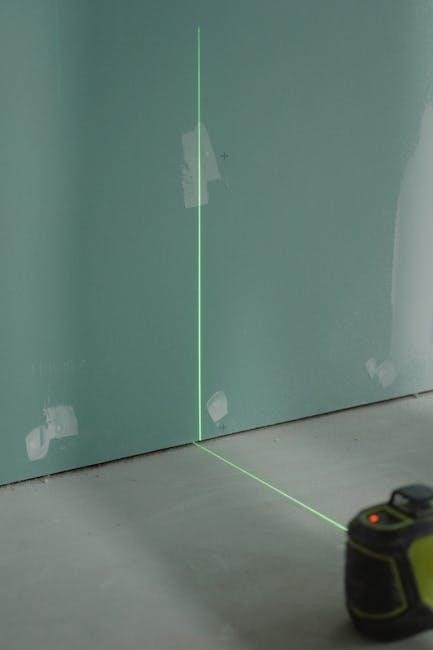
9․1 Laser Measuring Tools
Laser measuring tools use light technology to calculate distances accurately and efficiently․ They offer faster and more precise measurements compared to traditional rulers, especially for large spaces․ These devices often feature digital displays, memory storage, and Bluetooth connectivity, making them ideal for professionals and DIY projects alike․ They reduce human error and provide versatility in various applications․
9․2 Mobile Apps for Measurement
Mobile apps for measurement offer innovative solutions for quick and accurate measurements using smartphone cameras․ Many apps utilize AR technology to measure distances, lengths, and areas․ They often include features like unit conversions, data export, and real-time calculations․ These tools are portable, cost-effective, and ideal for everyday use, making them a modern alternative to traditional rulers for both professionals and casual users․
Rulers remain essential tools, evolving from traditional designs to digital solutions․ Their versatility ensures continued relevance in a tech-driven world, making them indispensable for precise measurements across industries;
10․1 The Future of Rulers in a Digital Age
Digital rulers and laser tools are revolutionizing measurement, offering precision and efficiency․ Mobile apps further enhance functionality, enabling quick conversions and remote sharing․ As technology advances, rulers adapt, blending traditional accuracy with modern convenience, ensuring their relevance in an increasingly digital world․
10․2 Final Tips for Mastering Ruler Usage
Always ensure proper alignment to avoid measurement errors․ Use guide lines for precision and set up your workspace to minimize distractions․ Choose the right ruler size for your task and calibrate it regularly for accuracy․ Practice using both metric and imperial units for versatility․ Clean and store rulers properly to maintain their clarity and longevity, ensuring reliable results in all projects․