post op immediate denture instructions

Article Plan: Post-Op Immediate Denture Instructions (as of 02/20/2026)

Immediate dentures require diligent aftercare for optimal healing and fit. Annual check-ups are crucial for adjustments and maintenance, ensuring long-term comfort and functionality.

Promptly address any denture-related issues by contacting your dental office to schedule an appointment. Use ADA-approved cleansers and a specialized denture brush.

Immediate dentures are a convenient solution for replacing missing teeth, offering a functional and aesthetic restoration right after tooth extraction. Unlike conventional dentures, which are fitted after complete healing, immediate dentures are fabricated before extractions and inserted immediately following the procedure.

This approach eliminates the period of being without teeth, maintaining facial support and allowing for a more natural appearance throughout the healing process. However, because the mouth undergoes significant changes during healing, adjustments to the denture are almost always necessary.

Understanding the unique aspects of immediate denture care is vital for a successful outcome. This includes a carefully managed post-operative period, a gradual dietary progression, and meticulous denture and oral hygiene. Regular dental check-ups, at least annually, are essential to monitor fit and address any concerns promptly.

These instructions will guide you through the initial stages of recovery and long-term maintenance, ensuring your comfort and satisfaction with your new smile.

Understanding the Post-Operative Period

The initial weeks following immediate denture placement are a critical healing phase. Expect some discomfort, swelling, and changes in sensation as your gums and bone adjust to the extractions and the new denture. This period requires patience and diligent adherence to post-operative instructions.

It’s important to recognize that immediate dentures are designed to serve as a provisional solution. As the extraction sites heal and the underlying tissues remodel, the denture’s fit will inevitably change. This is perfectly normal and why adjustments are necessary.

Expect some difficulty with speech and eating initially. Saliva production may also increase as your mouth adjusts. These are temporary effects that typically subside with time and practice. Maintaining excellent oral hygiene, even with the denture in place, is paramount to prevent infection and promote healing.

Understanding these expected changes will help you navigate the post-operative period with confidence and contribute to a successful long-term outcome.

Initial 24 Hours: Critical Care

The first 24 hours post-denture placement are the most crucial for successful healing. Strict adherence to instructions minimizes complications and promotes optimal recovery. Focus on controlling bleeding and swelling, and managing discomfort.

Bite firmly on gauze pads provided by your dentist for the first 30-60 minutes, changing them as needed, to control bleeding. Avoid vigorous rinsing or spitting, as this can disrupt clot formation. Rest with your head elevated to minimize swelling.

Limit physical activity and avoid strenuous exercise. Apply ice packs to the outside of your cheeks for 20 minutes on, 20 minutes off, to further reduce swelling. Do not remove the dentures during this initial period unless specifically instructed by your dentist.

This initial phase sets the stage for a comfortable and successful transition with your new immediate dentures. Prioritize rest and diligent follow-through with all provided care guidelines.

Bleeding Management

Some minor bleeding is normal following immediate denture placement. This is typically due to the extraction sites and the initial adaptation of the denture. Effective management is key to minimizing discomfort and promoting healing.

Immediately after the procedure, bite down firmly on the gauze pads provided for 30-60 minutes. Maintain consistent pressure, changing the gauze as it becomes saturated with blood. Avoid disturbing the gauze frequently, as this can restart the bleeding.

If bleeding persists, do not panic. Continue applying firm, consistent pressure with fresh gauze. Avoid rinsing vigorously or spitting, as these actions can dislodge the forming blood clots. A moistened tea bag (black tea contains tannic acid, which aids clotting) can also be used if gauze is unavailable.

Contact your dentist if bleeding is excessive or does not subside after several hours. Minor oozing is expected, but heavy, continuous bleeding requires professional attention.

Swelling Control

Post-operative swelling is a natural response to denture placement and extractions. It’s essential to manage this swelling to ensure comfort and facilitate healing. Expect the most significant swelling to occur within the first 24-72 hours.

Immediately following the procedure, apply an ice pack or cold compress to the outside of your cheeks in 20-minute intervals. Repeat this process for the first 48-72 hours. Avoid direct contact between the ice pack and your skin; use a cloth barrier.

Keep your head elevated, even while sleeping, for the first few days. This helps to minimize fluid accumulation and reduce swelling. Avoid strenuous activity, as it can increase blood flow to the area and worsen swelling.

After 72 hours, you may switch to warm compresses if swelling persists. Warmth can help to increase circulation and promote healing. Contact your dentist if swelling is severe, accompanied by fever, or doesn’t improve after several days.

Pain Management Strategies

Managing discomfort is a crucial part of the post-operative period following immediate denture placement. A combination of approaches can effectively control pain and ensure a smoother recovery. It’s important to follow your dentist’s specific instructions regarding medication and self-care.

Your dentist may prescribe pain medication to help manage initial discomfort. Take the medication exactly as prescribed, and do not exceed the recommended dosage. Be aware of potential side effects and discuss any concerns with your dentist or pharmacist.

Over-the-counter pain relievers, such as ibuprofen or acetaminophen, can also be helpful for managing mild to moderate pain. Follow the dosage instructions on the packaging. Alternating between different over-the-counter medications can sometimes provide better relief.

Remember that pain typically decreases over time. If pain is severe or not controlled by medication, contact your dentist immediately.

Prescription Pain Medication

Following immediate denture placement, your dentist may prescribe pain medication to manage post-operative discomfort. These medications are typically stronger than over-the-counter options and are designed to address more significant pain levels experienced in the initial healing phase.

It is absolutely critical to take prescription pain medication exactly as directed by your dentist. Do not increase the dosage or frequency, even if you are still experiencing pain, as this can lead to adverse effects. Similarly, do not stop taking the medication prematurely, even if you feel better, unless instructed by your dentist.

Be aware of potential side effects associated with your prescribed medication. Common side effects can include drowsiness, nausea, and constipation. If you experience any severe or concerning side effects, contact your dentist or pharmacist immediately.

Avoid consuming alcohol while taking prescription pain medication, as this can significantly increase the risk of dangerous interactions.

Over-the-Counter Pain Relief

For mild to moderate pain following immediate denture placement, over-the-counter (OTC) pain relievers can be very effective. Options like ibuprofen (Advil, Motrin) and acetaminophen (Tylenol) are commonly recommended to manage discomfort and reduce inflammation.

Always follow the dosage instructions provided on the medication packaging. Do not exceed the recommended daily dose, and be mindful of any existing medical conditions or medications you are currently taking that might interact with OTC pain relievers. If you have concerns, consult with your pharmacist or dentist.

Alternating between ibuprofen and acetaminophen can sometimes provide more comprehensive pain relief. However, it’s crucial to maintain careful tracking of dosages to avoid exceeding the maximum daily limits for either medication.

Applying a cold compress to the outside of your cheeks can also help reduce swelling and alleviate pain. Apply for 20 minutes on, 20 minutes off, several times a day.

Diet Progression After Denture Placement

Following immediate denture placement, a gradual diet progression is essential for comfortable healing and adaptation. Initially, focus on liquids to minimize pressure and disruption to the surgical sites. This includes broth, clear soups, and strained juices – ensuring adequate hydration is paramount during this phase.

As healing progresses, typically around days 4-7, transition to a soft food diet. Examples include mashed potatoes, yogurt, scrambled eggs, and well-cooked cereals. Avoid hard, crunchy, or chewy foods that could irritate the extraction sites or put undue stress on the dentures.

Gradually reintroduce normal foods as tolerated, starting with softer options and slowly incorporating more textured items. Continue to avoid excessively hard or sticky foods for an extended period.

Listen to your body and adjust the diet accordingly. If you experience discomfort, revert to a softer consistency until healing advances further. Patience is key to a successful transition.

Days 1-3: Liquid Diet

The initial 72 hours post-immediate denture placement necessitate a strictly liquid diet. This crucial phase minimizes trauma to the extraction sites and allows for initial healing without undue pressure. Prioritize nutrient-rich liquids to maintain strength and support recovery.

Acceptable options include clear broths (chicken, beef, or vegetable), strained fruit juices (apple, grape), and clear soups – ensuring they are lukewarm or cool to avoid irritation. Avoid anything requiring chewing or significant oral manipulation.

Hydration is paramount during this period. Supplement liquids with water, herbal teas, or electrolyte solutions to prevent dehydration. Small, frequent sips are preferable to large volumes.

Avoid carbonated beverages, as they can cause discomfort. Also, refrain from using a straw, as the sucking action can disrupt clot formation. Focus on nourishment and gentle intake for optimal healing.

Days 4-7: Soft Food Diet

As initial healing progresses, transition to a soft food diet for days four through seven. This stage introduces slightly more texture while continuing to protect the extraction sites and allow tissues to adapt to the new dentures.

Excellent choices include well-cooked cereals, mashed potatoes, yogurt, scrambled eggs, and pureed fruits or vegetables. Ensure foods are soft, moist, and easy to swallow without requiring extensive chewing. Ground meats or fish are also suitable options.

Cut food into small pieces to minimize strain on the healing tissues. Avoid sticky or chewy foods, as they can adhere to the dentures or extraction sites. Continue to prioritize hydration with water and non-irritating beverages.

Gradually increase the variety of soft foods as tolerated, paying attention to any discomfort. If pain or irritation arises, revert to a liquid diet temporarily. Patience and gentle progression are key to successful healing.

Gradual Return to Normal Diet

After the initial seven days, and with your dentist’s approval, begin a gradual return to your normal diet. This phase requires careful attention to how your mouth responds to increasingly textured foods.

Start by introducing slightly firmer soft foods like well-cooked pasta, tender chicken, or soft breads. Chew slowly and deliberately, distributing the pressure evenly across all teeth. Monitor for any signs of discomfort, such as soreness, irritation, or denture instability.

If you experience any issues, temporarily revert to the soft food diet until healing progresses further. Avoid hard, crunchy, or sticky foods initially, as these can place excessive stress on the dentures and extraction sites;

Continue to avoid extremely hot or cold foods that may cause sensitivity. Maintain excellent oral hygiene throughout this transition. A gradual approach ensures a comfortable and successful adaptation to your new dentures and a return to enjoyable eating.

Denture and Mouth Care (After Initial 24 Hours)

Maintaining impeccable denture and oral hygiene is paramount after the first 24 hours. This routine safeguards your gums and ensures the longevity of your dentures.

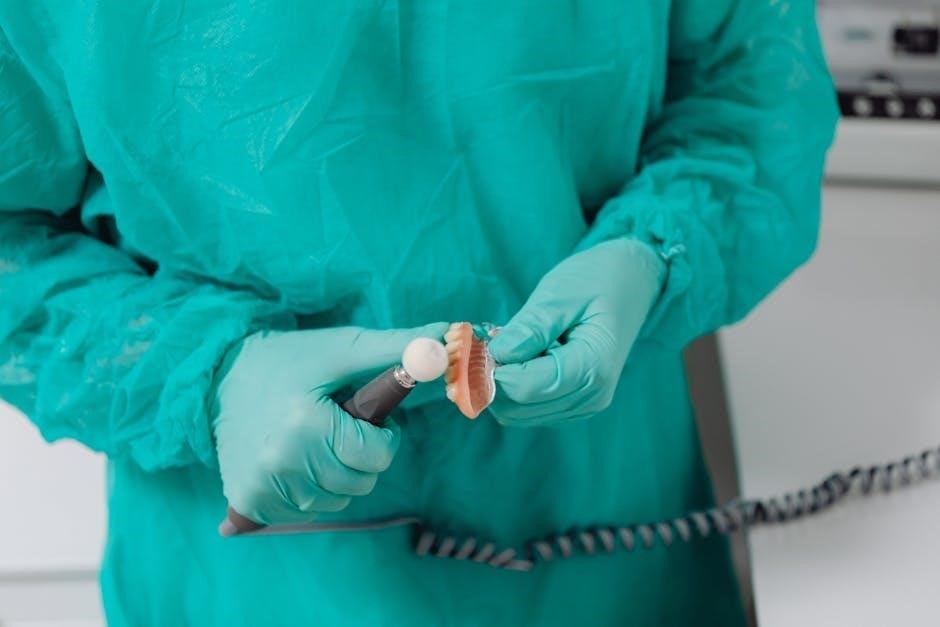
Brush your dentures daily using a denture brush specifically designed to conform to the denture’s contours. Avoid using regular toothpaste, as it can be abrasive and damage the denture material. Instead, utilize an ADA-approved denture cleanser – these are formulated to effectively clean without causing harm.

Rinse your mouth thoroughly after each meal to remove food particles. Remove your dentures at night to allow your gums to rest and breathe. Soak the dentures in a denture-cleansing solution or water overnight to prevent drying and warping.

Never use abrasive cleaning products like bleach or harsh chemicals, as they can damage the dentures. Regular professional cleanings with your dentist are also essential for optimal denture health.

Denture Brushing Techniques

Effective denture brushing requires a gentle yet thorough approach. Utilize a specialized denture brush, designed with bristles contoured to fit the denture’s surfaces. Avoid using a regular toothbrush, as its bristles are often too stiff and can scratch the denture material.

Brush all surfaces of the denture – the inner and outer surfaces, as well as the areas that contact your gums. Employ a circular motion, ensuring you reach all crevices and areas where plaque and food debris can accumulate. Pay particular attention to areas that fit closely to the gums.

Hold the denture firmly while brushing to prevent breakage. Brush over a sink filled with water or a soft towel to cushion the denture if it slips. Avoid applying excessive pressure, as this can damage the denture or your gums.

Rinse the denture thoroughly after brushing to remove any remaining debris or cleanser. Inspect the denture regularly for any signs of damage or wear.

ADA-Approved Denture Cleansers

Maintaining denture hygiene necessitates the use of appropriate cleaning solutions. The American Dental Association (ADA) provides a seal of acceptance for denture cleansers that have been rigorously tested for safety and effectiveness. Choosing an ADA-approved cleanser is paramount to ensure you’re using a product that won’t damage your dentures or pose a health risk.

These cleansers effectively remove stains, plaque, and odor-causing bacteria, contributing to a cleaner, fresher-feeling denture. They typically come in tablet or powder form, dissolving in water to create a soaking solution. Follow the manufacturer’s instructions carefully regarding dilution and soaking time.

Regular soaking in an ADA-approved cleanser helps maintain the denture’s integrity and prevents the buildup of stubborn deposits. Avoid using household cleaners, bleach, or abrasive substances, as these can damage the denture material and compromise its fit. Always rinse the denture thoroughly after soaking.

Avoiding Abrasive Cleaning Products

Protecting the integrity of your immediate dentures requires careful consideration of cleaning product choices. Utilizing abrasive substances can inflict irreversible damage, compromising the denture’s fit, appearance, and longevity. Household cleaners, including bleach, vinegar, and even some toothpastes, are strictly prohibited for denture cleaning.

Abrasive materials create microscopic scratches on the denture surface, fostering the accumulation of bacteria and stains. These scratches can also roughen the denture, increasing friction against your gums and potentially causing irritation or sores. Avoid using harsh scrubbing brushes or scouring powders, as they exacerbate this abrasive effect.

Opt instead for ADA-approved denture cleansers and a soft-bristled denture brush designed specifically for this purpose. Gentle cleaning is key; avoid excessive force or vigorous scrubbing. Regular professional dental cleanings are also essential to remove stubborn deposits safely and effectively, preserving your denture’s condition.

Common Post-Operative Issues

Following immediate denture placement, experiencing certain temporary challenges is entirely normal. Patients frequently report the development of sore spots where the denture exerts pressure on the gums. These areas typically resolve with adjustments made by your dentist, so don’t hesitate to schedule an appointment if discomfort persists.

Initial difficulty with speech is also common, as your mouth adapts to the new appliance. Reading aloud and practicing pronunciation can expedite this adjustment period. Changes in saliva production are another frequent occurrence; some individuals experience increased salivation initially, while others notice a temporary decrease.

These salivary changes usually normalize over time. Minor swelling and discomfort are expected, managed with prescribed or over-the-counter pain relief. Remember, these issues are usually transient, and proactive communication with your dentist is crucial for a smooth recovery and optimal denture function.

Sore Spots and Adjustments

The development of sore spots is a very common occurrence after immediate denture placement. These areas represent points of concentrated pressure between the denture base and the underlying soft tissues. Don’t attempt to self-adjust your denture; this could worsen the problem or cause further irritation.

Contact your dentist promptly when you notice any discomfort. They will carefully evaluate the denture fit and identify the specific areas requiring adjustment. Relining or rebasing the denture may be necessary to redistribute the pressure more evenly. Small adjustments can make a significant difference in your comfort and ability to function.

It’s important to understand that multiple adjustments may be needed during the initial healing phase as your gums and bone remodel. Follow your dentist’s instructions carefully and attend all scheduled follow-up appointments. Properly adjusted dentures are key to a successful outcome and long-term satisfaction.

Difficulty with Speech

It’s perfectly normal to experience some difficulty with speech immediately after receiving immediate dentures. Your mouth needs time to adapt to the new appliance and you need to learn how to articulate words effectively with the denture in place. This is a temporary issue that typically improves with practice and patience.

Start by reading aloud slowly and clearly, focusing on pronouncing words that are particularly challenging. Repeating troublesome sounds and phrases can help retrain your tongue and facial muscles. Avoid speaking too quickly, as this can lead to slurring or mispronunciation.

If speech difficulties persist beyond a few weeks, consult with your dentist or a speech therapist. They can provide personalized guidance and exercises to help you overcome these challenges. Remember, consistent practice is key to regaining natural and confident speech. Don’t be discouraged – most patients successfully adapt to speaking with dentures;

Changes in Saliva Production

Following immediate denture placement, you may notice alterations in saliva production. Initially, it’s common to experience an increase in saliva flow as your body adjusts to the new dentures. This is a natural response and usually subsides within a few days or weeks. This excess saliva helps lubricate the mouth and aids in the healing process.

Conversely, some individuals may experience a temporary decrease in saliva production. This can lead to a feeling of dryness or difficulty swallowing. Sipping water frequently throughout the day can help alleviate this discomfort. Avoid sugary drinks, as they can contribute to dry mouth.

If dry mouth persists or becomes severe, inform your dentist. They may recommend saliva substitutes or other strategies to manage the condition. Maintaining adequate hydration and practicing good oral hygiene are crucial during this adjustment period. These changes are typically temporary, and saliva production usually returns to normal over time.

When to Contact Your Dentist Immediately

Certain post-operative situations require prompt dental attention. Do not hesitate to contact our office immediately if you experience excessive bleeding that doesn’t subside with gentle pressure and biting on gauze for an extended period. Severe pain that is not adequately controlled by prescribed or over-the-counter medication is another critical indicator.

Any fracture or damage to your immediate denture necessitates immediate professional evaluation. Attempting self-repair can worsen the problem and compromise the fit. Significant swelling or signs of infection, such as fever or pus, also warrant an urgent call.

If the denture feels loose or unstable, or if you notice any unusual changes in your bite, contact us promptly. Ignoring these issues can lead to further complications and hinder the healing process. We are here to address your concerns and ensure a smooth recovery. Your comfort and well-being are our top priorities.

Excessive Bleeding

Some minor bleeding is normal following immediate denture placement, as the extraction sites begin to heal. However, excessive or prolonged bleeding requires attention. Apply firm, consistent pressure to the bleeding area using clean gauze pads. Bite down firmly on the gauze for at least 30 minutes, and repeat if necessary.

If bleeding continues unabated after several attempts at pressure control, contact our office immediately. Avoid rinsing vigorously or disturbing the blood clots, as this can dislodge them and restart the bleeding. Do not use straws or engage in strenuous activity that could increase blood pressure.

A small amount of pink-tinged saliva is normal for the first 24-48 hours. However, bright red, continuous bleeding is not. We will assess the situation and provide appropriate guidance, which may include additional pressure techniques or further intervention. Your safety and comfort are paramount.

Severe Pain Not Controlled by Medication

It’s expected to experience some discomfort after immediate denture placement, which should be manageable with prescribed or over-the-counter pain medication. However, if your pain is severe and not adequately relieved by the recommended dosage, it’s crucial to contact our office without delay.

Do not increase your medication dosage without consulting us first. Uncontrolled pain could indicate a complication, such as infection, nerve irritation, or improper denture fit. Describe the nature of your pain – is it sharp, throbbing, constant, or intermittent? – to help us diagnose the issue.

We may need to examine your mouth to identify the source of the pain and adjust the denture accordingly. Ignoring severe, persistent pain can lead to further complications and hinder the healing process. Your well-being is our priority, and we are here to provide prompt and effective relief.

Denture Fracture or Damage

Immediate dentures, being acrylic, can be susceptible to fracture or damage, especially during the initial healing phase when your bite is still adjusting. If you notice any cracks, chips, or breaks in your denture, it’s essential to contact our office immediately for evaluation and repair.

Do not attempt to repair the denture yourself using adhesives or other DIY methods. This can worsen the damage and potentially harm your gums and oral tissues. Even a seemingly minor fracture can compromise the denture’s fit and function, leading to discomfort and difficulty chewing.

Carefully handle your denture when removing it for cleaning and soaking. Avoid dropping it or applying excessive force. Prompt repair is crucial to prevent further damage and maintain the denture’s integrity. We will assess the damage and determine the best course of action, which may involve a laboratory repair or, in some cases, a remake.

Long-Term Denture Care and Maintenance

Maintaining your immediate dentures long-term requires consistent care to ensure their longevity and your continued comfort. Regular professional check-ups, at least annually, are paramount. These appointments allow us to assess the fit of your dentures, as your gums and jawbone will naturally change over time.

Adjustments are often necessary to accommodate these changes and prevent sore spots or instability. Continue using a denture brush and ADA-approved cleanser daily to remove food debris and plaque buildup. Avoid abrasive cleaning products that can scratch the denture surface.

Handle your dentures with care, placing them in a safe location when not in use. Proper storage in water or a denture soaking solution prevents warping and maintains their shape. Report any concerns, such as cracks, looseness, or discomfort, to our office promptly. Proactive maintenance will maximize the lifespan of your dentures and your satisfaction.

Importance of Regular Dental Check-ups

Consistent dental check-ups are absolutely vital for the long-term success of your immediate dentures. Annual examinations allow us to monitor the health of your gums and jawbone, identifying any potential issues early on. Changes within your mouth are inevitable, and dentures require periodic adjustments to maintain a comfortable and secure fit.

These appointments aren’t just about the dentures themselves; they’re about your overall oral health. We’ll assess for signs of irritation, infection, or bone loss. Professional cleaning removes stubborn plaque and tartar that home care might miss. Early detection of problems prevents more serious complications down the road.

Don’t wait for discomfort to schedule a visit. Proactive care extends the life of your dentures and ensures continued functionality. Regular check-ups are a key investment in your oral health and overall well-being, guaranteeing a confident smile for years to come.

soclean 2 instruction manual

SoClean 2 Instruction Manual: A Comprehensive Guide

Welcome! This SoClean 2 manual details setup and operation for effortless CPAP equipment cleaning, utilizing a patented process eliminating 99.9% of germs.

Thank you for choosing the SoClean 2, a revolutionary device designed to simplify your CPAP equipment maintenance routine. This innovative system offers a fast, easy, and effective way to disinfect your mask, hose, and other accessories without the need for water or harsh chemicals.

The SoClean 2 utilizes a patented ozone process to destroy a remarkable 99.9% of harmful germs, bacteria, and pathogens that can accumulate in your PAP equipment. Daily use ensures a cleaner, healthier sleep experience. This manual provides a comprehensive overview of the device, key setup instructions, and guidance for optimal performance.

While designed for broad compatibility, certain CPAP models may require specific adapters or setup adjustments. The SoClean 2 aims to make daily disinfecting simpler than traditional soap and water methods, promoting consistent hygiene for your sleep therapy.

What’s Included in the Box

Upon opening your SoClean 2 package, please verify that all components are present. You should find the SoClean 2 device itself, designed for countertop placement near your CPAP machine. Included is a power adapter to connect the unit to a standard electrical outlet.

A dedicated SoClean Adapter is provided to facilitate connection between the SoClean 2 and your CPAP hose. Depending on your hose’s dimensions, a Hose Sleeve may also be included to ensure a secure and airtight seal. Please note that some headgear materials, particularly those containing nylon, are not compatible with ozone.

This manual serves as your guide to setup and operation. Carefully review all instructions before initial use. If any components are missing or damaged, please contact customer support for assistance. Retain the original packaging for potential warranty claims or returns.

Device Overview & Key Features

The SoClean 2 is engineered for fast, easy, and effective CPAP equipment disinfection. Its compact design fits conveniently on most surfaces near your CPAP machine. The device utilizes ozone technology, a patented process, to eliminate up to 99.9% of harmful bacteria, viruses, and mold without water or chemicals.

Key features include a simple one-button operation for initiating cleaning cycles. An automatic shut-off function ensures safety and energy conservation. The SoClean 2 is compatible with most CPAP hoses and masks, though certain headgear materials (like nylon) require removal before cleaning.

The unit features a secure lid latch to contain ozone during operation. Regular use of the SoClean 2 promotes better hygiene and potentially extends the life of your CPAP equipment, contributing to a healthier sleep therapy experience.

Setting Up Your SoClean 2

Begin by connecting your CPAP hose and mask to the SoClean 2, ensuring proper compatibility and following the activation steps for optimal performance.

Connecting to Your CPAP Machine

Establishing a connection between your CPAP machine and the SoClean 2 is a straightforward process, ensuring effective cleaning and disinfection of your vital sleep therapy equipment. First, disconnect the CPAP hose from your machine. Then, securely attach the hose to the designated port on the SoClean 2 unit.

Ensure a snug fit to prevent any air leaks during the cleaning cycle. The SoClean 2 is designed to accommodate various CPAP hose types, but a sleeve may be required for certain models – refer to the ‘Hose Compatibility & Sleeve Usage’ section for details.

Once connected, power on the SoClean 2 and follow the initial device activation instructions to begin the automated cleaning process. Remember to always refer to the complete instruction manual for detailed guidance and safety precautions.

Hose Compatibility & Sleeve Usage

The SoClean 2 is engineered for broad CPAP hose compatibility, however, some hoses necessitate the use of a specialized sleeve for optimal performance and to ensure a secure seal during the cleaning cycle. If your hose exhibits looseness when connected directly to the device, a sleeve is crucial.

Sleeves are readily available and designed to adapt to various hose diameters, creating a tight, airtight connection. Proper sleeve usage prevents ozone leakage and maximizes cleaning effectiveness.

Always verify compatibility before initiating a cycle. Note that headgear containing nylon is not compatible with ozone and should be removed before cleaning. Refer to the included accessories or contact customer support if you require assistance determining the correct sleeve for your specific hose type.

Initial Device Activation

After connecting your CPAP hose and mask (or utilizing a sleeve if required), the SoClean 2 requires initial activation to begin the cleaning process. Ensure the lid is securely latched shut; the device will not operate if the lid isn’t properly sealed.

Simply plug the SoClean 2 into a standard electrical outlet. The device will automatically initiate a self-check and begin its first cleaning cycle. This initial cycle may take slightly longer than subsequent cycles as the system primes itself.

Allow the full cycle to complete before disconnecting your equipment. Your sleep equipment mask and hose are then ready for use! If interruption is needed, consult the ‘Canceling a Cycle’ section.

Daily Operation & Cleaning Cycle

SoClean 2 simplifies daily PAP equipment maintenance, offering a fast, easy, and effective way to disinfect your mask and hose without water or chemicals.

Starting a Cleaning Cycle

Initiating a cleaning cycle with your SoClean 2 is remarkably straightforward. First, ensure your CPAP mask and hose are securely connected to the device. It’s crucial to verify compatibility, especially regarding headgear materials – avoid using nylon headgear due to ozone sensitivity.

Next, carefully place the mask into the SoClean 2 chamber. If your hose requires a sleeve, ensure it’s properly positioned. Then, firmly push the lid down until it latches shut, creating a sealed environment for the cleaning process.

The SoClean 2 will automatically begin the cycle. You can then confidently proceed with your evening, knowing your sleep equipment is being thoroughly disinfected. Remember, your mask and hose will be ready for use upon cycle completion!

Cycle Duration & Indicators

A standard cleaning cycle on the SoClean 2 typically takes approximately two hours to complete, ensuring thorough disinfection of your CPAP equipment. Throughout the cycle, the device utilizes indicator lights to communicate its status.

While specific light patterns may vary, generally, a solid light indicates the cycle is in progress. Upon completion, the light will change, signaling that your mask and hose are sanitized and ready for use.

It’s important to allow the full cycle to finish for optimal cleaning; However, if interruption is necessary, refer to the Canceling a Cycle section for instructions. Consistent use of the full cycle guarantees the patented process effectively destroys germs and pathogens.

Canceling a Cycle

If you need to access your CPAP mask and hose before the SoClean 2’s maintenance cycle is finished, you can cancel the process. Simply lift the lid of the device; this action will immediately halt the cleaning cycle.

However, interrupting the cycle may result in incomplete disinfection. It’s recommended to allow the full two-hour cycle to complete whenever possible to ensure optimal germ and pathogen elimination.

After canceling, your sleep equipment is ready for removal. Remember, consistent full cycles provide the most effective cleaning. If you frequently need to interrupt cycles, consider adjusting your routine to accommodate the full cleaning duration.

Maintenance & Care

Regular upkeep ensures optimal SoClean 2 performance; this includes timely filter replacements and keeping the device’s exterior clean and free from dust.

Filter Replacement

Maintaining the SoClean 2’s filter is crucial for effective cleaning and device longevity. The filter removes ozone and other particles, ensuring clean air cycles through your CPAP equipment. Replacement is recommended every six months, or sooner if the filter appears discolored or damaged.

To replace the filter, first, disconnect the SoClean 2 from the power source. Locate the filter access panel, typically on the back of the device. Open the panel and remove the old filter. Insert the new filter, ensuring it’s properly seated. Close the access panel securely.

Cleaning the SoClean 2 Exterior

Regularly cleaning the exterior of your SoClean 2 device helps maintain hygiene and extends its lifespan. Disconnect the device from the power outlet before cleaning. Use a soft, damp cloth to wipe down the exterior surfaces. Avoid using harsh chemicals, abrasive cleaners, or excessive water, as these can damage the device.

Pay particular attention to the lid and areas around the air inlet and outlet. Ensure these areas are free from dust and debris. For stubborn stains, a mild soap solution can be used, but always wipe with a clean, damp cloth afterward to remove any soap residue.

Never immerse the SoClean 2 in water or allow liquid to enter the device. Proper exterior cleaning contributes to a sanitary environment for your CPAP equipment.

Troubleshooting Common Issues

If your SoClean 2 isn’t activating, ensure it’s properly connected to a power source and the lid is securely latched. Check for any error codes displayed, referencing the “Understanding Error Codes” section for specific guidance. If the cycle cancels prematurely, verify hose compatibility and that no incompatible headgear (containing nylon) is present during operation.

For issues with ozone odor, ensure proper ventilation after each cycle. If the device isn’t cleaning effectively, confirm the filter is recently replaced. Remember to consult the FDA recall information for any relevant updates or safety concerns.

If problems persist, contact customer support for assistance, providing the model number and a detailed description of the issue.

Safety Information & Precautions

Always heed FDA recall notices and warnings regarding ozone exposure; nylon headgear is incompatible. Prioritize safety when using the SoClean 2 device.

Ozone & Headgear Compatibility

Important Considerations: The SoClean 2 utilizes ozone to effectively disinfect your CPAP equipment. However, it’s crucial to understand ozone’s potential impact on certain materials. Specifically, some headgear constructed with nylon is not compatible with ozone exposure.

Ozone can cause nylon to degrade over time, leading to cracking, reduced elasticity, and ultimately, failure of the headgear. To prevent damage and ensure the longevity of your CPAP mask’s headgear, it is strongly recommended to remove it before initiating a cleaning cycle with the SoClean 2.

Simply detach the headgear from your mask and place only the mask and hose within the device. This precaution will safeguard your investment and maintain the integrity of your CPAP therapy. Always refer to your mask manufacturer’s guidelines for specific material compatibility information.

FDA Recall Information

Important Safety Update: The U.S. Food and Drug Administration (FDA) has issued information regarding a product recall concerning SoClean 2 and SoClean 3 equipment. This recall addresses potential safety concerns related to the device’s operation and the generation of ozone.

The FDA advises users to carefully review the recall details and follow the recommended guidance provided by the agency and SoClean. This may include specific instructions regarding device usage, maintenance, and potential health risks associated with ozone exposure.

Users are encouraged to visit the FDA website or contact SoClean directly for the most up-to-date information on the recall, affected product models, and available remedies. Prioritizing your health and safety is paramount; staying informed about this recall is essential for continued safe use.

Important Safety Warnings

Caution: Ozone Exposure! The SoClean 2 utilizes ozone for disinfection. While effective, ozone can be harmful if inhaled directly. Never attempt to open the device during operation or immediately after a cycle. Ensure the lid is securely latched before initiating a cleaning cycle.

Headgear Compatibility: Be aware that certain headgear materials, specifically those containing nylon, are incompatible with ozone and may degrade over time. It is strongly recommended to remove headgear from the mask before placing it in the SoClean 2 for cleaning.

General Precautions: Do not immerse the device in water. Only use the SoClean 2 as directed in this manual. Disconnect the power cord before any maintenance or cleaning. Keep out of reach of children.

Advanced Features & Settings

Explore error code meanings for troubleshooting and optimize cleaning with various mask types; customer support details and warranty information are available.

Using the SoClean 2 with Different Mask Types

The SoClean 2 is designed for compatibility with most common CPAP mask types, including nasal masks, full face masks, and nasal pillow masks. However, it’s crucial to verify material compatibility, particularly with headgear. Note that some headgear contains nylon, which is not compatible with ozone – remove it before cleaning.

Ensure the mask is properly positioned within the device chamber, allowing for complete ozone exposure. For masks with complex designs or multiple components, disassemble them as much as possible to ensure thorough cleaning. The SoClean 2’s automated cycle effectively reaches most areas, but pre-disassembly maximizes sanitation.

Always refer to your mask manufacturer’s instructions for cleaning recommendations and limitations. While the SoClean 2 provides a powerful cleaning solution, it’s essential to adhere to any specific guidelines provided with your mask to maintain its integrity and prolong its lifespan.

Understanding Error Codes

The SoClean 2 utilizes error codes to indicate potential issues requiring attention. A flashing red light accompanied by a specific beep pattern signals an error. Refer to the complete list in the appendix of this manual for detailed explanations of each code. Common errors include “H2O” indicating excessive moisture detected, or “Lid” signifying the lid isn’t securely latched.

If an error occurs, first ensure the device is properly connected to a power source and the lid is firmly closed. Attempt to restart the cycle. If the error persists, consult the troubleshooting section or contact customer support. Do not attempt to disassemble or repair the device yourself.

Ignoring error codes can compromise the cleaning process and potentially damage the unit; Regularly checking for and addressing error messages ensures optimal performance and longevity of your SoClean 2.

Customer Support & Warranty Information

For assistance with your SoClean 2, our dedicated customer support team is available via phone, email, and online chat. Visit our website at [insert website address here] for contact details and frequently asked questions. We strive to provide prompt and helpful solutions to any issues you may encounter.

The SoClean 2 is covered by a [insert duration] limited warranty against defects in materials and workmanship from the date of purchase. This warranty does not cover damage resulting from misuse, accidents, or unauthorized repairs. Proof of purchase is required for all warranty claims.

Please retain your original purchase receipt. For complete warranty details and claim procedures, please refer to the warranty card included in the box or visit our website. We are committed to your satisfaction!

integrated flight instruction

Integrated flight instruction combines ground school, simulation, and actual flight training, providing a structured approach to teaching pilots. It emphasizes using both external references and instruments for efficient learning and aircraft control.

1.1 Definition and Overview

Integrated flight instruction is a comprehensive training method combining ground school, flight simulation, and actual flight training. It teaches pilots to use both external visual references and cockpit instruments for precise aircraft control. This approach ensures a structured and logical progression of skills, enabling students to master flight maneuvers efficiently. By integrating theory and practice, it prepares students for real-world scenarios, emphasizing safety and decision-making. This holistic method is designed to produce well-rounded, competent pilots capable of handling various flight conditions.

1.2 Historical Development

Integrated flight instruction evolved from traditional training methods that separated ground school and flight training. In the early 20th century, flight training was fragmented, but advancements in aviation technology led to more structured approaches. The concept of integrating ground theory with practical flight skills gained momentum in the mid-20th century. By the 1980s, the term “integrated flight instruction” became widely recognized, emphasizing a cohesive learning process. Modern integrated training incorporates simulation and digital tools, reflecting a continuous evolution toward efficient, safety-focused pilot development.

1.3 Importance in Modern Aviation

Integrated flight instruction is vital in modern aviation as it ensures pilots are well-equipped to handle complex aircraft systems and dynamic flight environments. By combining theoretical knowledge with practical skills, it enhances safety, reduces training time, and improves adaptability. This method prepares pilots for real-world scenarios, fostering better decision-making and situational awareness. Its structured approach ensures consistency, making it a cornerstone of professional pilot training programs worldwide.

Key Components of Integrated Flight Instruction

Integrated flight instruction includes ground school, flight simulation, and actual flight training, blending theory with practice for comprehensive pilot development.

2.1 Ground School and Theory Training

Ground school and theory training form the foundation of integrated flight instruction, covering aviation principles, regulations, weather, navigation, and aircraft systems. This phase ensures students understand the theoretical aspects of flight, preparing them for practical training. It includes comprehensive courses on aerodynamics, human factors, and decision-making, providing a structured approach to building knowledge. Theoretical training is essential for developing the cognitive skills necessary for safe and effective flight operations, ensuring a smooth transition to simulator and actual flight training.

2.2 Flight Simulation Training

Flight simulation training bridges the gap between theory and practical flight, offering a realistic and safe environment for pilots to practice maneuvers. Modern simulators replicate actual aircraft behavior, allowing students to experience various weather conditions, emergencies, and flight scenarios. This phase emphasizes instrument flying skills, situational awareness, and decision-making. Simulation training is cost-effective and reduces risks associated with initial flight training. It is seamlessly integrated with ground school and actual flight training, ensuring a comprehensive learning experience that prepares students for real-world challenges.

2.3 Actual Flight Training

Actual flight training is the practical phase where students apply knowledge gained from ground school and simulation. It involves hands-on experience with aircraft controls, navigation, and real-world scenarios. Instructors guide students through basic and advanced maneuvers, emphasizing both external visual references and instrument flying. This phase builds confidence and proficiency, ensuring students can safely operate an aircraft in various conditions. Regular feedback and assessments help refine skills, preparing learners for independent flight and future licensing. The integration of theory and practice accelerates progress and enhances overall flight readiness.

2.4 Assessment and Progress Tracking

Assessment and progress tracking are critical components of integrated flight instruction. Regular evaluations ensure students meet training milestones, while continuous feedback helps refine skills. Instructors use standardized checklists and stage checks to monitor proficiency. Progress tracking tools, such as digital logs and performance reports, provide clear insights into student development. This structured approach allows for personalized instruction, addressing weaknesses and reinforcing strengths. Effective assessment ensures learners are well-prepared for licensing exams and real-world flying scenarios, maintaining safety and competence throughout their training journey.

Theoretical Foundations

Integrated flight instruction relies on foundational concepts like principles of flight, aerodynamics, weather, navigation, and human factors. These theories provide a knowledge base for practical flight training.

3.1 Principles of Flight

The principles of flight are fundamental to integrated instruction, covering lift, thrust, drag, and weight. Understanding these forces is crucial for controlling aircraft attitudes and performance during training.

3.2 Aerodynamics and Aircraft Performance

Aerodynamics and aircraft performance are central to integrated flight instruction, focusing on how air interacts with aircraft surfaces. Understanding lift, drag, and thrust is vital for optimizing flight efficiency. Aircraft performance characteristics, such as climb rates and stall speeds, are analyzed to enhance pilot decision-making. This knowledge is integrated into ground school and practical training, enabling pilots to predict and control aircraft behavior under various conditions, ensuring safe and effective flight operations.

3.3 Weather and Navigation

Weather and navigation are critical components of integrated flight instruction, teaching pilots to interpret meteorological data and use navigation systems effectively. Understanding weather conditions, such as wind patterns, icing, and thunderstorms, is essential for safe flight planning. Navigation techniques, including GPS, RNAV, and chart reading, are integrated into training to enhance situational awareness. Students learn to analyze METARs, TAFs, and NOTAMs, ensuring informed decision-making. Real-time weather updates and navigation tools are emphasized to prepare pilots for dynamic flight environments, promoting safety and efficiency in all conditions.

3.4 Human Factors and Decision Making

Human factors and decision-making are vital in integrated flight instruction, focusing on cognitive and psychological aspects of flying. Training emphasizes recognizing personal limitations, stress, and external pressures to enhance safe decision-making. Models like PAVE, CARE, and DECIDE guide pilots in assessing risks and choosing appropriate actions. Crew resource management and communication skills are also stressed to minimize errors. By addressing hazardous attitudes and promoting situational awareness, integrated instruction helps pilots make sound judgments, reducing accidents and improving overall flight safety and efficiency.

Practical Applications

Integrated flight instruction applies to real-world scenarios, teaching pilots practical maneuvers, instrument techniques, and emergency procedures. Structured training ensures consistency and readiness for actual flight challenges.

4.1 Basic Flight Maneuvers

Basic flight maneuvers are foundational skills taught in integrated flight instruction, such as takeoffs, landings, climbs, and turns. These maneuvers are practiced in real-world conditions and simulations, emphasizing smooth control inputs and situational awareness. The integration of ground school theory ensures pilots understand the aerodynamic principles behind each maneuver. By combining practical flight training with theoretical knowledge, students develop the muscle memory and decision-making skills needed for safe and efficient flying. This structured approach ensures a seamless progression from basic to advanced techniques.

4.2 Instrument Flying Techniques

In integrated flight instruction, instrument flying techniques are a critical component, teaching pilots to rely on cockpit instruments for navigation and control. Students learn to transition seamlessly from visual to instrument references, using tools like the Primary Flight Display (PFD) and Horizontal Situation Indicator (HSI). These skills are essential for flying in low visibility or poor weather, ensuring safety and precision. The structured approach of integrated training enhances proficiency in instrument flying, preparing pilots for real-world scenarios and advancing their ability to handle complex flight situations confidently.

4.3 Emergency Procedures

Integrated flight instruction includes comprehensive training in emergency procedures, ensuring pilots can respond effectively to critical situations. Students learn protocols for system failures, navigation errors, and medical emergencies, emphasizing quick decision-making. The curriculum incorporates theoretical knowledge and practical simulation exercises, teaching pilots to remain calm and follow structured checklists. Regular drills and scenario-based training enhance preparedness, while feedback mechanisms improve response strategies. This approach ensures pilots can manage emergencies confidently, prioritizing safety and efficient resolution of critical incidents during flight operations.

4.4 Real-World Scenarios and Case Studies

Integrated flight instruction incorporates real-world scenarios and case studies to prepare pilots for practical challenges. These scenarios simulate actual flight conditions, such as system failures, navigation errors, and unexpected weather changes. By analyzing historical incidents, students learn effective decision-making and risk management. Case studies highlight successes and mistakes, offering valuable lessons. This approach bridges theory and practice, ensuring pilots are equipped to handle diverse situations confidently. Real-world applications enhance critical thinking and adaptability, crucial for safe and efficient flight operations in dynamic environments.

Safety Considerations

Safety is the top priority in integrated flight instruction. It ensures training environments are secure, with protocols in place to minimize risks and enhance learning effectiveness.

5.1 Risk Management

Risk management in integrated flight instruction involves identifying and mitigating potential hazards. Instructors use systematic approaches to assess risks, ensuring safe training environments. This includes pre-flight briefings, weather evaluations, and aircraft inspections. By addressing risks proactively, integrated flight instruction minimizes incidents and enhances learning outcomes. Proper risk management aligns with regulatory standards, fostering a culture of safety and responsibility. It ensures that all training activities are conducted securely, preparing pilots for real-world challenges while maintaining a focus on accident prevention and effective decision-making skills.

5.2 Safety Protocols

Safety protocols in integrated flight instruction are essential for ensuring secure training environments. These include pre-flight inspections, emergency procedure drills, and adherence to weather guidelines. Instructors emphasize repetitive checks and real-time monitoring of aircraft systems. Protocols also cover emergency preparedness, such as evacuation plans and communication strategies. By integrating these practices, training programs minimize risks and ensure compliance with aviation standards. Regular reviews and updates of safety protocols further enhance their effectiveness, making them a cornerstone of integrated flight instruction.

5.3 Incident Analysis

Incident analysis plays a critical role in integrated flight instruction by examining events to identify root causes and prevent future occurrences. Instructors conduct thorough reviews of incidents, involving students in the process to enhance learning. This collaborative approach fosters improved decision-making and safety awareness. By understanding contributing factors, such as human error or technical issues, targeted corrective actions can be implemented. Incident analysis not only improves safety but also strengthens the overall training framework, ensuring a proactive approach to risk mitigation.

Instructor Qualifications and Training

Instructors must hold certifications, possess extensive aviation knowledge, and demonstrate teaching methodologies. Their expertise ensures comprehensive training, aligning with integrated flight instruction’s structured approach.

6.1 Certification Requirements

Certified flight instructors must meet rigorous standards, including holding a valid flight instructor certificate and medical clearance. Additional ratings, such as CFI and CFII, are often required. Recurrent training ensures instructors stay updated on aviation regulations and teaching methodologies. Specific certifications vary by jurisdiction, but all mandate demonstrated competence in both flying and instructional techniques. These requirements ensure that instructors can effectively guide students through integrated flight instruction, blending theoretical knowledge with practical skills safely and efficiently.

6.2 Teaching Methodologies

Effective teaching methodologies in integrated flight instruction emphasize a blend of theoretical and practical learning. Instructors use scenario-based training, real-world examples, and interactive tools to engage students. A focus on active learning encourages students to apply knowledge in simulations and actual flights. Clear communication and structured lesson plans ensure concepts are understood. Additionally, instructors adapt their methods to individual learning styles, fostering a supportive environment that minimizes obstacles to learning and promotes safety. These approaches ensure comprehensive skill development, preparing students for both routine and challenging flight scenarios.

6.3 Continuous Professional Development

Continuous professional development is crucial for flight instructors to maintain and enhance their teaching skills. Instructors engage in ongoing training, workshops, and industry conferences to stay updated on aviation advancements. They also participate in peer evaluations and incorporate student feedback to refine their methodologies. Staying current with regulatory changes and technological innovations ensures they provide relevant and effective instruction. This commitment to lifelong learning fosters a supportive and adaptive learning environment for students.

Technological Advancements

Technological advancements like flight simulators, PFD, HSI, and mobile apps enhance integrated flight instruction, providing immersive training experiences and real-time tracking of student progress and performance.

7.1 Flight Simulators

Flight simulators are a cornerstone of integrated flight instruction, offering realistic and immersive training environments. They replicate real-world flight conditions, enabling pilots to practice maneuvers, emergency procedures, and instrument flying without risks. Advanced simulators incorporate virtual reality and precise aircraft models, enhancing learning effectiveness. They also reduce training costs and environmental impact by minimizing actual flight hours. Simulators allow instructors to monitor progress in real-time, providing immediate feedback and refining skills. This technology bridges the gap between theory and practice, ensuring pilots are well-prepared for actual flight scenarios.

7.2 Primary Flight Displays (PFD)

Primary Flight Displays (PFDs) are essential tools in integrated flight instruction, presenting critical flight data in a centralized interface. They combine altitude, airspeed, heading, and attitude information, enhancing situational awareness. PFDs are developed using advanced software, ensuring precise and user-friendly interfaces. They play a key role in training by allowing pilots to practice instrument flying and decision-making. PFDs integrate seamlessly with other systems, providing a realistic cockpit environment for both simulation and actual flight training, thus improving the overall effectiveness of integrated flight instruction programs.

7.3 Horizontal Situation Indicators (HSI)

The Horizontal Situation Indicator (HSI) is a vital component in integrated flight instruction, providing pilots with a clear display of heading, course deviation, and lateral position. It integrates with GPS and flight management systems, offering precise navigation data; The HSI enhances situational awareness, particularly during instrument flying and navigation training. Its ability to display deviations from planned routes makes it essential for teaching enroute navigation and approach procedures. This tool is integral to modern flight training, aiding pilots in mastering navigation skills efficiently.

7.4 Mobile Applications

Mobile applications play a crucial role in modern integrated flight instruction by providing accessible tools for training. Apps like the Cirrus Approach offer comprehensive course materials, progress tracking, and essential flight tools optimized for devices like the iPad. These applications support ground school and practical training, enabling students to review lessons and access resources anytime. They streamline learning by integrating theory with practice, making flight instruction more flexible and efficient for both instructors and students. Mobile apps are increasingly essential for contemporary aviation training programs.

Integrated Flight Training Programs

Integrated flight training programs combine ground theory with practical flight training, offering a structured path from novice to qualified pilot in an intensive, comprehensive manner.

8.1 Course Design

Integrated flight training programs are carefully designed to ensure a logical progression from basic to advanced skills. The curriculum is structured to blend ground theory with practical flight exercises, ensuring a seamless transition between classroom learning and real-world application. Course design emphasizes a balanced approach, incorporating the use of flight simulators, primary flight displays (PFD), and horizontal situation indicators (HSI) to enhance learning. This comprehensive structure ensures students develop both technical proficiency and decision-making abilities, preparing them for real-world scenarios and career demands in aviation.

8.2 Curriculum Development

Curriculum development for integrated flight instruction involves creating a structured, comprehensive program that aligns ground theory with practical flight training. It integrates simulator sessions, actual flights, and classroom instruction to ensure a cohesive learning experience. The curriculum is tailored to progress logically, from basic maneuvers to complex scenarios, ensuring students build skills incrementally. Feedback mechanisms and assessments are incorporated to track progress and refine instruction, making the curriculum adaptable to individual needs while maintaining high standards of aviation training.

8.3 Implementation Strategies

Implementation of integrated flight instruction involves a structured approach, combining ground theory with practical flight training. Programs are delivered through a mix of classroom sessions, simulator exercises, and actual flights. Technology, such as mobile apps, enhances accessibility to training materials and progress tracking. Continuous feedback from instructors ensures personalized learning. Real-world scenario training is incorporated to prepare students for diverse conditions. The strategy emphasizes a balanced blend of theoretical knowledge and hands-on experience, ensuring a seamless transition from simulation to actual flight operations.

Assessment and Evaluation

Assessment involves monitoring student progress, using evaluation techniques to measure proficiency, and providing constructive feedback to enhance learning and skill development in integrated flight instruction.

9.1 Student Progress Monitoring

Student progress monitoring in integrated flight instruction involves regular assessments to track learning and skill development. Instructors use feedback loops to identify strengths and areas needing improvement. Mobile apps like Cirrus Approach enable real-time tracking of milestones, ensuring alignment with training objectives. This structured approach helps tailor instruction to individual needs, fostering efficient and effective learning outcomes in both ground and flight training environments.

9.2 Evaluation Techniques

Evaluation techniques in integrated flight instruction include assessments of piloting ability, decision-making, and adherence to safety protocols. Tools like PAVE, CARE, and DECIDE help evaluate aeronautical decision-making. Hazardous attitude identification and the 3Ps model are also used. These methods ensure comprehensive skill assessment, focusing on both technical proficiency and judgment. Regular evaluations help instructors refine training, ensuring students meet safety and performance standards effectively.

9.4 Feedback Mechanisms

Feedback mechanisms in integrated flight instruction involve regular, constructive input to students, ensuring continuous improvement. Instructors use debrief sessions, digital platforms, and performance tracking tools to provide detailed insights. Mobile apps, like the Cirrus Approach, enable real-time feedback on progress. Feedback focuses on technical skills, decision-making, and adherence to safety protocols, helping students refine their abilities. Timely and specific feedback enhances learning efficiency, ensuring students meet training objectives effectively.

Integrated flight instruction effectively combines theory, simulation, and practical training, ensuring comprehensive pilot development. Its structured approach enhances safety, efficiency, and adaptability, preparing pilots for modern aviation challenges.

10.1 Summary of Key Points

Integrated flight instruction seamlessly merges ground theory, simulation, and practical flight training, ensuring a holistic learning experience. By emphasizing both external and instrument references, it equips pilots with essential skills for safe and efficient flight operations. The method’s structured approach promotes logical progression, consistent instruction, and adaptability to real-world scenarios, making it a preferred choice for modern aviation training. Its focus on safety, assessment, and continuous improvement underscores its effectiveness in developing proficient and decision-capable pilots for current and future challenges.

10.2 Future Trends

Future trends in integrated flight instruction will likely focus on advanced technologies like AI-driven flight simulators and enhanced mobile applications for personalized learning.
These tools will offer real-time feedback and adaptive training programs tailored to individual student needs.
Virtual and augmented reality will further immerse students in training scenarios, improving skill retention and decision-making.
Additionally, integrated systems will streamline ground school and flight training, reducing costs and training time while maintaining high safety standards.
Such innovations will ensure integrated flight instruction remains at the forefront of modern aviation education.

10.3 Final Thoughts

Integrated flight instruction represents a holistic approach to aviation training, blending theory, simulation, and practical experience for comprehensive skill development. By emphasizing both external and instrument references, it equips pilots with adaptability and confidence. As technology advances, this method will continue to evolve, ensuring safer and more efficient training. Its structured yet flexible design makes it a cornerstone of modern aviation education, preparing pilots for diverse challenges in the skies.

sel 451 instruction manual

The SEL-451 Instruction Manual provides essential guidance for installing, configuring, and operating the SEL-451 Protection, Automation, and Bay Control System, ensuring optimal performance and reliability.

1.1 Overview of the SEL-451 Protection, Automation, and Bay Control System

The SEL-451 is a comprehensive, stand-alone protection, automation, and bay control system designed for substation applications. It integrates advanced protection, control, and monitoring functions into a single device, simplifying substation automation. The system supports high-speed circuit breaker protection, disconnect switch control, and remote bit operations, ensuring reliable and efficient operation. With customizable logic and settings, the SEL-451 is ideal for medium voltage and critical power projects. It offers Ethernet and serial communication options, supporting DNP3 and IEC 61850 protocols. The system’s advanced features, such as synchrophasor measurement and automation capabilities, make it a versatile solution for modern power systems.

1.2 Importance of the Instruction Manual for Proper Configuration and Operation

The SEL-451 Instruction Manual is crucial for ensuring safe, efficient, and accurate configuration and operation of the system. It provides detailed procedures for physical installation, wiring, and initial setup, minimizing the risk of errors. The manual also covers troubleshooting common issues and interpreting error codes, enabling quick resolution. Adhering to the guidelines ensures compliance with safety standards and optimal system performance. Proper use of the manual prevents equipment damage and guarantees reliable operation. It serves as an essential reference for maintenance, upgrades, and advanced customization, making it indispensable for both novices and experienced users.

Installation and Configuration

This section details the physical installation and wiring guidelines for the SEL-451, ensuring safe and proper setup. It also covers initial configuration steps for optimal system operation.

2.1 Physical Installation and Wiring Guidelines

The SEL-451 manual provides detailed instructions for physical installation, emphasizing safety and proper wiring practices. Ensure all connections meet specified torque values to avoid damage. Grounding is critical for noise reduction and reliable operation; follow the manual’s grounding procedures. Use shielded cables for communication ports to prevent electromagnetic interference. Mount the device securely in a well-ventilated area to maintain optimal operating temperatures. Verify all wiring complies with local electrical codes and manufacturer recommendations. Proper physical installation ensures system reliability and performance, so consult the manual for specific guidelines and torque specifications before proceeding.

2.2 Initial Configuration and Setup Procedures

The SEL-451 manual outlines initial configuration steps, starting with software setup using ACSELERATOR QuickSet SEL-5030. Assign device IDs and configure communication protocols like DNP3 or IEC 61850. Set protection parameters, such as overcurrent and undervoltage thresholds, according to system requirements. Enable automation features like auto-reclosing and synchro-check. Verify settings by reviewing event log thresholds and control logic. Ensure proper synchronization with external devices and test communication interfaces. Follow the manual’s step-by-step guide to ensure accurate initialization, preventing operational issues. Proper setup is crucial for reliable performance and safety in power systems.

Operation and Control

The SEL-451 integrates protection and control functions, enabling advanced automation and monitoring. It supports circuit breaker and disconnect switch control, ensuring reliable power system operation and efficiency.

3.1 Circuit Breaker and Disconnect Switch Control Capabilities

The SEL-451 offers comprehensive control capabilities for circuit breakers and disconnect switches. It provides high-speed breaker protection and automation, ensuring efficient operation. The relay supports advanced synchrophasor measurement for system stability awareness; With circuit breaker status and control logic, it integrates seamlessly with protection settings and logic configurations. Additionally, the SEL-451 allows remote bit controls and bay control functions, simplifying substation automation. Its communication ports support Ethernet and serial connections, enabling DNP3 and IEC 61850 Edition 2 protocols. These features ensure reliable and efficient control of medium voltage and critical power systems.

3.2 Automation and Bay Control Functions

The SEL-451 provides advanced automation and bay control functions, enabling seamless integration of protection, control, and monitoring in substation applications. It supports high-speed breaker protection and automation, ensuring reliable operation. The system allows for remote control of circuit breakers and disconnect switches, simplifying substation management. With comprehensive bay control capabilities, the SEL-451 integrates protection, metering, and monitoring functions into a single platform. Communication protocols like DNP3 and IEC 61850 enable efficient data exchange. These features enhance operational efficiency and reduce complexity, making the SEL-451 an ideal solution for modern power systems.

Programming and Settings

The SEL-451 allows for advanced programming of protection settings and logic configurations, enabling customization to meet specific system requirements and ensuring precise control over automation functions.

4.1 Protection Settings and Logic Configuration

The SEL-451 manual details the configuration of protection settings and logic, enabling precise control over circuit breaker and disconnect switch operations. Advanced customization options allow users to tailor settings to specific system requirements, ensuring reliable performance. Protection settings influence trip logic, while the manual provides detailed diagrams to simplify configuration. Users can leverage software tools like ACSELERATOR QuickSet SEL-5030 for seamless setup. This section emphasizes the importance of accurate protection settings to maintain system stability and safety, offering comprehensive guidance for optimal configuration.

4.2 Advanced Features and Customization Options

The SEL-451 offers advanced features like synchrophasor measurement for system stability and customizable logic for automation. Users can tailor settings using software tools like ACSELERATOR QuickSet SEL-5030. Communication options include Ethernet and serial ports with DNP3 and IEC 61850 protocols. Customization allows integration with bay control status and circuit breaker operations, enhancing system adaptability. These features simplify setup and ensure compatibility with various power systems, making the SEL-451 ideal for medium voltage applications.

Maintenance and Troubleshooting

The SEL-451 manual outlines essential maintenance and troubleshooting practices to ensure reliable operation and optimal performance of the protection and control system.

5.1 Routine Maintenance and Inspection Procedures

The SEL-451 manual details routine maintenance tasks, including inspecting connections, verifying battery health, and cleaning components. Regular firmware updates ensure optimal performance. Users must follow safety protocols during inspections to prevent damage or electrical hazards. The manual also recommends periodic checks of control circuits and communication ports to maintain reliable operation. Logging maintenance activities helps track system health and ensures compliance with operational standards. Adhering to these procedures minimizes downtime and extends the lifespan of the SEL-451 system, ensuring continuous protection and control functionality.

5.2 Troubleshooting Common Issues and Error Codes

The SEL-451 manual provides detailed troubleshooting guides for common issues, such as error codes, communication faults, and circuit breaker malfunctions. It outlines step-by-step procedures to identify and resolve problems, including checking connections, verifying settings, and utilizing diagnostic tools like ACSELERATOR QuickSet software. The manual also emphasizes the importance of regular firmware updates to prevent errors and ensure system stability. By following these guidelines, users can efficiently diagnose and address issues, minimizing downtime and maintaining reliable system operation.

The SEL-451 manual is a comprehensive resource for configuring and operating the system, ensuring reliability and efficiency. For further assistance, refer to SEL datasheets and manufacturer support.

6.1 Summary of Key Points and Best Practices

The SEL-451 manual emphasizes proper installation, configuration, and maintenance for optimal system performance. Adhering to guidelines ensures reliable operation and minimizes downtime. Regular updates and manufacturer support are crucial for staying current with advancements and troubleshooting. Always refer to the latest documentation for detailed procedures and best practices. By following these recommendations, users can maximize the efficiency and longevity of the SEL-451 system in their medium voltage and critical power applications. Proper training and adherence to safety protocols are essential for safe and effective system management.

6.2 Additional Resources and Manufacturer Support

The SEL-451 manual is complemented by various resources, including data sheets, installation guides, and training materials. Users can access PDF manuals, software tools like SEL-5030, and manufacturer support for troubleshooting. Schweitzer Engineering Laboratories offers comprehensive assistance, ensuring users stay updated with the latest advancements. Additional literature, flyers, and configurable labels are available for detailed specifications. These resources enhance understanding and optimal use of the SEL-451 system, providing reliable solutions for medium voltage and critical power applications. Manufacturer support ensures seamless integration and maintenance, guaranteeing safe and efficient operation.

honda radio/navigation code retrieval and reset instructions

The Honda radio/navigation system features an anti-theft lock that activates when the battery is disconnected, requiring a unique code to unlock. This code is typically found on a glove box sticker or obtained via the VIN, ensuring secure access to restore functionality.

1.1 Why Is the Radio Code Necessary?

The Honda radio code is essential for securing your vehicle’s audio system against theft. It activates when the battery is disconnected, requiring the unique code to unlock the radio and navigation features. This anti-theft mechanism ensures that only authorized users can restore functionality, safeguarding your system from unauthorized access. The code is typically found on a sticker in the glove box or retrieved via the vehicle’s VIN number through Honda’s official channels. By requiring this code, Honda protects your investment and maintains the integrity of your car’s electronics, ensuring that only rightful owners can access and use the system. This security feature is a critical component of Honda’s commitment to preventing theft and maintaining customer trust.

1.2 Understanding the Anti-Theft System in Honda Vehicles

Honda’s anti-theft system is designed to protect your vehicle’s radio and navigation system from unauthorized use. When the battery is disconnected or drained, the system locks, displaying an “Anti-Theft” message or a blinking LED. This lockout requires a unique code to reactivate the system, ensuring security. The code, linked to your vehicle’s VIN, is stored in Honda’s database and can be retrieved through official channels. This advanced security feature prevents thieves from easily accessing your car’s electronics, safeguarding your investment; By understanding this system, you can appreciate Honda’s commitment to protecting your vehicle and its components from potential theft or tampering, ensuring peace of mind for drivers and owners alike. The system is both efficient and effective in maintaining vehicle security.

Methods for Retrieving the Honda Radio Code

Retrieve your Honda radio code via the official Honda website, by checking the glove box sticker, or using your vehicle’s VIN for secure and efficient access.

2.1 Online Retrieval Using the Official Honda Website

Retrieving your Honda radio code online is a straightforward process through the official Honda website. By visiting the site, you can provide your vehicle’s VIN and proof of ownership to access the code. This method is convenient and secure, ensuring only authorized users can obtain the code. The website guides you through a few simple steps, making it easy to unlock your radio or navigation system. Once you’ve entered the required information, the code is generated and displayed for immediate use. This online service is available for most Honda models, offering a quick solution to restore your audio system’s functionality without the need for physical documents or dealership visits. Visit the official Honda website to initiate the process and regain access to your system efficiently.

2.2 Finding the Code on the Glove Box Sticker

The Honda radio code is often printed on a sticker located inside the glove box of your vehicle. This sticker is typically placed for easy access and visibility. It contains the unique 4-digit or 5-digit code required to unlock your radio or navigation system. To locate it, open the glove box and look for a small white or silver sticker with the code printed on it. This method is one of the quickest ways to retrieve your code without needing to contact Honda or use online services. If the sticker is missing or unreadable, you may need to explore other retrieval methods. This convenient placement ensures that owners can easily access their code when needed, making it a common solution for Honda vehicles.

2.3 Retrieval Through the Vehicle’s VIN Number

For Honda vehicles, the radio/navigation code can also be retrieved using the Vehicle Identification Number (VIN). The VIN is a unique 17-digit identifier found on the driver’s side dashboard or doorjamb. By visiting the official Honda website or contacting a dealership, you can provide the VIN along with proof of ownership to obtain the code. Some online services also allow VIN-based code retrieval after verifying your identity and vehicle details. This method is particularly useful if the glove box sticker is missing or unreadable. The process typically involves submitting the VIN and completing a verification process, ensuring secure access to your radio code. It is a reliable alternative for retrieving the code when other methods are unavailable.

Step-by-Step Instructions for Resetting the Radio/Navigation System

Resetting your Honda radio/nav system involves entering the unique code, typically found via VIN or glove box sticker, using preset buttons or online tools for quick activation.

3.1 Manual Reset Using the Radio’s Preset Buttons

To manually reset your Honda radio, press and hold the 1 and 6 preset buttons while turning the ignition on; This displays the serial number, which you’ll need to jot down. Once you have the serial number, contact Honda’s dedicated hotline at (800) 999-1009. Provide the serial number and proof of ownership to obtain your unique reset code. After receiving the code, enter it using the radio’s preset buttons. If the system shows “Anti-theft” or a blinking LED, ensure the ignition is in the correct position and try again. This process should unlock your system without needing external tools or services.

3.2 Resetting the System via the Official Honda Website

Visit the official Honda website and navigate to the radio code retrieval section. Enter your vehicle’s VIN and provide proof of ownership to verify your identity. Follow the prompts to submit your request. Once processed, Honda will send a confirmation email with your unique reset code. Return to your vehicle, turn the ignition to the “ON” position, and enter the code using the radio’s preset buttons. For systems without preset buttons, ensure the code is a four-digit sequence. If issues arise, such as an “Anti-theft” message, double-check the ignition position and code entry. Contact Honda support if problems persist. This method ensures a secure and efficient reset process.

Troubleshooting Common Issues

Common issues include “Anti-theft” messages, blinking LEDs, or code entry problems. Ensure the ignition is in the correct position and retry the code entry process carefully.

4.1 What to Do If the Radio Displays “Anti-Theft” or a Blinking LED

If your Honda radio displays “Anti-Theft” or shows a blinking LED, it indicates the system is locked. This typically occurs after a power interruption, such as a dead battery or disconnect. To resolve this, ensure the ignition is in the “ON” position and enter the correct 4-digit code using the preset buttons. If the code is unknown, refer to the glove box sticker or retrieve it via the VIN using Honda’s official website. If the issue persists, verify the code entry procedure and ensure the system is properly powered. In some cases, a hard reset or professional assistance may be required to unlock the system and restore functionality.

4.2 Solving Problems with Code Entry or System Lockouts

If you encounter issues entering the code or the system remains locked, ensure the ignition is in the “ON” position and the battery is stable. Verify the code by checking the glove box sticker or retrieving it via the VIN on Honda’s official website. Enter the code carefully using the preset buttons, ensuring accuracy. If the code fails, wait 10 minutes and retry. Some systems may require a soft reset by pressing and holding the power button. Persistent issues may require contacting Honda customer support or visiting a dealership. If the problem persists, professional assistance may be necessary to unlock the system and restore functionality. Always double-check the code entry process to avoid further lockouts.

Preventing Future Lockouts

Store your radio code securely and update it periodically to avoid unauthorized access. Regular system updates and proper handling of power cycles can prevent future lockouts effectively.

5.1 Tips for Safely Storing Your Radio Code

Always store your Honda radio code in a secure location, such as a safe or a private digital file. Avoid keeping it in the glove box or vehicle, as this could lead to theft. Write the code on a separate document and store it with other important documents, like your vehicle title or insurance papers. Consider using a password manager to securely store the code digitally. Never share the code with unauthorized individuals. If you update or change the code, ensure all copies are updated. This ensures easy access while maintaining security, preventing future lockouts and unauthorized system access.

5.2 Updating or Changing Your Radio Code

If you wish to update or change your Honda radio code, start by accessing the official Honda website or contacting customer support. Provide your VIN and ownership proof for verification. Once confirmed, follow the prompts to generate a new code. Some systems allow manual code changes using the radio’s preset buttons. Turn the ignition on, press and hold the 1 and 6 buttons, and enter the new code when prompted. Ensure the new code is securely stored to avoid future lockouts. Updating your code enhances security and ensures uninterrupted access to your radio/navigation system. Always verify your identity during the process to maintain system integrity and prevent unauthorized changes.

Additional Resources and Support

For further assistance, visit the official Honda website or contact customer service. Third-party services also offer code retrieval help, ensuring your radio/navigation system is functional again quickly.

6.1 Contacting Honda Customer Service for Assistance

Reaching out to Honda Customer Service is a reliable way to retrieve your radio code. Visit the official Honda website or call their support hotline at (800) 999-1009. Provide your VIN and proof of ownership to verify your identity. A representative will guide you through the process, ensuring you receive the correct code promptly. In most cases, the code is linked directly to your vehicle’s VIN, making it a secure and efficient method. This service is available for all Honda models, including those with older systems or specific displays. By contacting Honda directly, you avoid potential risks associated with third-party services.

6.2 Using Third-Party Services for Code Retrieval

Third-party services offer an alternative for retrieving Honda radio codes, especially for those who prefer not to contact Honda directly. These services often require your vehicle’s VIN and sometimes proof of ownership. Websites may charge a fee and promise quick retrieval by entering your VIN and other details. While convenient, ensure the service is reputable to avoid scams. Some forums and communities also provide guidance or codes based on shared experiences. However, relying on third-party services carries risks, as unauthorized access or incorrect codes can lock the system. Always verify the credibility of the service before proceeding to ensure a smooth and secure code retrieval process.

listen and draw activity instructions

The Listen and Draw activity is an engaging method that enhances creativity and listening skills through audio descriptions, enabling participants to visualize and illustrate stories or concepts effectively.

What is a Listen and Draw Activity?

A Listen and Draw activity is an interactive exercise where participants listen to verbal descriptions, stories, or instructions and then create visual representations through drawing. This method encourages auditory processing, creativity, and fine motor skills. It is often used in educational and therapeutic settings to enhance focus and imagination. The activity can be adapted for various age groups and skill levels, making it a versatile tool for learning and self-expression. By linking hearing to creativity, it fosters a deeper connection between comprehension and artistic interpretation.

Benefits of Listen and Draw for Learning and Creativity

The Listen and Draw activity enhances cognitive development by connecting auditory and visual processing, improving memory and concentration. It fosters creativity, allowing individuals to interpret and express ideas uniquely. This method also builds confidence, as participants see their imagination take physical form. For younger learners, it supports language comprehension and fine motor skills, while for older participants, it encourages critical thinking and artistic exploration. Overall, it bridges listening and creativity, making it a powerful tool for holistic development and self-expression across all age groups.

Why Listen and Draw is Popular in Educational Settings

Listen and Draw is widely embraced in education due to its engaging and interactive nature, fostering active participation and focus. It caters to diverse learning styles, making it inclusive for visual, auditory, and kinesthetic learners. The activity bridges language development with artistic expression, encouraging creativity while reinforcing comprehension. Educators appreciate its versatility, as it can be adapted to various subjects and age groups. Additionally, it provides immediate visual feedback, allowing teachers to assess understanding and engagement effectively. Its simplicity and effectiveness make it a favorite in classrooms worldwide for enhancing both skills and enjoyment.

Materials and Preparation

Gather paper, markers, crayons, glue, scissors, and audio equipment. Prepare a quiet space with clear audio output, ensuring all materials are easily accessible for participants.

Essential Materials Needed for the Activity

The core materials include paper, markers, colored pencils, crayons, glue, scissors, and audio equipment for clear sound playback. Ensure high-quality tools for vibrant creativity. A quiet, well-lit space with minimal distractions is crucial. Optional items like stickers or stencils can enhance engagement. Arrange seating to promote focus and comfort, allowing participants to easily hear instructions and express their imagination freely.

How to Prepare the Environment for Maximum Engagement

Arrange tables and chairs to allow easy movement and visibility. Ensure the space is quiet, well-lit, and free from distractions. A clean, organized environment inspires creativity. Display examples or visuals to spark imagination. Position audio equipment centrally for clear sound. Keep materials within easy reach to minimize disruptions. Test technology beforehand to avoid technical issues. Create a welcoming atmosphere with bright colors or calming decor to encourage focus and enthusiasm. A well-prepared space sets the foundation for an engaging and productive Listen and Draw session.

Step-by-Step Instructions for Conducting the Activity

Introduce the activity, provide clear instructions, play the audio, and allow time for drawing. Encourage creativity and focus, ensuring a smooth and enjoyable experience for all participants.

Begin by introducing the Listen and Draw activity, explaining its objective: to enhance creativity and listening skills through visual interpretation. Clearly outline the process, emphasizing the importance of focus and imagination. Ensure participants understand they will listen to a descriptive audio or verbal instructions and then translate what they hear into a drawing. Provide materials like paper and drawing tools, and set expectations for engagement and creative freedom. Encourage questions to ensure clarity before starting the activity, fostering a positive and productive environment for all involved.

Step 2: Delivering Clear and Engaging Instructions

Deliver instructions in a clear, concise, and engaging manner to ensure participants understand the task. Speak slowly and use descriptive language to paint a mental picture. Provide examples or visuals to clarify expectations, if needed. Encourage participants to ask questions before beginning. Emphasize the importance of focusing on the audio and translating heard descriptions into their drawings. Keep instructions positive and motivating to foster creativity and participation. Ensure all materials are within reach and the environment is conducive to focus and imagination.

Step 3: Playing the Audio or Providing Verbal Descriptions

Play the selected audio or deliver verbal descriptions clearly and at a moderate pace. Ensure the volume is adequate for all participants to hear without strain. If using verbal descriptions, speak vividly to inspire imagination. Pause briefly between key details to allow time for drawing. Maintain engagement by using expressive tone and language. Encourage participants to focus solely on the audio and translate the descriptions into their artwork. Avoid interruptions and ensure the audio or verbal cues are concise and easy to follow, fostering creativity and focus among all participants.

Step 4: Allowing Time for Drawing and Creativity

Provide a set time for participants to draw based on age and activity complexity. Ensure the environment remains calm and free from distractions. Allow participants to interpret the audio or descriptions freely, fostering creativity and personal expression. Monitor progress subtly without interrupting their flow. Encourage imagination and exploration of ideas during this phase. After the time concludes, prepare participants to share their work, promoting pride in their creations and fostering a sense of accomplishment and collaborative enjoyment among the group.

Age-Specific Modifications

Adapt the activity’s complexity and instructions according to the participants’ age, ensuring it suits their developmental stage and enhances engagement effectively for diverse groups.

Adapting the Activity for Young Children

For young children, simplify instructions and use visual aids to enhance understanding. Incorporate short, engaging audio clips with familiar themes, such as animals or fairy tales. Provide basic drawing tools like crayons or washable markers. Break the activity into shorter sessions to maintain their attention. Encourage creativity by allowing them to interpret the audio freely. Offer positive reinforcement to build confidence and motivation. This approach ensures the activity is both fun and developmentally appropriate for young participants.

Adjusting Instructions for Older Students or Adults

For older students or adults, provide more complex audio content, such as detailed descriptions or literary passages. Allow additional time for processing and drawing to accommodate deeper reflection. Encourage the use of symbolism or abstract interpretations to challenge their creativity. Consider offering optional background music or ambient sounds to enhance focus. Provide constructive feedback that highlights unique interpretations and techniques. This approach fosters critical thinking and artistic expression while catering to their advanced cognitive and creative abilities.

Common Challenges and Solutions

Addressing distractions and ensuring clear comprehension are key challenges. Solutions include creating a quiet environment, simplifying instructions, and encouraging questions to clarify expectations effectively.

Managing Distractions and Maintaining Focus

To minimize distractions, create a quiet environment and ensure participants are seated comfortably. Use clear, engaging instructions to capture attention. Encourage active listening by providing visual aids or examples. For younger children, incorporate movement breaks to refocus energy. Positive reinforcement, such as praise for concentration, can motivate participants. For older students, emphasize the importance of focus and offer periodic reminders. By structuring the activity thoughtfully, distractions can be reduced, fostering an engaging and productive experience for all ages.

Handling Incorrect Interpretations of Instructions

If participants misinterpret instructions, clarify promptly with examples or visual aids. Encourage questions to ensure understanding. For younger children, simplify language and demonstrate steps. For older participants, provide detailed explanations. Positive reinforcement helps reduce anxiety and fosters creativity. Reviewing instructions step-by-step ensures alignment with expectations. By addressing misunderstandings early, the activity remains engaging and effective, promoting confidence and clear communication among all participants.

Assessment and Feedback

Assessment involves observing participation and creativity, while feedback focuses on constructive criticism, highlighting strengths and suggesting improvements to enhance learning and artistic growth.

How to Observe and Evaluate Participation

To effectively observe participation, focus on attentiveness and creativity during the activity. Evaluate how well participants translate audio descriptions into visual representations. Assess their ability to follow instructions and express ideas through art. Note individual engagement levels and willingness to explore creative interpretations. Use these observations to provide constructive feedback, highlighting strengths and areas for improvement. This approach ensures personalized growth and reinforces the learning objectives of the Listen and Draw activity.

Providing Constructive Feedback to Participants

Constructive feedback is essential for fostering growth and improvement. Focus on specific aspects of the participant’s work, such as creativity, attention to detail, and interpretation of instructions. Highlight strengths and offer actionable suggestions for refinement. Encourage participants to reflect on their process and explore new techniques. Positive reinforcement and open dialogue create a supportive environment, helping participants refine their skills and build confidence in their artistic and listening abilities.

The Listen and Draw activity effectively enhances creativity, listening skills, and self-expression. It encourages participants to explore their imagination while developing essential cognitive abilities through engaging practice.

The Listen and Draw activity is a creative and educational tool that enhances listening, comprehension, and artistic skills. It involves audio descriptions or verbal instructions that participants interpret through drawing; This method fosters imagination, focus, and self-expression while encouraging engagement and collaboration. Suitable for all ages, it adapts to different learning levels, making it versatile for educational and therapeutic settings. By combining auditory and visual elements, it provides a holistic learning experience that promotes cognitive development and creativity. Regular practice can lead to improved communication and problem-solving abilities.

Encouraging Continued Practice and Exploration

Consistent practice in Listen and Draw activities helps refine skills and fosters creativity. Encourage participants to explore different themes and techniques, keeping the process enjoyable. Provide varied audio prompts to maintain interest and challenge their imagination. Regularly reviewing their progress and discussing their interpretations can build confidence. Creating a supportive environment where mistakes are seen as learning opportunities motivates continued engagement. Inspire participants to apply their skills in real-world contexts, such as illustrating stories or designing visuals for projects, to deepen their understanding and enjoyment of the activity.

statlock catheter stabilization device instructions

The StatLock Catheter Stabilization Device is a mechanical system designed to secure catheters, preventing movement and related complications. It offers a cost-effective, safe alternative to sutures and adhesive tapes, minimizing catheter-related infections and patient discomfort. Suitable for various catheters, including central venous and Foley catheters, the device promotes stability and patient mobility, reducing healthcare costs associated with catheter management. It is a single-use device intended for secure, long-term catheter placement.

1.1 Overview of the StatLock Device

The StatLock Catheter Stabilization Device is a single-use, mechanical system designed to secure catheters, minimizing movement and reducing complications. It provides a safe, cost-effective alternative to sutures and adhesive tapes, offering stability for various catheter types, including central venous and Foley catheters. The device is engineered to minimize catheter-related infections and patient discomfort, ensuring secure placement and patient mobility.

1.2 Importance of Catheter Stabilization

Catheter stabilization is crucial to prevent movement-related complications, such as infections, dislodgment, and patient discomfort. Proper stabilization ensures the catheter remains in the correct position, reducing the risk of catheter-related bloodstream infections and improving patient outcomes. It also minimizes the need for repeated procedures, lowering healthcare costs and enhancing overall patient care quality.

Key Features and Benefits of the StatLock Device

The StatLock Device reduces catheter-related complications and associated costs. Its design minimizes catheter movement, preventing infections and ensuring secure placement. Cost-effective and easy to use, it is a safe alternative to sutures, providing optimal catheter stabilization and patient comfort.

2.1 Design and Functionality

The StatLock Device features a retainer clamp and an adhesive anchor pad, designed to securely hold catheters in place. Its directional arrow ensures proper alignment with the catheter tip, while the balloon inflation arm placement prevents misalignment. The compact design allows for easy application and adjustment, minimizing catheter manipulation and enhancing patient comfort during use.

2.2 Advantages Over Traditional Suture Stabilization

The StatLock Device eliminates the need for sutures, reducing the risk of needlestick injuries and patient discomfort. It minimizes catheter movement, lowering infection risks and complications. The device is easier to apply and adjust compared to sutures, saving time and reducing the need for frequent interventions.

2.3 Cost-Effectiveness and Reduction of Complications

The StatLock Device reduces healthcare costs by minimizing catheter-related complications, such as infections and dislodgments. Its design extends catheter life, reducing replacement frequency and associated expenses. By preventing complications, it decreases the need for additional treatments, antibiotics, and extended hospital stays, offering a cost-effective solution for catheter stabilization and patient care.

Preparing for StatLock Device Application

Preparing for StatLock application involves gathering supplies, preparing the patient, and ensuring hand hygiene for a sterile and safe environment.

3.1 Gathering Necessary Supplies

To apply the StatLock device, gather essential supplies, including the StatLock stabilization device, alcohol prep pads, gloves, and a sterile drape. Ensure the catheter and surrounding area are clean. The StatLock device comes pre-packaged with an anchor pad and retainer clamp, simplifying preparation. Follow the manufacturer’s instructions for any additional items.

3;2 Patient Preparation and Positioning

Position the patient to ensure easy access to the catheter insertion site. Clean and dry the skin thoroughly. Allow the skin to dry completely before applying the StatLock device to ensure proper adhesion. Ensure the patient is comfortable and informed about the procedure to minimize anxiety and promote cooperation during the application process.

3.4 Hand Hygiene and Gloving

Perform hand hygiene with soap and water or alcohol-based hand sanitizer before handling the StatLock device or catheter. Don gloves to maintain sterility and minimize infection risks. Ensure proper glove fit to avoid compromising dexterity during the application process. Gloves should be worn according to facility protocols to ensure patient safety and procedural integrity.

Step-by-Step Application Instructions

Open the retainer clamp, place the catheter inside, and align the directional arrow with the catheter tip. Secure the anchor pad on the skin, ensuring proper fit and catheter stability. Verify the device is tightly closed and the catheter is correctly positioned for optimal functionality and patient comfort.

4.1 Opening the Retainer Clamp

To open the StatLock retainer clamp, locate the tab and press it firmly while lifting the lid. Ensure the directional arrow faces the catheter tip for correct alignment. Be cautious not to pinch the catheter during this step. Properly opening the clamp is essential for secure and accurate catheter placement.

4.2 Placing the Catheter into the Retainer

Gently insert the catheter into the StatLock retainer, ensuring the directional arrow aligns with the catheter tip. Position the balloon inflation arm next to the clamp hinge. Secure the catheter firmly but carefully to avoid damage. Proper alignment ensures stability and prevents catheter movement, which is critical for effective stabilization and patient safety.

4.3 Aligning the Directional Arrow and Balloon Inflation Arm

Align the directional arrow on the StatLock retainer with the catheter tip. Position the balloon inflation arm alongside the clamp hinge to ensure proper stabilization. This prevents catheter misplacement and ensures the device functions correctly. Avoid pressing the center arrow during closure to maintain secure alignment.

4.4 Securing the Anchor Pad on the Skin

Peel the backing from the anchor pad and press it firmly on the skin, ensuring a secure fit. The directional arrow should point toward the catheter tip. Avoid air bubbles or wrinkles. Gently press the pad to ensure strong adhesion, providing stability and minimizing catheter movement. Check the fit to confirm proper placement.

4.5 Final Adjustments and Verification

Ensure the catheter is properly aligned and the directional arrow points toward the tip. Verify the balloon inflation arm is next to the clamp hinge. Check for about one inch of catheter slack between the insertion site and the retainer. Inspect the anchor pad for secure adhesion and proper placement on the skin.

Contraindications and Warnings

The StatLock device is contraindicated in patients with known allergies to adhesives or tapes and those sensitive to benzoin. It is for single-use only.

5.1 Patient Allergies and Sensitivities

The StatLock device is contraindicated in patients with known allergies to adhesives, tapes, or benzoin. Ensure patients are assessed for sensitivities before application. If a reaction occurs, remove the device immediately and consider alternative stabilization methods. Always review patient history to avoid adverse reactions and ensure safe device use.

5.2 Device-Specific Warnings and Precautions

The StatLock device is for single-use only and must not be reused. Avoid pressing the center arrow when closing the retainer clamp to prevent damage. Ensure proper handling to avoid catheter misalignment or kinking. Follow instructions carefully to prevent complications. Regularly inspect the device and site for signs of wear or adhesive failure.

Maintenance and Inspection of the StatLock Device

Regularly inspect the StatLock device and catheter site for proper alignment, secure adhesion, and signs of wear. Clean the site with an antimicrobial solution as needed to prevent infections. Ensure the catheter remains stable and adjust if necessary to maintain proper positioning and prevent complications.

6.1 Regular Monitoring of the Catheter and Device

Regularly inspect the StatLock device and catheter for proper alignment, stability, and signs of wear or damage. Ensure the catheter remains securely positioned within the retainer clamp and the anchor pad adheres well to the skin. Monitor for any movement or loosening of the device, which could compromise catheter stability and patient safety.

6.2 Cleaning and Care of the Stabilization Site

Clean the stabilization site with antiseptic solution, such as chlorhexidine, to prevent infection. Avoid harsh chemicals that may damage the device or skin. Gently clean around the anchor pad and catheter hub, ensuring no moisture remains. Allow the site to air dry before reapplying dressings or securing devices, following manufacturer guidelines.

Removal of the StatLock Device

Gather alcohol prep pads, perform hand hygiene, and open the retainer clip by pressing the ends together. Dissolve the adhesive with alcohol, then gently remove the device.

7.1 Preparing for Device Removal

Gather alcohol prep pads, supplies, and ensure hand hygiene. Don gloves if preferred. Inform the patient of the removal process. Prepare to dissolve the adhesive and carefully open the retainer clip, following proper infection control and patient safety protocols.

7.2 Opening the Retainer Clip

To open the StatLock retainer clip, locate the tab and press it firmly while gently lifting the lid. Ensure the catheter is secure and handle with care to avoid movement. Use alcohol prep pads to prepare the area, maintaining sterility and patient safety throughout the process.

7.3 Dissolving Adhesive and Removing the Device

Apply an alcohol prep pad to the adhesive anchor pad to dissolve the bond. Gently lift the pad from the skin while maintaining a firm grip on the device. Continue until the adhesive is fully dissolved and the device is removed. Clean the site with antiseptic solution to ensure proper wound care and prevent infection.

Troubleshooting Common Issues

Address common issues like catheter misalignment or adhesive failure by repositioning the device or cleaning the skin. Consult instructions for detailed solutions to ensure proper function.

8.1 Difficulty Securing the Catheter

Difference in securing the catheter may occur due to improper alignment or insufficient slack. Ensure the directional arrow points toward the catheter tip and the balloon inflation arm is correctly positioned. If issues persist, reposition the catheter and device, ensuring proper fit and adherence to the skin. Consult instructions for detailed guidance.

8.2 Adhesive Pad Not Sticking Properly

If the adhesive pad fails to stick, ensure the skin is clean, dry, and free of oils or lotions. Avoid touching the adhesive surface, as oils from skin can reduce stickiness. If issues persist, re-prepare the skin with alcohol, allow it to dry, and reapply. Check for patient allergies to adhesives or benzoin, as sensitivities may cause poor adhesion. Follow manufacturer guidelines for proper application and consider alternative stabilization methods if the problem recurs.

8.3 Catheter Misalignment or Movement

If the catheter becomes misaligned or moves, check the directional arrow alignment with the catheter tip and ensure the balloon inflation arm is correctly positioned next to the clamp hinge. Verify the catheter is securely placed in the retainer and the anchor pad is properly adhered. Minimize catheter manipulation to prevent movement and ensure proper stabilization. Regularly inspect the device and catheter placement to avoid complications.

Tips for Healthcare Providers

Minimize catheter manipulation to maintain proper positioning. Ensure correct alignment of the directional arrow and balloon inflation arm. Regularly inspect the device and catheter for stability and integrity.

9.1 Minimizing Catheter Manipulation

Minimizing catheter manipulation is crucial to prevent dislodgment and reduce infection risks. Secure the catheter properly with the StatLock device, ensuring the directional arrow points toward the tip. Avoid unnecessary handling or adjusting once placed. Use sterile techniques during insertion and maintenance to maintain catheter integrity and patient safety.

9.2 Ensuring Proper Fit and Positioning

Proper fit and positioning are essential for effective catheter stabilization. Align the directional arrow on the StatLock device with the catheter tip and ensure the balloon inflation arm is next to the clamp hinge. Avoid pressing the center arrow when closing the retainer. Ensure the catheter has one inch of slack and is secure without being overly tight. Regularly check the fit and positioning to maintain stability and prevent complications.

9.3 Patient Education and Comfort

Education and comfort are crucial for patient satisfaction. Inform patients about the purpose and benefits of the StatLock device, such as reduced catheter movement and discomfort. Demonstrate the application process to alleviate anxiety and address any concerns. Ensure proper positioning to avoid pressure points. Provide post-application care instructions for comfort and safety.

Cost Implications and Benefits

The StatLock device reduces healthcare costs by minimizing catheter-related complications and extending catheter life, resulting in significant hospital savings and improved patient outcomes.

10.1 Reduction in Catheter-Related Complications

The StatLock device minimizes catheter-related complications, such as infections, dislodgments, and thrombosis, by securely stabilizing catheters. This reduction in complications lowers the need for additional medical interventions, antibiotics, and prolonged hospital stays, ultimately decreasing healthcare costs and improving patient outcomes.

10.2 Extended Catheter Life and Hospital Cost Savings

The StatLock device extends catheter life by minimizing movement and reducing mechanical complications. Fewer catheter replacements and infections lead to significant hospital cost savings. Reduced need for antibiotics, shorter hospital stays, and lower intervention rates contribute to overall financial benefits for healthcare facilities.

Clinical Evidence and Studies

StatLock devices reduce catheter-related complications and infections, supported by comparative studies showing improved patient outcomes and safety compared to traditional methods.

11.1 Comparative Studies with Other Stabilization Methods

Studies comparing StatLock to traditional suture or adhesive methods demonstrate reduced catheter-related complications, infections, and patient discomfort. StatLock minimizes catheter movement, enhances stability, and lowers healthcare costs, offering superior patient outcomes and safety compared to conventional stabilization techniques.

11.2 Outcomes in Reducing Infections and Complications

Clinical studies demonstrate that the StatLock device significantly reduces catheter-related infections and complications compared to traditional methods. By minimizing catheter movement and manipulation, it lowers the risk of microbial colonization and mechanical complications, promoting safer, more reliable catheter stabilization and improved patient outcomes in various clinical settings.

Manufacturer Instructions and Updates

Always follow the manufacturer’s instructions and updates for the StatLock device to ensure proper use and safety. Check the product insert for specific guidelines and precautions.

12.1 Importance of Following Provided Guidelines

Adhering to the manufacturer’s guidelines ensures proper StatLock device application, minimizing risks of complications and optimizing catheter stabilization. Proper technique prevents device failure, maintains patient safety, and upholds therapeutic efficacy, aligning with clinical best practices for catheter care and management.

12.2 Checking for Updated Instructions and Recalls

Regularly reviewing the manufacturer’s website for updated guidelines and recalls ensures compliance with safety standards. This practice helps healthcare providers stay informed about device improvements, potential safety alerts, and revised protocols, ensuring optimal patient care and minimizing risks associated with outdated or recalled products.

The StatLock Catheter Stabilization Device offers a reliable, cost-effective solution for securing catheters, enhancing patient safety and comfort while reducing complications. Its ease of use and clinical benefits make it a valuable tool in healthcare settings.

13.1 Summary of Key Points

The StatLock device provides secure catheter stabilization, minimizing movement-related complications and enhancing patient comfort. It is cost-effective, reducing healthcare costs by preventing infections and extending catheter life. Designed for ease of use, it offers a reliable alternative to sutures, ensuring proper catheter placement and stability while maintaining patient mobility and safety.

13.2 Final Recommendations for Use

Adhere to manufacturer instructions for optimal use of the StatLock device. Ensure proper application and alignment to minimize catheter manipulation and prevent complications. Regularly inspect the device and catheter site for signs of wear or infection. Follow recommended removal techniques to avoid patient discomfort. Always prioritize patient-specific needs and facility protocols.

starry sky projector instructions

Welcome to the comprehensive guide for your starry sky projector! This manual will help you set up, operate, and troubleshoot your device for an enchanting experience. Learn how to customize projections, ensure safety, and maintain your projector for lasting enjoyment.

Safety Precautions When Using a Starry Sky Projector

Keep the projector away from open flames, water, and children. Avoid direct eye contact with lasers to prevent vision damage. Do not point the light near airports or fly zones to ensure safety and compliance with regulations.

Important Safety Measures to Avoid Hazards

Ensure the projector is placed on a stable, heat-resistant surface away from flammable materials. Avoid exposing it to water or moisture to prevent electrical damage. Keep the device out of direct sunlight and extreme temperatures. Always unplug it during cleaning or maintenance. Handle the projector with care to avoid physical damage. Follow all instructions provided in the user manual to ensure safe operation. Regularly inspect the power cord and adapter for signs of wear. Never overload the power outlet or use damaged cables.

Setting Up Your Starry Sky Projector

Begin by carefully unpacking your projector and ensuring all components are included. Connect it to a power supply using a 5V adapter and position it for optimal projection quality.

Unpacking and Initial Setup

Start by carefully unpacking your starry sky projector to ensure all components are included. Check for the projector unit, remote control, power cord, and any additional accessories; Before powering on, locate a suitable indoor space away from direct sunlight to preserve projection quality. Ensure the surface is flat and stable for optimal performance. Always follow the manufacturer’s guidelines for initial setup to avoid damage and ensure safety.

Connecting to the Power Supply

To power your starry sky projector, use a 5V USB cable and a compatible adapter (5V/2A or higher). Connect the adapter to a nearby power outlet and attach the USB cable to the projector. Ensure the connection is secure to avoid interruptions. Always use the recommended power specifications to prevent damage. Keep the projector away from water and avoid outdoor use to maintain functionality and safety. Proper power connection is essential for optimal performance and longevity of your device.

Choosing the Optimal Placement for Projection

Place your starry sky projector in a dark room for the best results. Position it on a stable, flat surface away from direct sunlight or bright lights. Adjust the angle to project onto a smooth, light-colored ceiling or wall for a clear, sharp image. Ensure the lens is unobstructed for optimal projection quality. Keep the projector away from windows to minimize light interference. Experiment with different distances and heights to achieve the desired coverage and effect. Proper placement enhances the immersive experience of your starry sky display.

Assembling the Projector (If Required)

If your starry sky projector requires assembly, start by attaching the astronaut head and body, which are magnetically connected. Rotate the body 360 degrees to achieve the desired angle for projection. Ensure all components are securely fitted. Connect the USB cable to the power adapter (typically 5V/2A) and plug it into the projector. Double-check that all parts are aligned and tightened properly. Refer to the manual for specific assembly instructions, as models may vary. Proper assembly ensures smooth operation and optimal projection quality.

Controlling the Starry Sky Projector

Control your starry sky projector effortlessly using the remote for color, brightness, and flashing adjustments. Use manual buttons for basic functions or connect to smart apps for enhanced features.

Using the Remote Control for Adjustments

The remote control allows you to easily adjust the color, brightness, and flashing frequency of your starry sky projection. Use the arrow buttons to navigate through settings and customize the display. Press the color button to cycle through different hues, while the brightness button adjusts the light intensity. The flashing frequency can be sped up or slowed down to create dynamic effects. Ensure the remote is within range for optimal performance and avoid direct exposure to moisture or extreme temperatures to maintain functionality.

Manual Controls and Button Functions

Locate the power button on the projector to turn it on or off with a single press. The switch button controls basic functions like brightness and color adjustment when pressed and held. Use the mode button to cycle through different projection patterns and effects. For music synchronization, press the music sync button to align the projection with your audio. Ensure all buttons are clean and dry for optimal performance. Refer to the manual for specific button layouts and additional functions tailored to your projector model.

Connecting to Smart Apps for Remote Control

Download and install the Tuya Smart App or other compatible apps. Ensure your smartphone and projector are connected to the same WiFi network. Open the app, follow in-app instructions to discover and connect your projector. Press and hold the power button on the projector for 6 seconds until the indicator blinks rapidly, indicating pairing mode. Once connected, the app will confirm the link, allowing you to adjust settings, toggle modes, and control the projection remotely for a seamless experience.

Customizing Your Starry Sky Projection

Personalize your starry sky experience by adjusting color, brightness, and flashing frequency using the remote or app. Sync music for immersive ambiance and tailored visual effects.

Adjusting Color and Brightness Settings

Customize your starry sky projector by adjusting color and brightness to match your ambiance. Use the remote or app to toggle between vibrant hues and soft tones. For optimal viewing, dim the brightness in darker rooms or increase it in well-lit spaces. Experiment with color modes to create a calming or dynamic atmosphere. Avoid direct eye contact with the laser to prevent discomfort. Adjust settings gradually to ensure visual comfort and consistency in lighting effects.

Changing the Flashing Frequency and Patterns

Easily customize the flashing effects of your starry sky projector by adjusting the frequency and patterns. Use the remote control or smart app to cycle through preset modes. Press the “Speed” button to increase or decrease the flashing rate, creating dynamic or calming effects. Experiment with different patterns, such as twinkling stars or flowing nebulae, to enhance the visual experience. For synced displays, connect the projector to music via Bluetooth, allowing the lights to pulse rhythmically with your favorite tracks for immersive entertainment.

Syncing Music with the Projection

Enhance your starry sky experience by syncing music with the projection. Connect your device via Bluetooth by pressing and holding the power button until the indicator blinks. Open your music app and play your favorite tracks. The projector automatically detects the rhythm, adjusting the light patterns to match the beat. For precise control, use the Tuya Smart App to customize synchronization settings. This feature creates an immersive ambiance, perfect for parties or relaxation, blending visual and auditory elements seamlessly.

Troubleshooting Common Issues

Encounter problems? Check connections, ensure the projector is powered on, and restart if necessary. Consult the manual for specific solutions to resolve issues quickly and effectively.

Resolving Connectivity Problems

If your starry sky projector isn’t connecting, ensure both the device and your phone are on the same Wi-Fi network. Restart the projector and check your internet connection. For Bluetooth models, pair the device by holding the power button until the indicator blinks rapidly. If issues persist, reset the projector to factory settings and reconnect. Always refer to the user manual for specific troubleshooting steps tailored to your model.

Fixing Projection Quality Issues

For optimal projection quality, ensure the lens is clean and free from dust. Adjust the projector’s focus for a sharp image. Position it on a stable surface and aim it directly at the desired surface. Avoid obstructions and ensure the room is dark for better visibility. If issues persist, check for firmware updates or consult the user manual for advanced calibration settings.

Addressing Remote Control Malfunctions

If the remote control isn’t functioning, replace the batteries with new ones and ensure they’re correctly inserted. Check that the remote is properly paired with the projector and within range. Reset the remote by pressing and holding the power button for a few seconds. Ensure no obstructions block the signal. If issues persist, consult the user manual or contact customer support for assistance.

Maintenance and Storage Tips

Regularly clean the lens with a soft cloth and store the projector in a dry, cool place. Avoid exposing it to extreme temperatures or moisture to ensure longevity.

Cleaning the Projector Lens and Components

Regular cleaning is essential for maintaining your starry sky projector’s performance. Use a soft, dry cloth to gently wipe the lens and remove dust or smudges. Avoid harsh chemicals or damp cloths, as they may damage the components. For stubborn spots, lightly dampen the cloth with distilled water, but ensure it is completely dry before wiping. Always handle the lens by the edges to prevent fingerprints. Clean the exterior with a mild detergent solution, then dry thoroughly. This will ensure clear and vibrant projections.

Check for dust or smudges regularly to maintain optimal projection quality. Proper cleaning will extend the lifespan of your projector and keep your starry sky displays breathtaking.

Proper Storage to Maintain Functionality

To ensure your starry sky projector remains in excellent condition, store it in a cool, dry place away from direct sunlight. Use the original packaging or a protective case to safeguard the lens and components from dust and damage. Avoid extreme temperatures or humidity, as this may affect performance. When not in use for extended periods, disconnect the power supply and store the cable separately. Proper storage will help maintain your projector’s functionality and ensure it continues to deliver stunning starry displays for years to come.

Keep the projector away from children and pets to prevent accidental damage during storage.

Advanced Features of Starry Sky Projectors

Explore timer functions, multiple projection modes, and music synchronization for a personalized experience. Use smart app connectivity to control settings and enjoy automated operations effortlessly anywhere.

Using Timer Functions for Automated Use

The timer function allows you to schedule when your starry sky projector turns on or off. Set a timer via the remote control or smart app to automate your experience. For example, program it to start before bedtime or during a party. This feature enhances convenience, ensuring your starry sky display begins and ends exactly when you want it to, without manual intervention. It’s perfect for creating a seamless and enjoyable atmosphere in any setting, every time.

Exploring Multiple Projection Modes

Your starry sky projector offers various projection modes to enhance your experience. Switch between static starry nights, dynamic cosmic effects, and colorful nebula displays. Many models include a combination mode that blends lights and colors for a mesmerizing show. Customize the projection by adjusting speed, brightness, and color intensity to match your mood or environment. Explore these modes using the remote control or app to create unique ambiance for relaxation, parties, or themed events. Experiment with different settings to find your perfect cosmic display.

Congratulations! You’re ready to enjoy your starry sky projector. Follow instructions for optimal use, customize settings for unique experiences, and ensure safety for lasting enjoyment.

Final Tips for Enjoying Your Starry Sky Projector

To enhance your experience, experiment with different settings and modes to create a unique ambiance. Regularly clean the lens for clear projections and update software for optimal performance; Pair music with your projections for a immersive experience. Always follow safety guidelines and store the projector properly when not in use. Explore advanced features like timers and multiple projection modes to maximize enjoyment. With proper care and creativity, your starry sky projector will bring endless delight to any space.

invicta watch instructions

Invicta watches are renowned for their blend of style, functionality, and affordability. With a wide range of models like Pro Diver, Bolt, and Aviator, Invicta offers timepieces that combine precision engineering with elegant design. Known for their durability and water resistance, these watches cater to both casual and professional use. Invicta provides comprehensive user manuals to guide owners in setting up and maintaining their timepieces, ensuring optimal performance and longevity.

Main Content

Invicta watches offer diverse models like Pro Diver, Bolt, and Aviator, blending style and functionality. Their timepieces feature water resistance, screw-down crowns, and precise movements. Manuals for setup and maintenance are available online, ensuring users can maximize their watch’s performance and longevity with ease.

2.1. Understanding Invicta Watch Models

Invicta offers a diverse range of watch models, each designed with unique features and functionalities. The Pro Diver series, for instance, is popular for its water resistance and sporty design, while the Bolt collection emphasizes strength and durability. The Aviator line caters to aviation enthusiasts with its intricate details and pilot-inspired aesthetics. Other notable models include the Subaqua, Reserve, and Venom series, each tailored to specific preferences such as diving, formal wear, or bold statements. Invicta watches are crafted from high-quality materials like stainless steel and feature advanced movements, including automatic and quartz options. Many models come with additional functions such as chronographs, date displays, and subdials. Understanding the differences between these models helps users choose the perfect timepiece for their lifestyle; Whether for professional use or everyday wear, Invicta’s wide range ensures there’s a watch for every occasion. Detailed instructions for each model are available online, ensuring owners can fully utilize their watch’s capabilities.

2.2. Key Features of Invicta Watches

Invicta watches are admired for their robust construction and innovative features, making them versatile for various lifestyles. One standout feature is their water resistance, with many models offering protection up to 30 meters or more, ensuring reliability in wet conditions. The screw-down crown, commonly found in Diver models, enhances water resistance by sealing the case; Invicta watches also boast precise movements, including both automatic and quartz options, providing accurate timekeeping. Many models feature chronograph functions, allowing users to measure time intervals, which is ideal for sports and professional activities. Additional features such as date and time displays, subdials, and unidirectional bezels cater to diverse needs. The use of high-quality materials like stainless steel and sapphire crystals ensures durability and elegance. Invicta watches often include luminous hands and markers for readability in low light. These features, combined with their stylish designs, make Invicta timepieces suitable for both casual and formal occasions. Whether for diving, aviation, or everyday wear, Invicta watches deliver a blend of functionality and sophistication, backed by comprehensive user manuals for optimal use.

2.3. Water Resistance and Maintenance

Invicta watches are designed to withstand various environmental conditions, with water resistance being a key feature. Most models offer a minimum water resistance of 30 meters, while others, like the Pro Diver series, provide even greater protection. To maintain water resistance, regular maintenance is essential. Users should avoid exposing their watches to extreme temperatures or chemicals, as this can compromise the seals. It is recommended to have the watch serviced professionally every 2-3 years to ensure the gaskets remain intact. Additionally, individuals should avoid opening the watch case themselves to prevent dust or moisture ingress. For models with screw-down crowns, ensuring the crown is properly secured after adjustments is crucial. Cleaning the watch with a soft cloth and mild soap can help maintain its appearance without damaging the finish. Proper care and adherence to maintenance guidelines will extend the life of the watch and preserve its performance. By following these steps, Invicta watch owners can enjoy their timepieces for years to come.

2.4. Setting Up Your Invicta Watch

Setting up your Invicta watch is a straightforward process that ensures accurate timekeeping and proper functionality. Begin by winding the watch if it is a manual model. Gently pull out the crown and turn it clockwise until you feel resistance, indicating the watch is fully wound. For automatic models, wear the watch regularly to keep it powered. Next, set the time by pulling the crown to the first position and rotating it clockwise or counterclockwise to align the hands with the desired time. To set the date, pull the crown to the second position and rotate it until the correct date appears in the window. For models with screw-down crowns, ensure the crown is securely tightened after adjustments to maintain water resistance. If your watch features a chronograph, use the buttons on the side to start, stop, and reset the stopwatch function. Always refer to your specific Invicta watch manual for detailed instructions, as some models may have additional features or requirements. Proper setup ensures your watch performs optimally and maintains its precision over time.

2.5. Operating Instructions for Different Functions

Invicta watches are designed with a variety of functions to suit different needs, and understanding how to operate them is essential for maximizing their utility. For models with a chronograph, the primary buttons on the side of the case control the stopwatch functionality. Pressing the top button starts the timer, the bottom button resets it, and the crown adjusts the subdials. For watches with a date function, the date wheel can be set by pulling the crown to the second position and rotating it until the correct date appears. Some Invicta watches also feature a 24-hour subdial or a second time zone, which can be adjusted using the crown or additional buttons; For alarm or GMT functions, refer to the specific instructions in your manual, as the process may vary. Always ensure the crown is pushed back into place and screwed down (if applicable) after making adjustments to maintain water resistance. Regularly reviewing the manual for your specific model will help you master all the functions and ensure optimal performance.

2.6. Manual Winding and Automatic Movements

Invicta watches are available with both manual winding and automatic movements, each offering unique advantages. For manual winding models, winding is necessary to maintain accuracy. To wind, turn the crown clockwise approximately 20-30 times daily until resistance is felt, indicating the mainspring is fully charged. Overwinding can damage the mechanism, so stop before resistance becomes firm. Automatic movements, on the other hand, harness kinetic energy from wrist motion to self-wind, eliminating the need for daily winding. These watches typically have a power reserve lasting 40-80 hours when not worn. To maintain automatic watches, wear them regularly and manually wind if they stop. For both types, avoid exposing the watch to extreme temperatures or magnetic fields, as this can affect accuracy. Regular maintenance, including periodic servicing by a professional, is crucial for preserving the longevity and performance of both manual and automatic Invicta timepieces.

2.7. Date and Time Setting

Setting the date and time on your Invicta watch is a straightforward process that ensures accurate timekeeping. Begin by pulling the crown out to the first position to wind the watch if it is a manual winding model. Once wound, move the crown to the second position to set the time. Rotate the crown clockwise or counterclockwise to adjust the hour and minute hands. For watches with a date function, pull the crown out further to the third position and turn it clockwise to advance the date or counterclockwise to reverse it. Some models feature a quick-set date option, allowing you to adjust the date without altering the time. After setting, push the crown back in and screw it down if your model has a screw-down crown to maintain water resistance. For automatic watches, ensure the timepiece is fully wound before setting. Always refer to your specific Invicta watch manual for model-specific instructions, as some features may vary. Proper synchronization of the date and time ensures your watch performs reliably and maintains its precision.

2.8. Care and Maintenance Tips

Proper care and maintenance are essential to ensure your Invicta watch continues to function optimally and retains its aesthetic appeal. Regularly clean the watch exterior using a soft cloth and mild soap to remove dirt and oils. For metal bracelets, use a soft-bristle toothbrush to gently scrub between links. Avoid exposing the watch to harsh chemicals, abrasive materials, or extreme temperatures, as these can damage the finish or compromise water resistance.

Store your watch in a cool, dry place when not in use, ideally in a watch box or pouch to prevent scratches. For quartz models, replace the battery every 2-3 years to maintain accuracy. For mechanical or automatic watches, have them serviced by an authorized professional every 3-5 years to ensure precise timekeeping and longevity. Always check the battery level and avoid letting it drain completely, as this can affect the movement.

Avoid exposing your watch to strong magnetic fields, such as those from electronics, as this can interfere with the timepiece’s accuracy. Regularly inspect the strap or bracelet for wear and tear, and adjust or replace it as needed. By following these care and maintenance tips, you can extend the life of your Invicta watch and preserve its performance and appearance.

2.9. Troubleshooting Common Issues

Troubleshooting common issues with your Invicta watch can help ensure optimal performance and extend its lifespan. One of the most frequent issues is inaccurate timekeeping, which can often be resolved by synchronizing the watch with a reliable time source or adjusting the time manually. For automatic and manual winding models, ensure the watch is sufficiently wound, as low power can affect accuracy.

Another common issue is water ingress, which can occur if the crown is not properly screwed down or if the gaskets are worn. Inspect the crown and gaskets regularly, and avoid exposing the watch to water beyond its rated depth. If moisture is detected, stop using the watch immediately and contact an authorized service center.

For watches with chronograph or date functions, improper button operation can lead to malfunctions. Refer to the user manual to ensure correct usage of the pushers and crown positions. Additionally, if the watch stops working entirely, check the battery for quartz models or ensure proper winding for mechanical models. If issues persist, consult the manual or contact Invicta customer support for assistance.

By addressing these common issues promptly and following proper troubleshooting steps, you can maintain your Invicta watch’s reliability and enjoy precise timekeeping for years to come.

trophy ridge sight light instructions

Learn how to properly install and adjust your Trophy Ridge Sight Light for optimal accuracy and visibility. This guide provides step-by-step instructions to enhance your archery experience.

1.1 Overview of Trophy Ridge Sight Light

The Trophy Ridge Sight Light is a versatile archery accessory designed to enhance visibility in low-light conditions. Featuring a rheostat light, it provides adjustable brightness for optimal pin visibility. The tool-less installation and compatibility with Trophy Ridge bow sights make it a convenient upgrade. Its durable design ensures long-lasting performance, while the React Technology allows for precise yardage adjustments, making it ideal for both hunters and target archers seeking accuracy and reliability in various lighting environments.

1.2 Importance of Proper Installation and Adjustment

Proper installation and adjustment of the Trophy Ridge Sight Light are crucial for optimal performance. Incorrect setup can lead to poor visibility and accuracy issues, especially in low-light conditions. Ensuring the sight light is securely mounted and the brightness is correctly adjusted prevents glare and ensures clear pin visibility. This step is vital for hunters and archers to maintain precision and confidence in their shots, making it essential to follow the manufacturer’s guidelines carefully for a flawless setup and reliable operation in the field.

Unboxing and Initial Setup

Begin by unboxing your Trophy Ridge Sight Light and familiarize yourself with its components. The tool-less design ensures a quick and hassle-free initial setup process, getting you ready for precise aiming in no time.

2.1 Contents of the Package

Your Trophy Ridge Sight Light package includes the main sight unit, a rheostat light for brightness control, mounting hardware, and an Allen wrench for adjustments. Additionally, some models come with instructional DVDs and yardage stickers for customization. Ensure all components are accounted for before proceeding with installation to guarantee a smooth setup process and optimal performance in various lighting conditions.

2.2 Tool-less Installation Process

The Trophy Ridge Sight Light features a tool-less installation design, allowing for a quick and hassle-free setup. Simply attach the sight to your bow using the pre-installed mounting system. Adjust the sight’s position by loosening the large knobs, sliding it into place, and tightening them again. This convenient process ensures you can install the sight without additional tools, saving time and effort for a seamless archery experience.

Adjusting the Rheostat Light

Adjust the rheostat light to customize brightness for optimal visibility. Ensure the pins are clearly visible in varying light conditions for precise aiming and accuracy.

3.1 Understanding the Rheostat Light Functionality

The rheostat light adjusts brightness smoothly, enhancing visibility in low-light conditions. It ensures clear pin visibility without over-illumination, maintaining a precise sight picture for accurate shots.

3.2 Step-by-Step Guide to Adjusting Brightness

Locate the rheostat dial, typically found on the sight light housing.

Turn the dial clockwise to increase brightness or counterclockwise to dim.

Test the brightness in low-light conditions to ensure optimal visibility.

Adjust until the pins are clearly visible without overwhelming the sight picture.

This ensures precise aiming and reliable performance in various lighting scenarios.

Sighting in the Trophy Ridge React Sight

Set your sight at 20 yards, adjust pins for accuracy, and fine-tune for longer distances. This ensures precise alignment and reliable performance in the field.

4.1 Setting the Top Pin for 20 Yards

Begin by setting the top pin at 20 yards for baseline accuracy. Adjust the sight so the arrow hits the target at this distance. This foundational setting ensures proper alignment for longer-range adjustments, providing a clear starting point for sighting in your Trophy Ridge React Sight effectively.

4.2 Adjusting the Second Pin for 30 Yards

After setting the top pin for 20 yards, adjust the second pin for 30 yards by turning the top bolt. Ensure the arrow hits the target at this distance. This step builds on the initial setup, providing accurate alignment for mid-range shots. Proper adjustment ensures consistency and precision, making it easier to aim at varying distances effectively with your Trophy Ridge React Sight.

4.3 Fine-Tuning for Longer Distances

For shots beyond 30 yards, fine-tune the sight by adjusting the yardage indicators. Ensure the top pin is set for 20 yards and the second pin for 30 yards. Use the micro-adjustment knob to align the sight for longer distances, checking accuracy at each interval. Proper alignment ensures consistent aim, while the React technology automatically adjusts pins for precise shots at extended ranges, enhancing overall accuracy and reliability in the field.

Using the React Technology

The React Technology automatically adjusts pin gaps based on your setup, eliminating manual adjustments. This feature ensures precise targeting at any distance, enhancing accuracy and efficiency.

5.1 Benefits of the React System

The React System offers unparalleled flexibility and precision. It allows archers to customize their setup to suit various shooting styles and distances. The system’s adaptability ensures accurate pin alignment without manual adjustments, making it ideal for both beginners and experienced archers. This technology enhances consistency and confidence, enabling shooters to focus on their targets without distractions. Its reliability in different conditions makes it a valuable asset for hunting and competitive shooting;

5.2 How to Engage and Disengage the React Feature

To engage the React feature, locate the designated control on your Trophy Ridge sight. Toggle the switch or turn the knob to activate the system. This allows the pins to automatically adjust based on your shooting distance. To disengage, simply reverse the process, ensuring the feature is off when not needed. This flexibility ensures you can customize your shooting experience to suit different conditions and preferences.

Maintenance and Troubleshooting

Regularly clean the lens and sight light to maintain optical clarity. Address fogging by ensuring proper ventilation and adjusting brightness with the rheostat for optimal visibility.

6.1 Cleaning the Sight Light and Lens

Regularly clean the Trophy Ridge Sight Light and lens using a soft, dry microfiber cloth to prevent scratches. For stubborn smudges or water spots, lightly dampen the cloth with water. Avoid harsh chemicals or abrasive materials, as they may damage the optics. Inspect the sight frequently for debris and clean as needed to maintain clarity and ensure optimal performance in low-light conditions. Proper maintenance extends the lifespan of your sight light.

6.2 Resolving Common Issues (Fogging, Poor Visibility)

To address fogging, ensure the sight light is free from moisture. Use a water-repellent coating or hydrophobic spray on the lens for prevention. If fogging occurs, gently wipe with a soft, dry cloth. For poor visibility, adjust the rheostat light to optimize brightness. Ensure the lens is clean and free of debris, as outlined in section 6.1. Proper maintenance and adjustments will enhance clarity and performance in low-light conditions.

Tips for Hunting with Trophy Ridge Sight Light

Optimize your hunting experience by adjusting the rheostat light for varying conditions. Ensure the sight is clean and free of debris for clear visibility. Use the React feature wisely to adapt to changing distances and lighting, enhancing accuracy and confidence in the field.

7.1 Optimizing Visibility in Low-Light Conditions

For optimal visibility in low-light conditions, adjust the rheostat light to a lower setting during the day to conserve battery life. At dawn or dusk, increase brightness to enhance pin visibility. Ensure the sight light is clean and free of debris. Position the light to avoid glare and use the React Technology for automatic pin adjustment. This setup ensures clear visibility and accurate targeting in challenging lighting scenarios.

7.2 Best Practices for Using the Sight Light in the Field

Always adjust the rheostat light intensity based on ambient light conditions to avoid overillumination. Clean the sight light lens regularly to prevent debris interference. Position the light to minimize glare and ensure optimal pin visibility. Use the React Technology for automatic adjustments. Test your settings in low-light conditions before hunting to ensure accuracy. These practices enhance performance and reliability in the field.

Compatibility with Other Trophy Ridge Accessories

The Trophy Ridge Sight Light is designed to seamlessly integrate with Trophy Ridge bow sights and other compatible archery gear, ensuring enhanced performance and versatility in the field.

8.1 Pairing with Trophy Ridge Bow Sights

The Trophy Ridge Sight Light pairs seamlessly with Trophy Ridge bow sights, offering compatibility with single-pin, 3-pin, and 5-pin models. Its tool-less installation ensures quick setup. The single-pin configuration provides a clean sight picture for precise distance adjustments, while multi-pin options enable rapid target acquisition across varying distances. This versatility makes it an ideal accessory for archers seeking enhanced accuracy and adaptability in the field.

8.2 Integration with Quivers and Other Archery Gear

The Trophy Ridge Sight Light integrates seamlessly with quivers and other archery gear, ensuring a streamlined setup; Its compact design allows for easy mounting alongside quivers, stabilizers, and other accessories. The tool-less installation process makes it simple to pair with your existing equipment, while the secure fit ensures minimal interference during shooting. This integration enhances overall archery performance and keeps your gear organized for efficient use in the field.

Advanced Setup for Precision Shooting

Enhance accuracy by fine-tuning yardage indicators and adjusting the sight for consistent performance. Customize settings to match your shooting style and optimize for precise long-distance shots.

9.1 Using Yardage Indicators for Accuracy

Yardage indicators on the Trophy Ridge sight allow precise adjustments for various shooting distances. By setting two accurate yardage marks, the sight automatically calculates and aligns pins for distances up to 100 yards. This feature ensures consistency and accuracy, enabling archers to focus on their target without manual adjustments. Proper setup enhances performance in both hunting and competitive shooting scenarios.

9.2 Customizing the Sight for Personal Preference

Archers can tailor the Trophy Ridge sight to their preferences by adjusting the rheostat light for optimal brightness and using micro-adjustment knobs for precise alignment. The sight’s flexibility allows customization of yardage indicators and pin configurations, ensuring a personalized setup. Compatibility with additional Trophy Ridge accessories further enhances adaptability, making it suitable for diverse hunting and shooting styles while maintaining peak performance and accuracy.

User Reviews and Feedback

Users praise the Trophy Ridge Sight Light for its ease of use and adaptability, though some note challenges with pin visibility in low-light conditions and adjustment mechanisms.

10.1 Common Praise for the Trophy Ridge Sight Light

Hunters and archers consistently praise the Trophy Ridge Sight Light for its ease of use and adaptability. Many users appreciate its tool-less installation and compatibility with various Trophy Ridge bow sights. The sight light’s durability and ability to enhance visibility in low-light conditions have made it a favorite among bowhunters. Its sleek design and reliability further contribute to its positive reputation in the archery community.

10.2 Addressing User Concerns and Criticisms

Some users have noted challenges with the Trophy Ridge Sight Light, such as limited visibility in extreme low-light conditions and initial difficulty in adjusting the rheostat. A few users found the React Technology complex to engage. However, Trophy Ridge has addressed these concerns by improving design durability and providing clearer instructions. Overall, the sight light remains a reliable choice for archers seeking precision and adaptability in various hunting environments.

The Trophy Ridge Sight Light is a reliable, versatile tool for archers, offering ease of use and flexibility for various shooting conditions. Its adjustable features and compatibility make it a top choice for enhancing accuracy and visibility, ensuring a seamless archery experience for both beginners and seasoned hunters.

11.1 Final Thoughts on the Trophy Ridge Sight Light

The Trophy Ridge Sight Light is an exceptional accessory for archers, offering unmatched clarity and precision. Its tool-less installation and adjustable brightness ensure ease of use, while its compatibility with various bow sights enhances versatility. Whether for hunting or target practice, this sight light delivers consistent performance, making it a valuable addition to any archer’s toolkit. Highly recommended for its reliability and adaptability.

Additional Resources

Check out instructional videos and guides on Trophy Ridge’s official website for detailed setup tutorials and troubleshooting tips. Manufacturer support is also available for warranty inquiries and assistance.

12.1 Instructional Videos and Guides

Trophy Ridge offers comprehensive instructional videos and detailed guides to help users master their sight light. These resources provide step-by-step instructions for installation, adjustment, and troubleshooting. Videos demonstrate how to optimize brightness settings and utilize React Technology effectively. Manufacturer-provided guides also cover advanced features and maintenance tips, ensuring users get the most out of their sight light. These tools are essential for both beginners and experienced archers to enhance their shooting accuracy and overall archery experience.

12.2 Manufacturer Support and Warranty Information

Trophy Ridge provides robust customer support, including phone, email, and online resources. Their limited lifetime warranty covers manufacturing defects, ensuring reliability. A 30-day money-back guarantee allows returns for a full refund if unsatisfied. Visit their official website for detailed warranty terms, contact information, and support options to address any questions or concerns about your sight light.