Valentin Imperial Riviera Maya offers a culinary journey with 7 gourmet restaurants‚ QR code menus‚ and diverse international cuisines․ Enjoy exceptional all-inclusive dining with unique options․
Overview of the Resort’s Culinary Offerings
Valentin Imperial Riviera Maya boasts an exceptional culinary experience‚ offering a diverse range of gourmet options across its 7 specialty restaurants․ Guests can explore international cuisines‚ including Mexican‚ Asian‚ Italian‚ and French‚ crafted by skilled chefs․ The resort features à la carte and buffet dining options for breakfast and lunch‚ while dinner menus highlight elegant‚ themed experiences․ QR code menus are now used‚ ensuring a modern and seamless dining process․ The food is praised for its 5-star quality‚ with guests often highlighting the creativity and flavor of each dish․ From sushi to steak‚ every meal is designed to delight․ The resort’s commitment to gastronomic excellence makes it a paradise for food enthusiasts‚ offering a culinary adventure that complements its tropical‚ luxurious atmosphere․
Importance of Menus in the All-Inclusive Experience
Menus at Valentin Imperial Riviera Maya are a cornerstone of its all-inclusive experience‚ offering guests a diverse and luxurious dining journey․ With QR code access‚ menus are easily navigated‚ providing transparency and convenience․ The variety of options ensures every palate is satisfied‚ from gourmet buffets to à la carte specialties․ Menus are thoughtfully curated to reflect global cuisines‚ enhancing the resort’s cosmopolitan appeal․ This attention to detail in menu design allows guests to explore new flavors without additional costs‚ making dining a seamless and enjoyable part of their stay․ The resort’s focus on menu quality and variety underscores its commitment to delivering a world-class‚ all-inclusive experience that exceeds guest expectations and creates lasting culinary memories․
Dining Options at Valentin Imperial Riviera Maya

Valentin Imperial Riviera Maya offers diverse dining options across 7 gourmet restaurants‚ featuring international cuisines accessible via QR code menus‚ ensuring a rich culinary experience․
Breakfast and Lunch Menus
The Valentin Imperial Riviera Maya offers two daytime restaurants serving breakfast and lunch‚ available à la carte or buffet style․ Breakfast features a wide selection of egg dishes‚ fresh fruits‚ pastries‚ and juices‚ while lunch includes grilled meats‚ seafood‚ and salads․ The resort also provides a spa breakfast with healthy options like omelets and yogurt․ Menus are accessible via QR codes‚ ensuring a modern and convenient dining experience․ Guests praise the variety and quality of the meals‚ with options catering to diverse tastes․ Whether you prefer a hearty breakfast or a light lunch‚ the resort’s menus are designed to satisfy every craving‚ making your dining experience memorable and enjoyable throughout your stay․
Dinner Menus and Specialty Restaurants
Dinner at Valentin Imperial Riviera Maya is a culinary delight‚ with seven specialty restaurants offering diverse international cuisines․ From the vibrant flavors of Mexican dishes at La Hacienda to the delicate art of sushi at G Ginger‚ each restaurant provides a unique dining experience․ Taman Sari serves authentic Asian cuisine‚ while Il Olivo offers Italian specialties and L’Alsace delivers French gastronomy․ La Fonduta‚ the resort’s steakhouse‚ promises premium cuts and expert preparation․ Menus are crafted by skilled chefs‚ ensuring a memorable evening․ With no reservations required‚ guests can explore these dining options freely‚ savoring the rich flavors and elegant ambiance of each venue․ The dinner menus are designed to cater to every palate‚ making every meal a highlight of your stay․
Room Service Menu Options
Valentin Imperial Riviera Maya offers convenient room service‚ allowing guests to enjoy meals in the comfort of their suites․ The room service menu provides a variety of options‚ including light bites‚ snacks‚ and full meals‚ catering to different tastes and preferences․ From breakfast items like omelets and pastries to dinner selections such as sandwiches and salads‚ the menu ensures a satisfying experience without leaving your room․ Additionally‚ the resort has transitioned to QR code menus for room service‚ making it easy to browse and order digitally․ While some guests have noted that the room service menu is slightly limited compared to the resort’s other dining options‚ it remains a popular choice for those seeking privacy and relaxation during their stay․

Specialty Restaurants and Their Menus
Valentin Imperial Riviera Maya features 7 specialty restaurants‚ each offering unique menus crafted by skilled chefs․ From Mexican to Japanese‚ Asian‚ Italian‚ French‚ and steakhouse cuisines‚ guests enjoy diverse flavors in elegant settings‚ enhancing their all-inclusive dining experience with exceptional quality and creativity․
La Hacienda ౼ Mexican Cuisine
La Hacienda at Valentin Imperial Riviera Maya is a vibrant celebration of Mexican culture and cuisine․ The restaurant offers an authentic dining experience‚ blending traditional flavors with modern twists․ Guests can enjoy dishes like tacos‚ ceviche‚ and mole‚ all crafted with fresh‚ locally sourced ingredients․ The menu is designed to showcase the diversity of Mexican gastronomy‚ from hearty enchiladas to delicate desserts such as churros and tres leches cake․ La Hacienda’s ambiance is warm and inviting‚ with colorful decor and live music that immerses diners in the spirit of Mexico․ Whether it’s a romantic evening or a lively gathering‚ La Hacienda promises a memorable culinary journey․
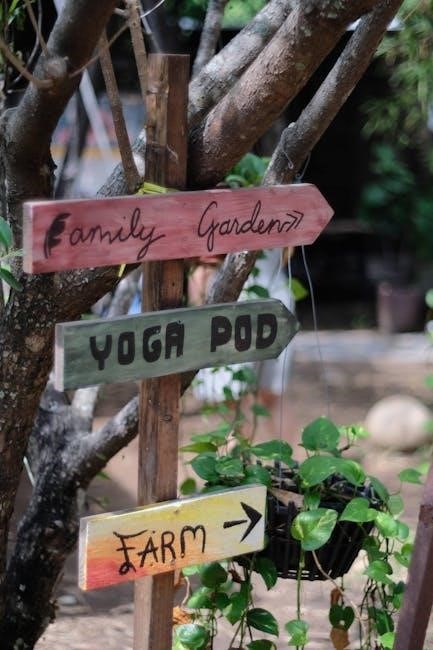
QR code menus make it easy to navigate the options‚ and the friendly staff are always happy to recommend pairings or explain the inspiration behind each dish․ For a truly immersive experience‚ La Hacienda occasionally hosts themed nights‚ featuring regional specialties and live performances․ This restaurant is a must-visit for anyone looking to savor the rich flavors and traditions of Mexico during their stay at Valentin Imperial Riviera Maya․
Taman Sari ‒ Asian Cuisine

Taman Sari at Valentin Imperial Riviera Maya is a haven for Asian cuisine enthusiasts‚ offering a diverse menu that spans the flavors of Asia․ From sushi and sashimi to Thai curries and Indonesian dishes‚ the restaurant delivers an authentic and refined dining experience․ The menu is crafted to highlight the bold spices‚ fresh ingredients‚ and intricate techniques characteristic of Asian gastronomy․ Guests can enjoy dishes like pad Thai‚ stir-fries‚ and dumplings‚ all prepared to perfection․ The sleek‚ modern decor creates a sophisticated ambiance‚ while the QR code menus provide easy access to the extensive offerings․ Whether you’re in the mood for something spicy or delicate‚ Taman Sari’s expert chefs ensure a memorable and flavorful journey through Asia․
G Ginger ౼ Sushi and Japanese Cuisine
G Ginger at Valentin Imperial Riviera Maya is a vibrant spot for sushi and Japanese cuisine lovers․ The menu features an array of fresh‚ expertly crafted dishes‚ including sushi‚ sashimi‚ and maki rolls․ Guests can also enjoy traditional Japanese dishes like teriyaki‚ tempura‚ and ramen‚ all prepared with authentic flavors and techniques․ The restaurant’s intimate and modern ambiance complements the dining experience‚ while the QR code menus make ordering seamless․ With a focus on fresh ingredients and artistic presentation‚ G Ginger offers a delightful journey through the flavors of Japan․ Whether you’re a sushi aficionado or exploring Japanese cuisine for the first time‚ this restaurant promises a memorable and satisfying meal․
Il Olivo ‒ Italian Cuisine
Il Olivo at Valentin Imperial Riviera Maya is a charming destination for Italian cuisine enthusiasts․ The menu showcases a variety of authentic dishes‚ including homemade pasta‚ wood-fired pizzas‚ and risotto‚ all crafted with fresh‚ high-quality ingredients․ Guests can savor classic favorites like osso buco‚ chicken parmesan‚ and tiramisu‚ each prepared with traditional Italian flair․ The restaurant’s elegant yet cozy ambiance‚ complete with dim lighting and an extensive wine list‚ creates a warm and inviting atmosphere․ Whether you’re in the mood for a romantic dinner or a casual meal‚ Il Olivo offers a delightful culinary experience․ The QR code menus allow for seamless ordering‚ ensuring a hassle-free and enjoyable dining experience for all guests․
L’Alsace ౼ French Cuisine
L’Alsace at Valentin Imperial Riviera Maya offers a sophisticated take on French cuisine‚ blending traditional techniques with modern flavors․ The menu features dishes like duck confit‚ foie gras‚ and Coq au Vin‚ all prepared with precision and elegance․ Guests can enjoy an extensive selection of fine wines‚ carefully curated to complement each course․ The restaurant’s intimate setting‚ adorned with classic French decor‚ provides a romantic ambiance perfect for special occasions․ With its focus on high-quality ingredients and impeccable service‚ L’Alsace delivers a memorable dining experience․ The QR code menu adds a touch of convenience‚ allowing guests to explore the culinary offerings effortlessly․ This restaurant is a must-visit for those seeking an authentic French gastronomic adventure in a luxurious setting․
La Fonduta ౼ Steakhouse
La Fonduta at Valentin Imperial Riviera Maya is a premier steakhouse offering an exceptional dining experience․ The menu showcases premium cuts of meat‚ including tender ribeye‚ juicy filet mignon‚ and succulent wagyu beef‚ all cooked to perfection․ Accompanying sides like truffle mashed potatoes and roasted broccolini add a gourmet touch․ The restaurant’s upscale yet inviting ambiance features elegant decor and soft lighting‚ creating a sophisticated setting for a memorable meal․ Guests can pair their dishes with fine wines from an extensive selection․ With its focus on quality and flavor‚ La Fonduta is a standout choice for steak lovers․ The QR code menu allows guests to explore the offerings seamlessly․ This steakhouse promises a delightful evening of fine dining in a refined atmosphere․
Additional Dining Experiences
Enhance your stay with unique dining experiences‚ including themed nights‚ food trucks‚ and beachfront specials․ Savor tacos‚ gourmet bites‚ and refreshing drinks in casual‚ scenic settings daily․

Food Trucks and Carts
Valentin Imperial Riviera Maya enhances your dining experience with an array of food trucks and carts located throughout the resort․ These casual‚ convenient options offer a variety of flavors‚ from traditional Mexican tacos to international street food․ Guests can enjoy fresh‚ gourmet bites poolside‚ on the beach‚ or while strolling through the lush gardens․ The food trucks are a favorite among travelers‚ providing a relaxed and scenic way to savor delicious meals without leaving the tropical atmosphere․ With options available daily‚ they add a unique and memorable touch to your all-inclusive dining experience‚ ensuring you never go hungry while exploring the resort’s stunning grounds․
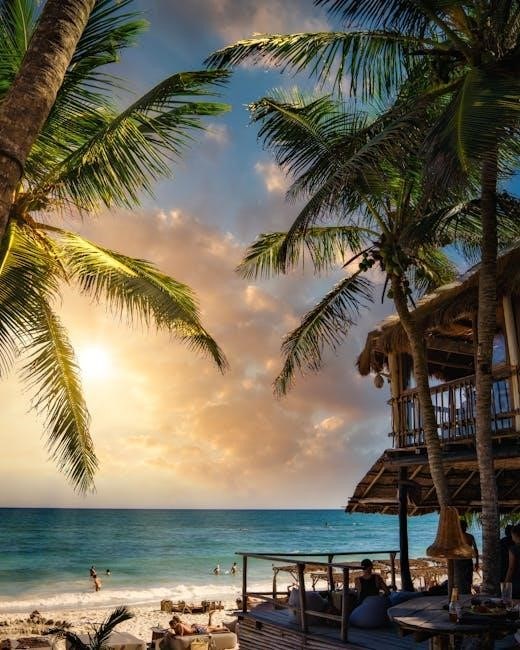
Poolside and Beachfront Dining
Valentin Imperial Riviera Maya offers an idyllic poolside and beachfront dining experience‚ blending gourmet cuisine with breathtaking ocean views․ Guests can enjoy à la carte meals or light bites while lounging by the pool or on the pristine beach․ The resort’s poolside restaurants serve fresh seafood‚ grilled specialties‚ and refreshing cocktails‚ perfect for a relaxing day in the sun․ Beachfront dining options provide a romantic ambiance‚ with the sound of waves complementing exquisite dishes․ Whether you’re seeking a casual lunch or an intimate dinner‚ the combination of exceptional service‚ delectable food‚ and stunning surroundings creates unforgettable moments․ This unique dining experience is a highlight of the resort’s all-inclusive offerings‚ ensuring every meal is a memorable occasion․

Culinary Highlights and Guest Reviews
Valentin Imperial Riviera Maya menus impress guests with 5-star quality and diverse culinary options․ Reviews highlight exceptional dining experiences‚ creative dishes‚ and outstanding service‚ making meals unforgettable․
Guest Feedback on Menu Variety and Quality

Guests at Valentin Imperial Riviera Maya consistently praise the exceptional variety and quality of the menus․ Many highlight the 5-star culinary experience‚ with dishes crafted by skilled chefs offering a blend of international flavors․ The sushi and Japanese cuisine at G Ginger‚ as well as the authentic Mexican dishes at La Hacienda‚ are particularly favored․ Guests appreciate the attention to detail in presentation and the use of fresh‚ high-quality ingredients․ Reviews often mention the extensive options available‚ catering to diverse dietary preferences and ensuring there’s something for everyone․ While some note that room service menus are limited‚ the overall dining experience is widely acclaimed as outstanding and memorable․ The resort’s commitment to culinary excellence shines through in guest feedback‚ making it a top choice for food enthusiasts․
Unique Dining Experiences
Valentin Imperial Riviera Maya offers unparalleled dining experiences that set it apart from other resorts․ Guests can enjoy the Chef’s Table‚ a unique culinary adventure where the chef prepares a personalized meal right before their eyes․ Themed evening dinners‚ such as beachfront barbecues or gourmet feasts‚ add a touch of exclusivity․ The resort also features food trucks and carts scattered across the property‚ offering casual yet flavorful bites․ Poolside and beachfront dining options allow guests to savor meals in breathtaking tropical settings․ These unique experiences‚ combined with the resort’s upscale ambiance‚ create unforgettable memories for food lovers․ Whether it’s a romantic dinner or a lively gathering‚ Valentin Imperial Riviera Maya ensures every meal is a special occasion․