
Welcome to the Honeywell T6 Install Manual, your comprehensive guide for installing and configuring the Honeywell T6 thermostat. This manual ensures a smooth, user-friendly experience, helping you optimize energy usage and integrate with smart home systems for enhanced convenience.
1.1 Overview of the T6 Thermostat
The Honeywell T6 thermostat is a programmable, smart-enabled device designed for efficient temperature control. Featuring a large backlit display, it offers geofencing, smart alerts, and seamless integration with smart home systems. Its user-friendly interface allows easy scheduling and adjustments, ensuring optimal comfort and energy savings. The T6 is compatible with various HVAC systems, making it a versatile choice for modern homes.
1.2 Importance of Proper Installation
Proper installation of the Honeywell T6 thermostat ensures compatibility with your HVAC system, optimal energy efficiency, and full access to smart features like geofencing and alerts. Correct setup prevents issues, enhances security with PIN locks, and guarantees accurate temperature control. It also ensures seamless integration with smart home systems and maintains safety standards, avoiding potential hazards from incorrect wiring. A well-executed installation safeguards your investment, providing long-term comfort and energy savings.

System Requirements and Compatibility
Ensure your HVAC system aligns with the Honeywell T6 thermostat’s specifications. Verify voltage requirements and compatibility with smart home systems for features like geofencing. Proper checks prevent installation issues and ensure seamless integration, optimizing performance and energy efficiency. Always verify compatibility to avoid potential malfunctions and ensure all advanced features function correctly, providing reliable temperature control and smart alerts. Consult the manual for detailed system requirements.
2.1 Checking System Compatibility
Before installation, verify that your HVAC system is compatible with the Honeywell T6 thermostat. Check voltage requirements and ensure your system supports advanced features like geofencing and smart alerts. Confirm compatibility with your smart home system for seamless integration. Proper checks prevent installation issues and ensure all features function correctly, optimizing performance and energy efficiency.
2.2 Necessary Tools and Materials
Gather essential tools and materials before starting the installation. You’ll need a screwdriver, wire strippers, and a voltage tester to ensure safety. Additional materials include mounting screws, wire connectors, and a level to ensure proper alignment. Having all items ready beforehand streamlines the process and prevents delays. Double-check the packaging for any included accessories specific to the T6 model.

Pre-Installation Steps
Before installing the Honeywell T6, gather all necessary tools and materials. Familiarize yourself with the wiring diagram and prepare the site. This section covers key pre-installation steps for a smooth setup.
3.1 Preparing the Site
Preparing the site ensures a safe and efficient installation. Clear the area of debris, ensure the surface is flat, and check for obstructions. Verify power is off at the circuit breaker. Gather tools and materials for easy access. Ensure the room temperature is stable for accurate thermostat calibration. This step is crucial for a successful and error-free installation process.
3.2 Understanding the Wiring Diagram
Understanding the wiring diagram is essential for a correct installation. It provides a visual representation of the thermostat’s connections, ensuring wires are linked properly. Identify each wire’s function (e.g., R, W, Y, G, C) and their corresponding terminals on the T6. Miswiring can lead to system malfunctions or safety hazards. Always refer to the diagram for precise connections and consult the manual or a technician if unsure.

Physical Installation of the T6 Thermostat
Mount the T6 thermostat securely on the wall, ensuring proper alignment and level placement. Remove the old thermostat and prepare the site for installation.
4.1 Removing the Old Thermostat
Begin by turning off the power to your HVAC system at the circuit breaker. Gently pull the old thermostat away from the wall to access the wires. Disconnect the wires from their terminals, taking note of their colors and positions. Remove any screws or clips securing the old thermostat and set it aside. Ensure the area is clear before proceeding with the T6 installation.
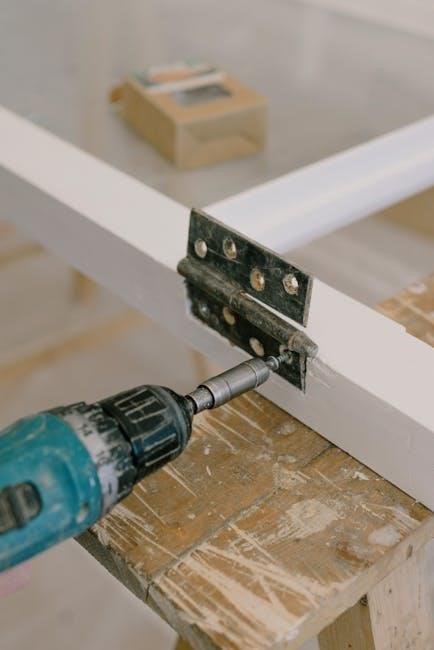
4.2 Mounting the T6 Thermostat
After removing the old thermostat, ensure the wall is clean and level. Peel the backing from the T6’s mounting plate and press it firmly onto the wall, aligning it straight. If necessary, drill holes and insert wall anchors for added stability. Secure the plate with screws, then gently snap the T6 thermostat onto the mounting plate until it clicks into place.
Wiring and Connections
Identify the correct wires from your HVAC system and connect them to the T6 thermostat according to the wiring diagram. Ensure all connections are secure and properly labeled for optimal functionality.
5.1 Identifying the Correct Wires
Begin by turning off the power to your HVAC system. Locate the wiring diagram in the Honeywell T6 manual to match each wire by its label (R, W, Y, G, C). Use a voltage tester to ensure no power is present. If your system lacks a C wire, consider using an adapter. Double-check connections and seek professional help if unsure. Organize wires neatly for a clean installation.
5.2 Connecting the Wires to the T6
Match each wire to the corresponding terminal on the T6 thermostat based on the wiring diagram. Securely insert the wires into their labeled slots, ensuring they are tightly connected. If your system requires a C wire, use the provided adapter or connect it directly if available. Double-check all connections for accuracy and refer to the diagram if unsure. Proper wiring ensures reliable performance and safe operation of your Honeywell T6 thermostat.

Configuration and Setup
Configure your Honeywell T6 by setting up schedules, adjusting temperature preferences, and enabling geofencing for smart automation. Follow on-screen instructions to complete the initial setup successfully.
6.1 Initial Setup and Programming
Start by powering on the Honeywell T6 and selecting your preferred language. Choose between heating, cooling, or both, then set your location and time zone. Follow the prompts to connect to Wi-Fi, allowing remote control via the Honeywell app. Enter a 4-digit PIN for security. Program temperature schedules based on your daily routine, ensuring energy efficiency and comfort. Save settings to complete initial setup.
6.2 Setting Up Schedules and Preferences
Create a schedule by selecting temperature settings for different times of the day. Use geofencing to adjust temperatures based on your location. Customize comfort levels, such as humidity control or fan settings, to suit your preferences. Save your preferences to ensure consistent operation. This feature optimizes energy usage while maintaining comfort, making it easy to adapt the system to your lifestyle.
Advanced Features of the T6 Thermostat
Explore advanced features like geofencing, smart alerts, and integration with smart home systems. These innovations enhance convenience, energy efficiency, and system control, optimizing your comfort experience.
7.1 Geofencing and Smart Alerts
Geofencing allows the T6 thermostat to adjust temperatures based on your location, optimizing energy usage when you’re away. Smart alerts notify you of extreme temperature changes, system issues, or when the thermostat is locked, ensuring you stay informed and in control of your home’s comfort and security at all times.
7.2 Integrating with Smart Home Systems
The Honeywell T6 thermostat seamlessly integrates with popular smart home systems like Amazon Alexa and Google Home. Voice commands or app controls allow easy management of temperature settings. Integration enhances automation, enabling synchronized operations with other smart devices for a cohesive and efficient home environment, improving overall comfort and convenience without additional complexity.

Maintenance and Troubleshooting
Regularly clean the thermostat’s display and sensors to ensure accuracy. Troubleshoot common issues like connectivity problems or unresponsive screens by resetting or checking wiring connections for stability.
8.1 Regular Maintenance Tips
For optimal performance, regularly clean the T6 thermostat’s display and sensors using a soft cloth. Check and ensure all wiring connections are secure and free from damage. Update firmware periodically to maintain functionality and security. Replace batteries if applicable, and ensure proper ventilation around the device to prevent overheating and ensure accurate temperature readings.
8.2 Common Issues and Solutions
Common issues include unresponsive screens or incorrect temperature readings. Solutions involve restarting the thermostat, checking wiring connections, or updating firmware. For display brightness concerns, adjust settings via the menu. If the thermostat locks unexpectedly, enter your PIN to regain access. Ensure proper installation and refer to the manual for troubleshooting steps to resolve issues effectively.
Security Features and Locking Mechanisms
The Honeywell T6 thermostat offers enhanced security with PIN locking and screen lock options, ensuring unauthorized access is prevented while maintaining easy control for authorized users.
9.1 Setting Up a PIN for Locking
To ensure security, the Honeywell T6 allows setting a 4-digit PIN for locking. This feature prevents unauthorized changes. Navigate to the menu, select “Lock,” and enter your desired PIN. Confirm and save the settings to activate. The PIN will be required for any future adjustments, enhancing system security and maintaining preferred settings. This step is crucial for protecting your thermostat configuration.
9.2 Understanding Screen Lock Options
The Honeywell T6 offers advanced screen lock options to customize security. Choose from partial or full locking modes. Partial locking allows temperature adjustments while keeping advanced settings secure. Full locking disables all touch functionality, requiring your PIN to unlock. These options provide flexibility, ensuring your thermostat remains secure while still allowing necessary user interactions based on your preferences and needs.

Energy Efficiency and Savings
The Honeywell T6 helps optimize energy usage through smart scheduling and geofencing, enabling significant savings while maintaining comfort. Learn how to maximize efficiency with advanced settings.
10.1 Optimizing Energy Usage
The Honeywell T6 thermostat offers advanced features to optimize energy usage, such as geofencing, smart alerts, and customizable schedules. By adjusting temperature settings based on occupancy and preferences, users can significantly reduce energy consumption. The thermostat also provides energy usage reports, helping you identify inefficiencies and make data-driven adjustments for long-term savings and environmental impact.
10.2 Monitoring Energy Consumption
The Honeywell T6 thermostat provides detailed energy consumption reports through its app, allowing users to track daily, weekly, and monthly energy usage. This feature helps identify patterns and inefficiencies, enabling informed adjustments to reduce waste. Real-time monitoring ensures optimal performance, while historical data offers insights for continuous improvement and cost savings.

Manufacturer Support and Resources
Honeywell offers comprehensive support and resources for the T6 thermostat, including online manuals, troubleshooting guides, and dedicated customer service. Access these through their official website or contact support directly for assistance with installation, setup, or technical issues, ensuring a seamless experience with your smart thermostat.
11.1 Contacting Honeywell Support
To contact Honeywell support for T6 thermostat assistance, visit their official website for live chat, email, or phone options. Ensure you have your product details ready. This streamlined process helps resolve issues efficiently, providing timely solutions to installation or operational queries, ensuring optimal performance and user satisfaction with your Honeywell T6 smart thermostat.
11.2 Accessing Online Manuals and Guides
Visit the Honeywell website to access comprehensive online manuals and guides for the T6 thermostat. These resources include downloadable PDFs with detailed installation instructions, troubleshooting tips, and advanced feature setups. Utilize the search function to quickly find specific topics, ensuring you have all the information needed to optimize your T6 thermostat’s performance and functionality.
Complete the installation by verifying all connections and settings. Ensure the thermostat operates correctly and efficiently, achieving optimal performance and energy savings as intended.
12.1 Verifying Proper Installation
After completing the installation, turn on the power and ensure the thermostat display lights up. Test all HVAC functions to confirm they operate correctly. Check that the screen lock is set and functioning. Verify that schedules and preferences are programmed accurately. Ensure geofencing and smart alerts are active if enabled. Confirm energy usage monitoring is operational and accurate. Finally, review all settings to ensure optimal performance and energy efficiency.
12.2 Ensuring Optimal Performance
Regularly clean the thermostat and check wiring connections to maintain functionality. Update the software to the latest version for enhanced features and security. Optimize settings for energy efficiency and comfort. Ensure proper integration with smart home systems for seamless control. Schedule periodic checks by a HVAC technician to address potential issues early. This ensures long-term reliability and peak performance of your Honeywell T6 thermostat.