

Buffalo Wild Wings Menu PDF: A Comprehensive Guide (Updated 04/22/2026)
Buffalo Wild Wings consistently updates its menu, and accessing the latest PDF version is crucial for informed dining choices; especially regarding promotions like “Bottomless Apps” starting June 26th․
Buffalo Wild Wings, a prominent sports bar and restaurant chain, is renowned for its expansive wing selection and lively atmosphere․ Staying current with their menu offerings, particularly regarding limited-time promotions and new item introductions, requires easy access to reliable information․ The official Buffalo Wild Wings menu PDF serves as a comprehensive resource for diners seeking detailed information on flavors, pricing, and nutritional content․
As of today, April 22, 2026, navigating the menu is essential, especially with the anticipated return of the “Bottomless Apps” deal on June 26th․ Understanding the current offerings, alongside historical context of past promotions (dating back to 2012), empowers customers to maximize their dining experience․ Beyond wings, the menu encompasses burgers, salads, sides, and even branded merchandise like Slider Slides․
Understanding the Buffalo Wild Wings Menu Format
The Buffalo Wild Wings menu, whether accessed digitally or via PDF, is generally organized into distinct sections․ Core categories include wings (with detailed flavor breakdowns), appetizers & shareable plates (including information on past “Bottomless Apps” deals), and a broader selection of entrees like burgers and salads․ Sides, such as fries and onion rings, are also clearly delineated․
The PDF version typically maintains this structure, allowing for easy navigation․ Special promotions, like football season specials and new item introductions, are often highlighted․ Digital menus on the website and app offer interactive features, but the PDF provides a static, complete overview․ Be mindful of third-party listings, as accuracy can vary; always prioritize the official source for the most up-to-date information․
Historical Context: Menu Changes & Promotions (2012-2026)
Since 2012, Buffalo Wild Wings’ menu has undergone significant evolution, driven by consumer trends and promotional strategies․ The introduction and subsequent ending of the “Bottomless Apps” promotion, notably resurfacing around June 26th in 2026, represent a key shift․ Menu expansions have included new wing flavors, appetizers, and limited-time offers tied to events like football season․
Analyzing past PDF menus reveals a gradual increase in menu item variety and a focus on shareable plates․ The brand has also introduced merchandise like “Slider Slides․” Tracking these changes through archived PDF versions provides valuable insight into Buffalo Wild Wings’ adaptation to the competitive dining landscape and its commitment to attracting customers with innovative offerings and deals․

Core Menu Sections: Wings & Sauces
Buffalo Wild Wings’ core revolves around customizable wings, boasting diverse flavors and sauces; the PDF menu details each option for a personalized experience․
Wing Flavors: A Detailed Breakdown
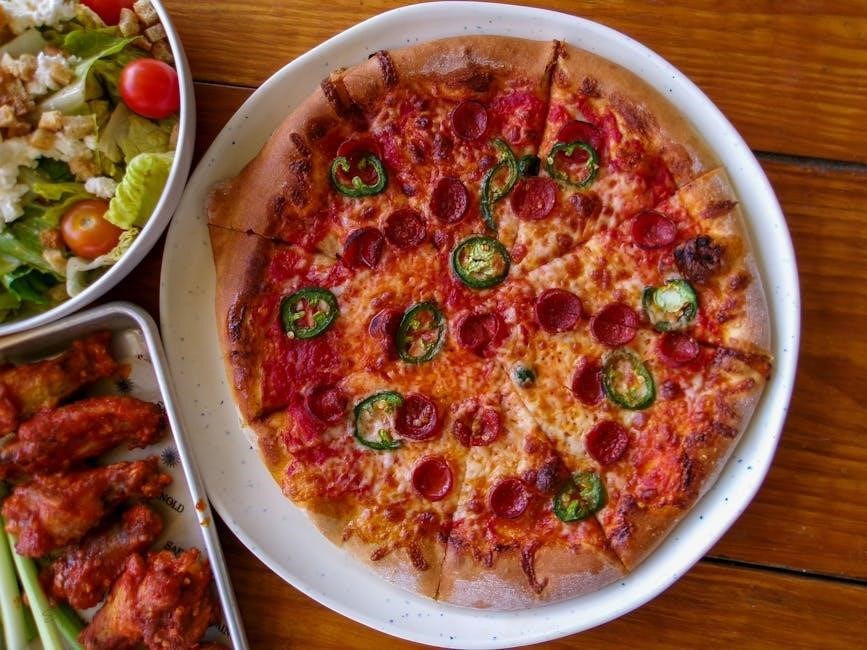
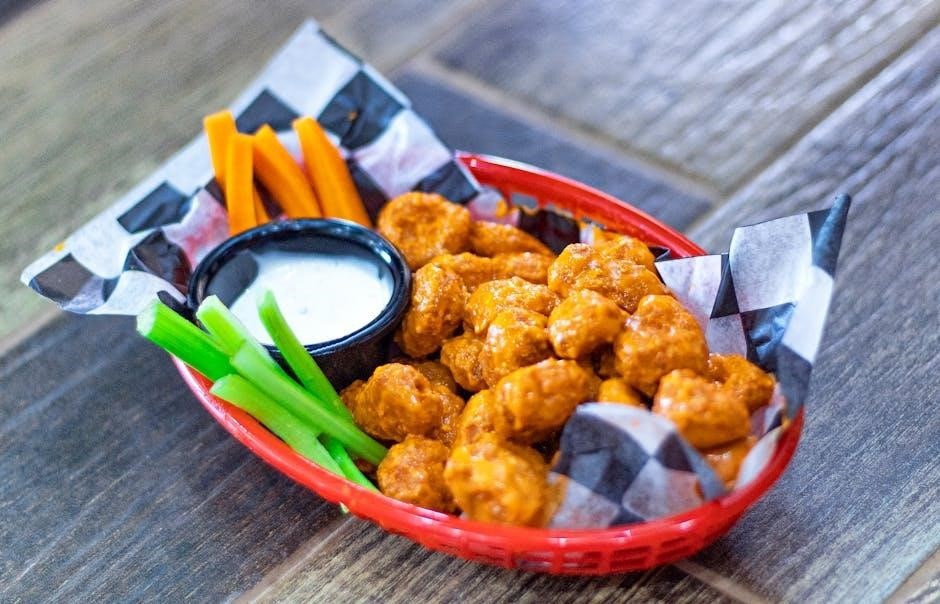
Buffalo Wild Wings offers an extensive array of wing flavors, meticulously detailed within their PDF menu․ Beyond the classic Buffalo sauce – available in varying heat levels – the selection expands to include Asian Zing, Parmesan Garlic, Lemon Pepper, and Mango Habanero, among numerous others․ The PDF provides comprehensive descriptions of each flavor profile, aiding customers in selecting their ideal wing experience․
Dry rub options, also showcased in the PDF, present alternatives for those preferring a less saucy approach․ These include flavors like Buffalo Ranch, Honey BBQ, and Spicy Garlic․ The menu clearly outlines the intensity and characteristics of each rub, ensuring transparency․ Regularly updated, the PDF reflects new flavor introductions and limited-time offerings, keeping the wing selection dynamic and exciting for patrons․ Detailed allergen information is also often included alongside flavor descriptions․
Sauce Heat Levels & Descriptions
The Buffalo Wild Wings PDF menu meticulously details sauce heat levels, crucial for spice enthusiasts․ Ranging from “No Heat” to “Blazin’ Carolina Reaper,” each level is clearly defined, allowing customers to gauge their tolerance․ Descriptions accompany each sauce, outlining flavor notes beyond just the heat intensity – for example, “Mild” offers a classic Buffalo flavor, while “Wild” introduces a sweet and spicy kick․
The PDF also clarifies the Scoville Heat Units (SHU) associated with certain sauces, providing a scientific measure of spiciness․ Beyond traditional Buffalo flavors, the menu details unique options like Mango Habanero and Jamaican Jerk, specifying their heat and flavor profiles․ Regularly updated, the PDF ensures accurate representation of sauce intensity, helping diners make informed choices and enjoy their wings safely․
Dry Rub Options & Flavor Profiles
The Buffalo Wild Wings PDF menu showcases a diverse selection of dry rubs, offering alternatives to traditional sauces․ These rubs provide distinct flavor experiences, ranging from savory to subtly sweet․ Detailed descriptions accompany each rub, highlighting key ingredients and overall taste profiles – for instance, Lemon Pepper delivers a zesty citrus flavor, while Chipotle BBQ offers a smoky and slightly spicy kick․
The PDF clearly outlines the intensity of each rub, helping customers choose based on their preferences․ Beyond the core options, limited-time dry rubs are also featured, adding variety to the menu․ The document ensures transparency regarding ingredients, catering to those with dietary restrictions․ Regularly updated, the PDF accurately reflects the current dry rub offerings at Buffalo Wild Wings․

Appetizers & Shares (Including Past “Bottomless Apps” Deals)
The Buffalo Wild Wings PDF details shareable appetizers, including past “Bottomless Apps” promotions—returning June 26th—and current menu items for groups․
Current Appetizer Menu Items
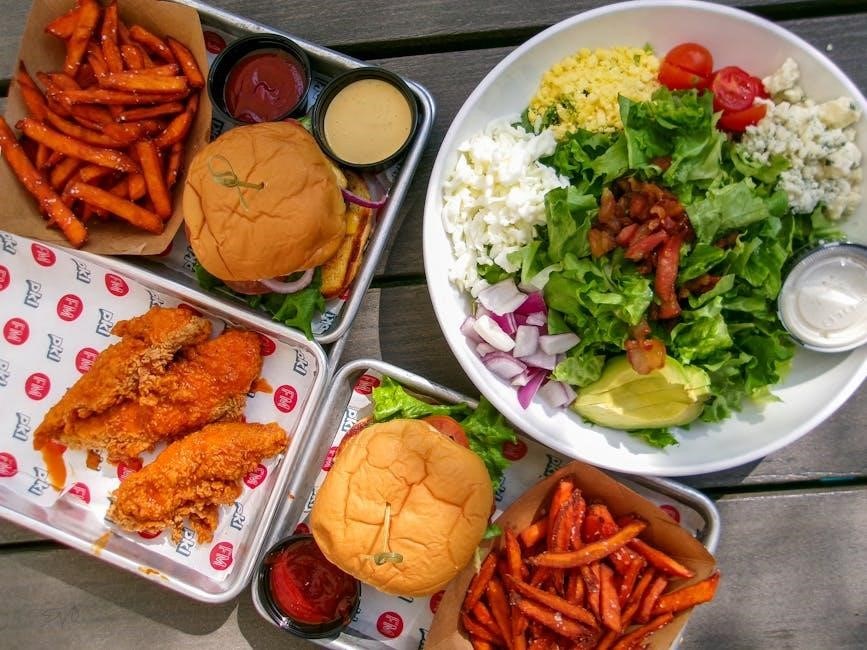
The Buffalo Wild Wings menu PDF showcases a diverse range of appetizers designed for sharing and complementing their signature wings․ Currently, guests can enjoy classic options like crispy onion rings, served with a tangy dipping sauce, and loaded fries, customizable with various toppings․ Mozzarella sticks, a perennial favorite, are also prominently featured, alongside seasoned fries and vibrant street tacos․
For those seeking bolder flavors, the appetizer selection includes Nashville Hot tenders and a variety of dips, such as guacamole and queso․ The PDF clearly outlines portion sizes and pricing for each item, allowing for easy meal planning․ Recent additions, often highlighted in promotional sections of the PDF, may include limited-time offerings or seasonal specialties, ensuring a continually refreshed appetizer experience․
The “Bottomless Apps” Promotion: History & Availability (June 26th & Beyond)

Buffalo Wild Wings’ “Bottomless Apps” promotion has a notable history of generating excitement and driving traffic․ The PDF menu often details current promotional periods, and as of today, April 22, 2026, the promotion is slated to return beginning on June 26th․ Historically, this deal allows guests to enjoy unlimited servings of select appetizers for a fixed price during specific timeframes․
Past iterations have included a variety of appetizers, though the specific offerings can change with each launch․ The PDF will be the definitive source for confirming which appetizers are included in the current promotion․ Availability is typically limited to participating locations and specific days/times, so checking the PDF or the BWW website is crucial before visiting․
Shareable Plates: Options for Groups
Buffalo Wild Wings caters to groups with a selection of shareable plates, detailed within their comprehensive PDF menu․ These options are designed for larger parties and offer a variety of flavors to satisfy diverse palates․ Current offerings, as reflected in the latest PDF, typically include larger portions of popular appetizers like wings, fries, and onion rings, often bundled with dipping sauces․
Beyond appetizers, shareable plates may also feature combinations of entrees, such as burgers and wings, providing a complete meal for multiple people․ The PDF menu clearly outlines the contents and pricing of each shareable option, making it easy to plan a group dining experience․ Checking the PDF ensures you have the most up-to-date information on available platters and their respective serving sizes․

Beyond Wings: Other Menu Offerings

Buffalo Wild Wings’ PDF menu details diverse options beyond wings, including burgers, sandwiches, salads, and wraps, providing alternatives for varied preferences and dietary needs․
Burgers & Sandwiches
The Buffalo Wild Wings menu PDF showcases a selection of burgers and sandwiches that complement their signature wings․ While wings remain the primary draw, these options cater to those seeking alternative entrees․ Currently, the menu features several burger variations, often including a classic cheeseburger and specialty options with unique toppings and sauces․
Sandwich choices typically encompass chicken tenders or grilled chicken, served on buns with various dressings and sides․ The PDF provides detailed descriptions of each burger and sandwich, including ingredient lists and potential allergen information․ These items offer a substantial meal beyond the wing experience, appealing to a broader range of palates and preferences․ Expect seasonal variations and limited-time offerings to occasionally appear within the digital PDF menu․
Salads & Wraps
The Buffalo Wild Wings menu PDF details a range of salads and wraps designed for lighter fare or as additions to a larger meal․ Salad options generally include a house salad, Caesar salad, and often a specialty salad featuring grilled chicken or other proteins․ These salads are customizable with various dressings and toppings, allowing guests to tailor their meal to their preferences․
Wraps typically consist of grilled or crispy chicken, lettuce, cheese, and signature sauces, all conveniently rolled in a flour tortilla․ The PDF clearly outlines the ingredients and nutritional information for each salad and wrap․ These options provide a refreshing alternative to wings and heavier menu items, catering to health-conscious diners․ Expect occasional limited-time wrap flavors to be highlighted within the updated PDF menu․
Sides: Fries, Onion Rings, & More
The Buffalo Wild Wings menu PDF comprehensively lists a variety of sides designed to complement their signature wings․ Classic options like French fries are prominently featured, available in regular and larger portions․ Crispy onion rings provide a satisfying alternative, offering a sweet and savory crunch․ Beyond these staples, the PDF often showcases seasonal or limited-time side offerings, such as sweet potato fries or loaded potato skins․
Guests can also find coleslaw, mac & cheese, and occasionally, other potato-based sides detailed within the document․ Nutritional information for each side is readily available in the PDF, aiding informed choices․ These sides are perfect for sharing or enjoying alongside a full wing meal, enhancing the overall dining experience at Buffalo Wild Wings․
Special Promotions & Limited-Time Offers
Buffalo Wild Wings’ menu PDF details current deals, like football season specials and the return of “Bottomless Apps” on June 26th, plus Slider Slides!
Football Season Specials
Buffalo Wild Wings consistently elevates the game-day experience with targeted promotions detailed within their regularly updated menu PDF․ These specials often coincide with major football events, including the NFL season, college football playoffs, and the Super Bowl․ Historically, these promotions have included discounted wings during game broadcasts, special shareable platters designed for groups, and bundled meal deals combining wings with sides and beverages․
The menu PDF is the definitive source for current football season offerings, as these change frequently․ Expect to find limited-time wing flavors inspired by rivalries or specific teams, and potentially even contests or giveaways tied to game outcomes․ Checking the digital menu or the official PDF ensures you don’t miss out on maximizing your football viewing experience with delicious deals from Buffalo Wild Wings․
Buffalo Wild Wings frequently refreshes its offerings, and the most current details are always found within the official menu PDF․ Recent additions, as of April 22, 2026, include Buffalo Wild Wings-branded sandals, known as Slider Slides, representing a foray into merchandise alongside food․ The menu PDF will detail any associated promotions or bundle deals with these items․
Looking ahead, the PDF is the place to discover upcoming menu innovations․ While specific details are often kept under wraps, expect seasonal flavors, limited-edition sauces, and potentially new appetizer options․ Staying updated via the menu PDF ensures you’re among the first to experience these culinary additions․ Regularly checking the digital menu or downloading the latest PDF version is key to staying informed about Buffalo Wild Wings’ evolving menu․
Buffalo Wild Wings Slider Slides & Merchandise
Beyond its core food menu, Buffalo Wild Wings has expanded into branded merchandise, most notably Buffalo Wild Wings-branded sandals called Slider Slides․ Information regarding these items, including sizing, pricing, and availability, is increasingly included within the comprehensive menu PDF, alongside traditional food offerings․ The PDF serves as a central hub for all brand-related products․
Expect the menu PDF to detail any promotional offers linking food purchases with merchandise discounts or bundles․ While currently focused on Slider Slides, future merchandise expansions – such as apparel or accessories – will likely be documented within the PDF․ Regularly consulting the latest version ensures customers are aware of all available products and associated deals from Buffalo Wild Wings․

Digital Menu & PDF Availability
Buffalo Wild Wings provides easy access to its current menu via its website, mobile app, and a downloadable PDF for convenient offline viewing and planning․
Locating the Official Buffalo Wild Wings Menu PDF
Finding the official Buffalo Wild Wings menu PDF requires a direct approach to ensure accuracy, as third-party listings can quickly become outdated․ The most reliable method is to navigate to the official Buffalo Wild Wings website․ Typically, a link to the PDF is found within the “Menu” or “Nutrition” sections, often at the very bottom of the page․
Alternatively, a focused Google search using specific keywords like “Buffalo Wild Wings menu PDF 2026” (adjusting the year as needed) will usually yield the official document as a top result․ Be cautious of sites offering menus that appear unofficial or are significantly older than the current date – April 22, 2026․ Always verify the source before relying on the information, especially concerning pricing or promotional offers like the upcoming “Bottomless Apps” deal starting June 26th․
Using the Digital Menu on the Website & App
Buffalo Wild Wings provides a user-friendly digital menu experience both on its website and through its mobile application․ The online menu allows for easy browsing of all offerings, including wings, appetizers, and the latest promotions, such as the anticipated “Bottomless Apps” return on June 26th․ Interactive features often include filtering by dietary restrictions and viewing nutritional information․
The mobile app enhances convenience with features like online ordering, location services, and exclusive deals․ Both platforms are updated frequently, reflecting current pricing and menu changes, making them more reliable than static PDF versions․ However, downloading the PDF remains useful for offline access․ Remember to check for new menu item introductions and the availability of Slider Slides merchandise directly within the app or on the website․
Third-Party Menu Listings & Accuracy
While numerous websites aggregate Buffalo Wild Wings menu information, relying on these sources can be problematic․ Accuracy often lags behind official updates, particularly concerning limited-time offers like the “Bottomless Apps” promotion scheduled for June 26th, or new menu item introductions․ Pricing discrepancies are also common on these platforms․
For the most dependable information, always refer to the official Buffalo Wild Wings website or mobile app․ Even when consulting a PDF menu sourced from a third party, verify its date to ensure it reflects the current offerings․ Be cautious of outdated information regarding wing flavors, sauce heat levels, or the availability of merchandise like Slider Slides․ Prioritize official channels to avoid disappointment or incorrect assumptions about menu details․
Nutritional Information & Allergen Details
Buffalo Wild Wings provides detailed nutritional data and allergen information; crucial for diners with dietary restrictions, accessible via their website and PDF menu․
Accessing Nutritional Information for Menu Items
Buffalo Wild Wings understands the importance of transparency regarding the nutritional content of their offerings․ Guests seeking detailed information can readily access it through several convenient channels․ The official Buffalo Wild Wings website features a dedicated nutrition section, allowing users to browse calorie counts, macronutrient breakdowns (fat, protein, carbohydrates), and other key nutritional facts for each menu item․
Furthermore, this information is often incorporated directly into the digital PDF version of the menu, providing a downloadable resource for offline viewing․ Users can typically filter by category – wings, appetizers, sides – to quickly locate the specific nutritional details they require․ This commitment to providing accessible nutritional data empowers customers to make informed choices aligned with their individual dietary needs and preferences, supporting a balanced lifestyle alongside enjoying their favorite BWW meals․
Allergen Information & Dietary Restrictions
Buffalo Wild Wings recognizes the diverse dietary needs of its patrons and provides resources to assist those with allergies or restrictions․ Comprehensive allergen information, detailing potential cross-contamination risks, is readily available on their official website․ This includes identifying the presence of common allergens like peanuts, tree nuts, soy, wheat, dairy, eggs, fish, and shellfish within various menu items․
While the PDF menu may not contain exhaustive allergen details, it often directs users to the website for the most up-to-date and complete information․ Guests with severe allergies are strongly encouraged to contact their local Buffalo Wild Wings restaurant directly to discuss ingredient sourcing and preparation methods․ This proactive approach ensures a safe and enjoyable dining experience for individuals managing dietary restrictions, allowing them to confidently navigate the menu․
Understanding Buffalo Wild Wings’ Ingredient Sourcing
Buffalo Wild Wings prioritizes quality and transparency in its ingredient sourcing, though detailed specifics aren’t always prominently featured within the standard PDF menu․ The company focuses on establishing relationships with reliable suppliers to ensure consistent product standards across all locations․ While a complete breakdown of every ingredient’s origin isn’t publicly available, Buffalo Wild Wings emphasizes responsible sourcing practices․
Information regarding poultry sourcing, for example, often highlights partnerships with reputable farms committed to animal welfare․ Consumers seeking more granular details about specific ingredients are encouraged to explore the company’s corporate social responsibility reports or contact customer support․ The PDF menu serves as a guide to available items, but doesn’t typically delve into the complexities of the supply chain․