tulip tie dye instructions pdf

Tulip Tie Dye Instructions: A Comprehensive Guide

Dive into the vibrant world of tie-dye! This guide offers detailed instructions, inspired by current trends, for creating stunning, personalized pieces with Tulip kits, ensuring joyful crafting experiences.

Explore simple techniques like spirals and stripes, perfect for all ages, and discover how to achieve professional-looking results, mirroring the popular styles seen on social media platforms.

Unlock the secrets to long-lasting color and learn essential care tips to maintain the brilliance of your tie-dye creations, transforming everyday loungewear into unique statements.

Understanding Tulip Tie Dye Kits

Tulip Tie Dye Kits are incredibly popular for their convenience and accessibility, offering a fantastic entry point into the world of fabric dyeing for crafters of all skill levels. These kits typically contain everything you need to get started, including a selection of vibrant, pre-mixed dyes in easy-to-use squeeze bottles.

The core components usually encompass dye powders, applicator bottles, rubber bands for creating patterns, and protective gloves to safeguard your hands. Some kits even include pre-printed project ideas or detailed instruction sheets, guiding you through various tie-dye techniques.

Different kit sizes cater to varying project scales, from small batches for individual items to larger kits suitable for group activities or creating multiple garments. Understanding the contents and scope of each kit allows you to choose the perfect option for your creative vision, ensuring a successful and enjoyable tie-dye experience.

Types of Tulip Tie Dye Kits Available

Tulip offers a diverse range of tie-dye kits designed to cater to different preferences and project types. The classic One-Step Tie Dye Kits are ideal for beginners, providing pre-mixed dyes that require no additional mixing or preparation – simply shake and apply!

For more experienced dyers, Pro Fiber Reactive Dye Kits offer a wider color palette and greater control over the dyeing process, resulting in more vibrant and long-lasting results. Party Kits are available for larger groups, containing ample supplies for multiple participants.

Specialty kits, like those designed for denim or specific patterns (e.g., rainbow, galaxy), provide targeted solutions for unique projects. Furthermore, Tulip ColorWorks offers options for broader crafting applications beyond traditional tie-dye, expanding creative possibilities.

Materials Needed Beyond the Kit

While Tulip kits provide a fantastic starting point, several additional materials enhance the tie-dye experience and ensure optimal results. Rubber gloves are essential for protecting your hands from dye staining, and a plastic drop cloth or tarp safeguards your work surface.

Plastic squeeze bottles (if not included) offer greater control during dye application, and rubber bands are crucial for creating various tie-dye patterns. Plastic wrap or resealable plastic bags are needed for keeping dyed items moist during the dye-setting process.

A bucket or sink is necessary for rinsing, and old towels are helpful for absorbing excess water. Consider a face mask to avoid inhaling dye fumes, and safety glasses to protect your eyes. Finally, having a well-ventilated area is paramount for a safe and enjoyable crafting session.

Preparing Your Fabric for Tie Dye

Proper fabric preparation is key to achieving vibrant, long-lasting tie-dye results. Begin by selecting natural fiber fabrics like cotton, rayon, or linen, as they absorb dye most effectively. Avoid fabrics with durable water repellent (DWR) finishes. Pre-washing your fabric is crucial; this removes sizing and oils that can hinder dye absorption, ensuring even color distribution.

Do not use fabric softener during washing, as it creates a barrier. After washing, ensure the fabric is completely dry before beginning the tie-dye process. Ironing the fabric can also help create smoother, more defined patterns. Soaking the fabric in soda ash solution (following kit instructions) further prepares it for optimal dye uptake, resulting in brighter, more permanent colors.

Pre-Washing and Fabric Choices

Selecting the right fabric and pre-washing are fundamental steps for successful tie-dyeing. Natural fibers excel – think 100% cotton t-shirts, canvas tote bags, or linen scarves. These materials readily absorb Tulip dyes, yielding brilliant colors. Avoid polyester or blends with a high synthetic content, as dye adhesion will be significantly reduced. Pre-washing removes sizing, oils, and finishes that impede dye penetration, ensuring even color saturation.

Use a mild detergent and warm water for pre-washing, and skip the fabric softener! Softeners leave a residue that blocks dye absorption. Tumble dry on low or hang to dry completely. Ironing the fabric before tying creates crisp lines in your designs. Lighter colored fabrics showcase dyes best, but you can experiment with darker shades for unique effects.

Safety Precautions When Tie Dyeing

Prioritizing safety is crucial when working with Tulip tie dye kits. Always wear gloves – the dye can stain skin and cause irritation. Protect your work surface with a plastic tablecloth or drop cloth, as dye spills are common. Work in a well-ventilated area to avoid inhaling dye fumes. Eye protection, such as safety glasses, is recommended, especially when mixing dyes.

Keep dyes out of reach of children and pets. Avoid contact with eyes and mouth; if contact occurs, rinse thoroughly with water and seek medical attention. Dispose of used dye properly according to package instructions. Old clothing should be worn during the process to prevent staining of good garments. Be mindful of your surroundings and clean up spills immediately.

Basic Tie Dye Techniques

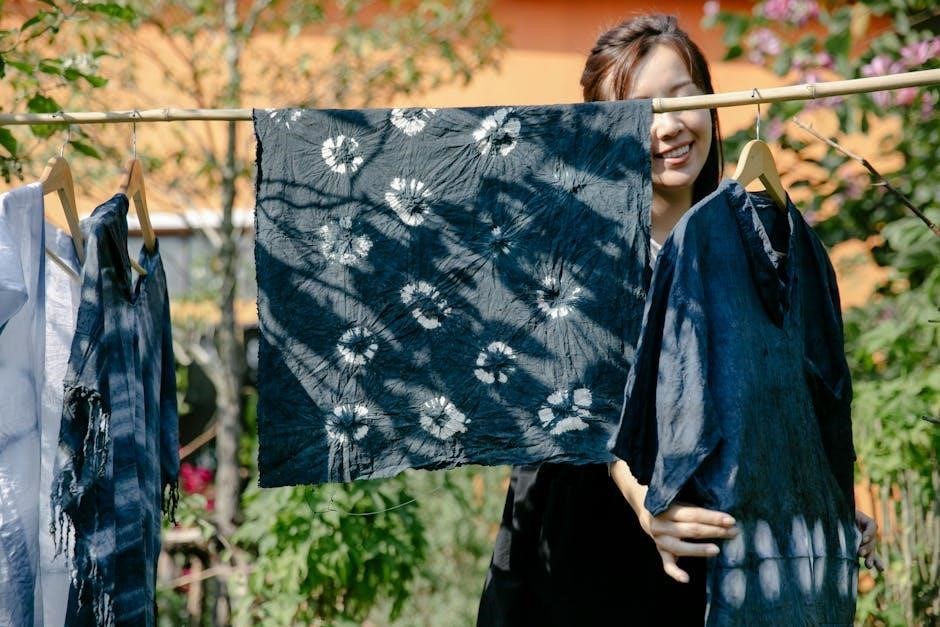
Embark on your tie-dye journey with these fundamental techniques! The spiral method involves pinching fabric at the center and twisting into a tight coil, securing with rubber bands before applying dye. For a bullseye effect, pinch fabric at intervals and bind tightly, creating distinct sections for color. Stripes are achieved by folding fabric accordion-style and binding along the length.

Scrunching, a freeform method, involves randomly gathering fabric and securing it with bands, resulting in a unique, organic pattern. Experiment with different binding techniques to create variations within these basics. Apply dye generously, ensuring saturation for vibrant results. Remember to flip and repeat dye application on both sides of the fabric for even coverage.

Spiral Tie Dye Method

Master the classic spiral! Begin by laying your fabric flat and pinching the center to create a cone shape. Rotate the fabric as you continue pinching, forming a tight, flat spiral. Secure this spiral firmly with multiple rubber bands, dividing it into pie-shaped sections – the more bands, the more defined the pattern.

Apply dyes to each section, using contrasting colors for a bold look or complementary shades for a softer effect. Ensure dye penetrates the fabric by gently squeezing the dye bottles. Flip the fabric and repeat the dye application on the reverse side. Allow the dye to set according to kit instructions before rinsing, revealing a beautiful, iconic spiral design.

Bullseye Tie Dye Method

Create striking bullseyes! Pinch the fabric at a specific point and pull it upwards, forming a cone. Wrap rubber bands tightly around the cone at regular intervals – these will define the rings of your bullseye. The closer the bands, the narrower the rings will be.

Apply different colors between each rubber band, carefully saturating the fabric. Consider using a rainbow sequence or contrasting hues for a dramatic effect. Remember to flip the fabric and repeat the dye application on the back. Allow sufficient setting time before rinsing to ensure vibrant, well-defined circles, resulting in a classic bullseye pattern.

Stripes & Scrunch Tie Dye Methods

Achieve bold stripes with ease! Fold your fabric accordion-style, creating neat pleats. Secure tightly with rubber bands along the length. Apply dye to alternating sections, ensuring each color is distinct. For a scrunch effect, simply crumple the fabric randomly and bind it with rubber bands.

This method yields organic, unpredictable patterns. Apply dye liberally across the scrunched fabric, allowing colors to blend and create unique textures. Experiment with color combinations for exciting results. Remember to saturate the fabric thoroughly for vibrant hues. Both techniques offer quick and satisfying tie-dye experiences, perfect for beginners!

Advanced Tie Dye Patterns

Elevate your tie-dye artistry! Beyond basic techniques, explore intricate designs like the mesmerizing Mandala pattern. This requires precise folding and tying to create symmetrical, radiating motifs. Alternatively, master the Ombre effect, blending colors seamlessly from light to dark.

Achieving Ombre involves strategic dye application and careful rinsing. For Mandalas, utilize string and precise folding for optimal results. These patterns demand patience and attention to detail, but the stunning visual impact is well worth the effort. Experiment with contrasting colors and varying dye concentrations to personalize your creations. Unlock your creative potential with these advanced techniques!

Mandala Tie Dye Technique

Create stunning symmetry with the Mandala technique! Begin by pinching the center of your fabric and twisting it into a circular shape, resembling a flower. Secure tightly with rubber bands, dividing the circle into pie-shaped sections. This creates the foundation for the radiating mandala design.

Apply different colors to each section, ensuring the dye penetrates the fabric thoroughly. Utilize Tulip’s squeeze bottles for precise application. Once dyed, allow ample setting time before rinsing. The key to a beautiful mandala lies in precise folding and vibrant color choices. Experiment with contrasting hues for a dramatic effect, or opt for a harmonious blend.

Ombre Tie Dye Technique

Achieve a gradual color transition with the Ombre technique! Start with your fabric laid flat. Instead of twisting or binding, progressively apply dye, starting with the darkest shade at one end and gradually lightening it towards the other. Control is key – use Tulip’s bottles to carefully layer the dye, blending the colors as you go.

For a seamless gradient, slightly overlap each color application. Allow the dye to sit for the recommended time, then rinse thoroughly. Experiment with different color combinations to create unique ombre effects. This technique is perfect for scarves, t-shirts, and other garments where a subtle, sophisticated look is desired.

Dye Application & Setting

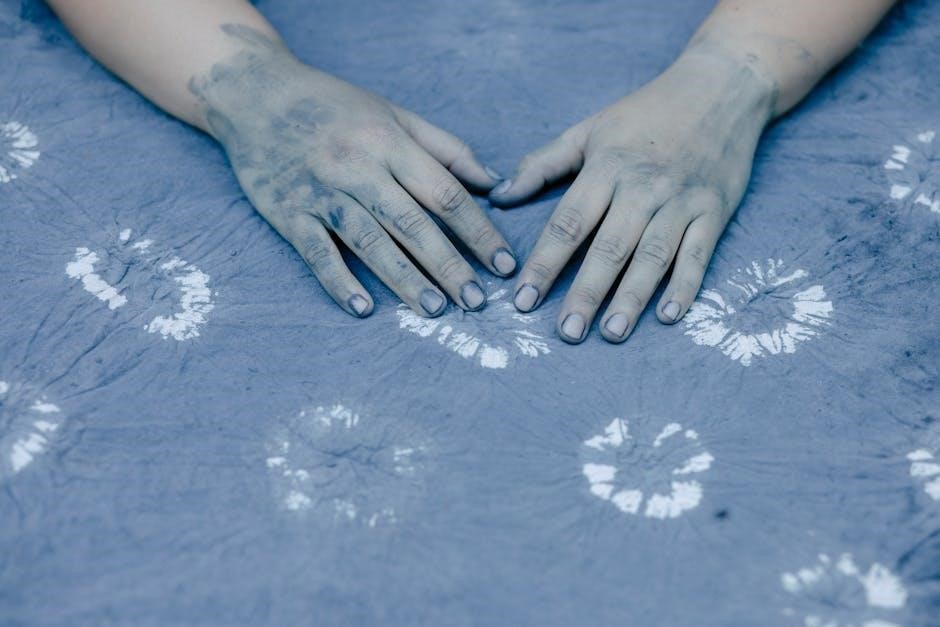
Precise dye application is crucial for vibrant results! Utilize Tulip’s dye bottles, squeezing gently to saturate the fabric evenly. Avoid over-saturation, which can lead to color bleeding. Target specific areas based on your chosen tie-dye technique – spirals, bullseyes, or stripes. Remember to wear gloves to protect your hands from staining.

Once dyed, the setting process is vital. Allow the dye to penetrate the fabric for at least 6-8 hours, or ideally overnight, in a sealed plastic bag. This ensures optimal color absorption. Rinse thoroughly under cold water until the water runs clear, removing excess dye. Wash separately for the first few washes to prevent color transfer.

Proper Dye Bottle Usage

Mastering Tulip dye bottle technique unlocks vibrant designs! Gently squeeze the bottle, avoiding forceful pressure that can cause splattering or uneven distribution. Hold the bottle at a slight angle to control the dye flow and target specific fabric sections. For intricate patterns, use a lighter touch and build up color gradually.

Shake the dye bottles well before each use to ensure consistent color mixing. Test the flow on a scrap fabric piece to familiarize yourself with the bottle’s output. Avoid cross-contamination by using a separate nozzle for each dye color. Properly cap the bottles when not in use to prevent drying and maintain dye potency.

Dye Setting Process & Rinse Instructions

Proper dye setting is crucial for vibrant, lasting color! After applying dye, place the tied fabric in a plastic bag or container, allowing it to sit for 6-8 hours, or ideally overnight, for optimal color absorption. This ‘setting’ period allows the dye to bond with the fabric fibers.

Rinse under cold running water until the water runs clear, starting with the rubber bands still in place. Then, remove the bands and continue rinsing. Wash separately in cold water with a mild detergent for the first wash to prevent color bleeding. Avoid using bleach or harsh chemicals. Tumble dry on low or hang to dry for best results.

Troubleshooting Common Tie Dye Issues

Encountering problems? Don’t worry, it’s common! Color bleeding and muddy colors often result from insufficient rinsing or mixing dyes improperly. Ensure thorough rinsing and avoid over-saturating the fabric with multiple colors in one area. Uneven dye distribution can occur if the fabric isn’t adequately saturated, or if the dye bottles are clogged.

To fix this, gently massage the dye into the fabric and ensure the dye bottle tips are clear; Faded colors may indicate insufficient dye setting time. Repeat the setting process, extending the duration. Always test a small, inconspicuous area first to assess dye absorption and color intensity.

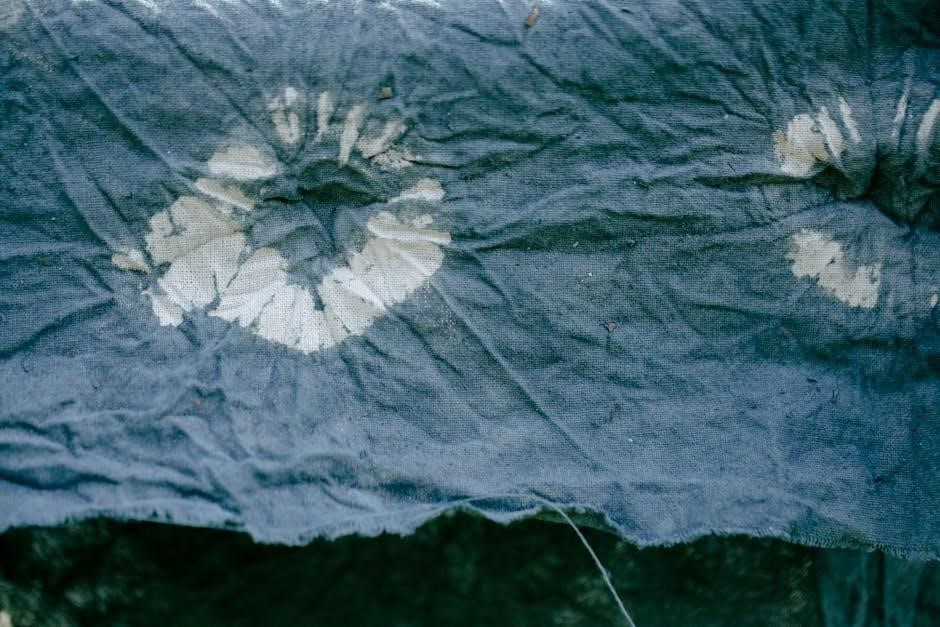
Color Bleeding & Muddy Colors

Dealing with unwanted color mixing? Color bleeding and muddy results are frequent tie-dye challenges. Insufficient rinsing is a primary culprit; thoroughly flush the fabric under cold water until the water runs clear. Improper dye application also contributes – avoid overlapping colors excessively, especially highly contrasting shades.

To prevent muddiness, consider using a color blocker or applying dyes in layers, allowing each layer to set partially before adding another. Always follow the kit’s instructions regarding dye dilution and application techniques. Remember that some dye migration is normal, but excessive bleeding indicates a problem needing correction through re-rinsing.

Uneven Dye Distribution

Frustrated by patchy results? Uneven dye distribution is a common issue, often stemming from inadequate fabric saturation. Ensure the fabric is thoroughly dampened before applying dye; dry spots repel the color. Proper squeezing of the dye bottles is crucial – consistent pressure delivers an even flow. Avoid over-saturating certain areas while neglecting others.

Technique matters too. For spiral or bullseye patterns, carefully work the dye into the folds and creases. Consider flipping the fabric over and repeating the process on the reverse side. Gentle manipulation during application helps the dye penetrate evenly. If spotting occurs, lightly mist the affected area with water and re-apply dye.

Caring for Your Tie Dye Creations

Preserve the vibrancy of your handmade tie-dye! Proper care is essential for maintaining those brilliant colors. Always wash tie-dye items separately for the first few washes to prevent color transfer. Turn garments inside out before laundering to protect the dye from abrasion. Use cold water and a mild detergent – harsh chemicals can fade the colors.

Avoid bleach and fabric softeners, as these can damage the dye. Tumble dry on low heat or, ideally, hang to dry. Direct sunlight can also cause fading, so drying indoors is preferable. Ironing is generally not recommended, but if needed, iron inside out on a low setting. Following these simple steps will ensure your tie-dye creations remain colorful for years to come!

Washing & Drying Instructions

Protect your colorful creations with these essential washing guidelines! For the first several washes, wash your tie-dye items separately from other laundry to avoid any potential color bleeding. Always turn garments inside out before placing them in the washing machine – this minimizes friction and color loss. Use a cold water cycle and a gentle detergent formulated for colors.

Avoid using bleach or fabric softeners, as these can significantly diminish the vibrancy of the dye. When it comes to drying, tumble dry on a low heat setting or, even better, hang your tie-dye items to air dry. Avoid direct sunlight, as prolonged exposure can cause fading. These simple steps will help keep your tie-dye looking its best!

Maintaining Vibrant Colors

Preserve the brilliance of your tie-dye masterpieces with these proactive care tips! Beyond initial washes, continue to wash tie-dye items with similar colors to minimize potential fading or color transfer. Consider using a color-safe laundry booster periodically to help lock in the dye and prevent it from washing out over time.

When storing your tie-dye creations, avoid prolonged exposure to direct sunlight, which can cause colors to fade. Instead, store them in a cool, dark closet or drawer. Ironing is generally not recommended, but if necessary, iron inside out on a low setting. By following these guidelines, you can ensure your tie-dye remains vibrant and eye-catching for years to come!

Posted in PDF

2016 toyota camry manual

Understanding your 2016 Toyota Camry is easy with the owner’s manual, available in PDF format, detailing features for all trim levels – LE, SE, XLE, and XSE.

Overview of the 2016 Camry

The 2016 Toyota Camry stands as a reliable and popular mid-size sedan, known for its dependability and safety. Offered in various trims – LE, SE, Special Edition, XLE, and XSE – it caters to diverse driver preferences. This vehicle boasts a reputation for outstanding reliability and consistently achieves top safety scores, making it an attractive choice for families.

The 2016 Camry provides a comfortable ride and practical features. Accessing the owner’s manual is crucial for maximizing your driving experience and understanding all its capabilities. Whether you’re a first-time Camry owner or need a refresher, the manual offers comprehensive guidance.

Importance of the Owner’s Manual

The owner’s manual for your 2016 Toyota Camry is an invaluable resource. It provides detailed information about your vehicle’s features, operation, and maintenance. Understanding its contents ensures safe and efficient driving, and helps you unlock the full potential of your Camry.

Whether obtained from the dealership or downloaded as a PDF, the manual covers everything from basic controls to advanced safety systems like Toyota Safety Sense™. It’s essential for troubleshooting minor issues and interpreting warning lights. Familiarizing yourself with the manual protects your investment and enhances your ownership experience.

Understanding the 2016 Camry’s Features

The 2016 Toyota Camry manual details the VIN location, trim levels (LE, SE, XLE, XSE), and key specifications for optimal vehicle understanding.

Vehicle Identification Number (VIN) Location

Locating your 2016 Toyota Camry’s Vehicle Identification Number (VIN) is crucial for various reasons, including vehicle history reports, warranty claims, and potential theft recovery. The owner’s manual provides specific guidance, but generally, you can find the VIN in several places on your vehicle.

Look on the driver’s side dashboard, visible through the windshield. It’s also typically located on the driver’s side doorjamb, affixed with a sticker. Additionally, the VIN is often stamped on the vehicle’s registration and insurance documents. Confirming the VIN matches across these sources ensures accuracy and helps protect your investment. Always refer to your 2016 Camry manual for the most precise location details.

Trim Levels: LE, SE, Special Edition, XLE, and XSE

The 2016 Toyota Camry offered a diverse range of trim levels to suit various preferences and budgets. The LE served as the base model, providing essential features and excellent value. Stepping up, the SE added sporty styling cues and enhanced handling. The Special Edition brought unique aesthetic touches for a distinctive look.

For increased luxury, the XLE trim included premium amenities and comfort features. Finally, the XSE combined sporty styling with upscale appointments. Your 2016 Camry manual details the specific features and specifications for each trim level, allowing you to fully understand and appreciate your vehicle’s capabilities.

Key Features and Specifications

The 2016 Toyota Camry boasts impressive reliability and safety scores, making it a popular family sedan. Key features include a standard rearview camera, Toyota Safety Sense™ suite, and available Entune™ infotainment system. Engine options typically include a 2.5-liter four-cylinder and a 3.5-liter V6, paired with a six-speed automatic transmission.

The owner’s manual provides detailed specifications regarding fuel economy, dimensions, and weight. It also outlines the functionality of various systems, ensuring you can maximize your driving experience. Refer to your manual for precise details relevant to your specific Camry trim level.

Operating Your 2016 Toyota Camry

The 2016 Toyota Camry manual details starting, stopping, and driving procedures, alongside explanations of available driving modes and the vehicle’s fuel system.

Starting and Stopping the Engine

The 2016 Toyota Camry manual provides detailed instructions for safely starting and stopping the engine. Before starting, ensure the vehicle is in Park (P) or Neutral (N), and the parking brake is engaged. The manual clarifies the proper use of the ignition system, including smart key operation if equipped.

It also outlines procedures for emergency stops and what to do if the engine fails to start. Specifically, the guide details the sequence for using the push-button start system, if present, and the traditional key-based ignition. Furthermore, it emphasizes the importance of fully depressing the brake pedal during starting to prevent unintended movement. Always refer to the manual for specific details related to your vehicle’s configuration.

Driving Modes and Controls

The 2016 Toyota Camry manual comprehensively explains the vehicle’s driving modes and control systems. It details the operation of the steering wheel-mounted controls for audio, Bluetooth, and cruise control. The manual clarifies the function of the gear selector, including manual shift mode if equipped, and provides guidance on utilizing the available driving modes – typically Eco, Normal, and Sport – to optimize performance and fuel efficiency.

It also covers the use of the climate control system, including automatic temperature settings and ventilation options. Furthermore, the guide explains the operation of the multi-information display, showcasing how to access vehicle data and customize settings. Always consult the manual for a complete understanding of your Camry’s driving features.

Fuel System and Refueling

The 2016 Toyota Camry manual provides detailed information regarding the fuel system and proper refueling procedures. It specifies the recommended fuel octane rating – typically regular unleaded – to ensure optimal engine performance and prevent damage. The manual clearly illustrates the location of the fuel filler door and explains how to safely open and close it.

It also outlines the fuel tank capacity and provides an estimated driving range. Crucially, the guide emphasizes the importance of avoiding fuel spills and adhering to all safety precautions during refueling. Additionally, it may contain information about the fuel cap’s role in emissions control and the consequences of a loose or damaged cap. Refer to the manual for complete details.

Maintenance and Care

The 2016 Toyota Camry manual details a recommended maintenance schedule, fluid checks, tire upkeep, and procedures to ensure longevity.

Recommended Maintenance Schedule

The 2016 Toyota Camry manual provides a comprehensive maintenance schedule crucial for optimal vehicle performance and longevity. Regular inspections, as outlined in the document, are categorized by mileage intervals – typically every 5,000, 10,000, 15,000, and 30,000 miles.

Essential services include oil and filter changes, tire rotations, fluid level checks (brake, coolant, power steering, and windshield washer), and visual inspections of belts, hoses, and exhaust systems. The manual also specifies when to replace components like air filters, cabin air filters, and spark plugs. Adhering to this schedule helps prevent costly repairs and maintains the vehicle’s resale value.

Fluid Checks and Replacements

The 2016 Toyota Camry manual emphasizes the importance of regularly checking and replacing vital fluids. This includes engine oil, crucial for lubrication and cooling, coolant, preventing overheating, brake fluid, ensuring effective stopping power, and power steering fluid, for smooth steering operation.

The manual details specific fluid types and capacities. It also outlines inspection procedures – checking levels, color, and consistency. Replacement intervals vary based on driving conditions, but generally, oil changes are recommended every 5,000-10,000 miles, while coolant and brake fluid should be flushed periodically. Proper fluid maintenance extends component life and ensures optimal performance.

Tire Information and Maintenance

The 2016 Toyota Camry manual provides comprehensive tire information, including recommended tire sizes, pressures, and load capacities for each trim level – LE, SE, XLE, and XSE. Maintaining correct tire pressure is vital for fuel efficiency, handling, and tire longevity.

Regular tire inspections are crucial, checking for wear, damage, and proper inflation. The manual details tread wear indicators and recommends tire rotation intervals to ensure even wear. It also covers proper tire replacement procedures and speed ratings. Adhering to these guidelines maximizes safety and performance, extending the life of your tires and ensuring a smooth ride.

Safety Features and Systems

The 2016 Toyota Camry manual details the airbag system, Anti-lock Brake System (ABS), and Toyota Safety Sense™ features, ensuring driver and passenger protection.

Airbag System

The 2016 Toyota Camry manual provides comprehensive information regarding the vehicle’s airbag system, a crucial component of its safety features. It details the locations of airbags – including those for the driver, front passenger, side airbags, and curtain airbags – designed to provide protection during various collision scenarios.

The manual emphasizes the importance of proper seatbelt usage in conjunction with the airbag system for optimal safety. It also outlines specific warnings and precautions, such as never placing rear-facing child seats in front of active airbags. Understanding the system’s operation and limitations, as described in the manual, is vital for all Camry occupants.

Anti-lock Brake System (ABS)

The 2016 Toyota Camry manual thoroughly explains the function of the Anti-lock Brake System (ABS). This system prevents wheel locking during hard braking, allowing the driver to maintain steering control. The manual details how ABS operates, often indicated by a flashing brake warning light during activation, and clarifies that this is normal operation.

It stresses that drivers should maintain firm and continuous pressure on the brake pedal when ABS is engaged, avoiding pumping the brakes. The manual also covers potential ABS malfunctions and associated warning lights, advising drivers to seek professional service if issues arise. Understanding ABS functionality, as outlined in the manual, enhances safe driving.

Toyota Safety Sense™

The 2016 Toyota Camry manual details the available Toyota Safety Sense™ (TSS) package, a suite of advanced safety features. This includes systems like Pre-Collision System with Pedestrian Detection, Lane Departure Alert with Lane Keep Assist, Automatic High Beams, and Dynamic Radar Cruise Control.

The manual explains the operational parameters of each TSS feature, emphasizing they are driver-assist technologies and do not replace safe driving practices. It clarifies limitations, such as weather conditions affecting sensor performance, and instructs drivers to remain attentive. Understanding TSS functionality, as described in the manual, is crucial for maximizing its benefits and ensuring safe operation.

Troubleshooting and Common Issues

The 2016 Toyota Camry manual guides owners through warning lights, jump-starting, and basic fixes for common problems, ensuring confident vehicle operation.

Warning Lights and Indicators

The 2016 Toyota Camry manual provides a comprehensive explanation of all dashboard warning lights and indicators. Understanding these signals is crucial for identifying potential vehicle issues promptly. The manual details the difference between critical warnings requiring immediate attention and those indicating routine maintenance needs.

Specifically, it clarifies the meaning of lights related to the engine, transmission, braking system (including ABS), airbag system, and tire pressure. Owners will find guidance on appropriate actions to take when a warning light illuminates, ranging from safely pulling over to scheduling a service appointment. Ignoring warning lights can lead to more significant and costly repairs, so referencing the manual is highly recommended.

Jump Starting Procedures

The 2016 Toyota Camry manual outlines safe and effective jump starting procedures for situations with a discharged battery. It emphasizes the importance of using proper jumper cables and following the correct connection sequence – positive to positive, negative to a grounded metal surface on the disabled vehicle.

The manual cautions against reversing the polarity, which can cause serious damage to both vehicles’ electrical systems. Detailed diagrams illustrate the correct cable placement, and specific instructions are provided regarding the duration of the jump start process. Always consult the manual before attempting a jump start to ensure safety and prevent potential vehicle damage.

Basic Troubleshooting Guide

The 2016 Toyota Camry manual provides a basic troubleshooting guide for common issues. It addresses problems like a vehicle that won’t start, unusual noises, or malfunctioning lights. The guide encourages owners to first check simple things like the fuel level and battery connections.

It also details how to interpret warning lights and indicators on the dashboard, offering potential causes and suggested actions. The manual stresses that this guide is for minor issues and recommends seeking professional assistance for complex problems. Following these initial steps can potentially save time and expense before visiting a mechanic.

Technical Specifications

The 2016 Toyota Camry manual details engine specs, transmission details, and crucial dimensions like weight, offering a comprehensive technical overview.

Engine Specifications

The 2016 Toyota Camry manual provides detailed engine specifications for each trim level. The standard engine is a 2.5-liter four-cylinder, producing 178 horsepower and 170 lb-ft of torque.

For those seeking more power, the XLE and XSE trims offer an optional 3.5-liter V6 engine, delivering 268 horsepower and 248 lb-ft of torque. Both engines are paired with a six-speed automatic transmission.

The manual also outlines fuel efficiency ratings, varying based on engine choice and driving conditions. Understanding these specifications is crucial for optimal performance and maintenance.

Transmission Details

The 2016 Toyota Camry manual comprehensively details the transmission system. All trim levels – LE, SE, Special Edition, XLE, and XSE – are equipped with a six-speed electronically controlled automatic transmission.

This transmission features overdrive, enhancing fuel efficiency during highway driving. The manual explains the shift positions, including Park, Reverse, Neutral, Drive, and manual shift mode (S).

It also provides guidance on proper shifting techniques and maintenance procedures, ensuring smooth operation and longevity. Understanding these details, as outlined in the manual, is vital for a positive driving experience.

Dimensions and Weight

The 2016 Toyota Camry manual provides precise vehicle dimensions and weight specifications. Overall length measures 192.7 inches, with a width of 71.7 inches and a height ranging from 56.5 to 57 inches, depending on the trim.

Wheelbase is consistently 109.3 inches across all models – LE, SE, XLE, and XSE. Curb weight varies based on engine and trim, generally falling between 3,330 and 3,535 pounds.

These figures are crucial for parking, garage fitment, and understanding vehicle handling characteristics. The manual details these measurements for informed ownership and practical use.

Locating the 2016 Camry Manual Online

Access the 2016 Toyota Camry manual easily through the official Toyota website as a PDF download, or conveniently on your mobile device.

Official Toyota Website

Toyota’s official website serves as the primary hub for accessing the 2016 Camry owner’s manual. Navigating to the Toyota Owners portal allows users to specifically search for resources related to their vehicle year and model. This ensures you receive the correct documentation tailored to your 2016 Camry, encompassing all trim levels – LE, SE, Special Edition, XLE, and XSE.

The website provides a secure and reliable source for downloading the manual in PDF format. Toyota prioritizes providing readily available support materials, and the online manual is a key component of this commitment. You can typically find the manual by entering your Vehicle Identification Number (VIN) for precise matching, guaranteeing you have the most accurate information for your specific vehicle.

PDF Download Options

Several online platforms offer PDF downloads of the 2016 Toyota Camry owner’s manual, providing convenient access to vehicle information. Beyond the official Toyota website, various automotive resource sites archive these manuals for easy retrieval. These PDF versions encompass all trim levels – LE, SE, Special Edition, XLE, and XSE – ensuring compatibility with your specific model.

Downloading the manual as a PDF allows for offline viewing and printing, making it readily available whenever needed. The PDF format preserves the original layout and content, including detailed diagrams and specifications. Ensure the source is reputable to guarantee a virus-free and accurate copy of the 568-page document, sized approximately 13.13 MB.

Accessing the Manual via Mobile Devices

The 2016 Toyota Camry owner’s manual is conveniently accessible on smartphones and tablets. After downloading the PDF version, users can utilize mobile-friendly PDF reader applications – like Adobe Acrobat Reader – for seamless viewing on the go. This allows quick reference to vehicle information, maintenance schedules, and safety features directly from your mobile device.

Many Toyota owners find this particularly useful during roadside assistance or when performing basic vehicle checks. The manual’s comprehensive content, covering all trims (LE, SE, XLE, XSE), remains readily available even without an internet connection. Ensure sufficient storage space for the 13.13 MB PDF file.

great value chicken strips cooking instructions

Great Value Chicken Strips are a convenient, versatile option for quick meals․ Made from premium white meat chicken, they offer a crispy, flavorful experience with minimal prep required․

Overview of Great Value Chicken Strips

Great Value Chicken Strips are a popular, convenient food option made from premium white meat chicken․ They are fully cooked, frozen, and coated in a crispy, flavorful breading․ Designed for ease, these strips can be heated in various ways, making them ideal for quick meals․ The product is packaged in a 25oz resealable bag, ensuring freshness and flexibility for multiple uses․ With 16 grams of protein per serving, they are a satisfying choice for families and individuals alike․ The strips are versatile, suitable for sandwiches, salads, pastas, and more․ Made with high-quality ingredients, they offer a delicious and hassle-free dining experience․ Perfect for busy lifestyles, Great Value Chicken Strips are a practical and tasty addition to any meal․

Importance of Proper Cooking Instructions

Proper cooking instructions are essential for achieving the best results with Great Value Chicken Strips․ Following the guidelines ensures the chicken reaches a safe internal temperature of 165°F, preventing undercooking or overcooking․ Incorrect methods can lead to uneven cooking, affecting texture and flavor․ For example, deep-frying without proper oil temperature control can result in greasy or burnt strips․ Similarly, microwaving without monitoring can cause dryness․ Adhering to recommended times and temperatures guarantees crispy exteriors and juicy interiors․ Proper cooking also prevents foodborne illness, as undercooked chicken can pose health risks․ By following the instructions, you ensure a delicious, safe, and satisfying meal every time․ This attention to detail enhances both taste and texture, making your dining experience enjoyable and hassle-free․

Understanding the Product

Great Value Chicken Strips are made from premium white meat chicken, fully cooked, and frozen for convenience․ They are boneless, breaded, and ready to heat, offering a crispy texture and high protein content in every serving․

Ingredients and Nutritional Information

Great Value Chicken Strips are made with premium white meat chicken, water, wheat flour, and a blend of seasonings․ They contain 2% or less of salt, dextrose, sodium phosphates, garlic powder, onion powder, paprika extract, spices, soybean oil, yeast, garlic extract, and garlic oil․ The breading is set in vegetable oil․ Each serving provides 16 grams of protein, making them a high-protein option․ The strips are fully cooked and frozen, ensuring convenience and longevity․ Nutritional information includes calories, fat, sodium, and carbohydrates, with no artificial flavors or colors․ They are free from harmful additives, offering a balanced and tasty meal solution for families and individuals alike․

Allergens and Dietary Considerations

Great Value Chicken Strips contain wheat and milk, making them unsuitable for individuals with gluten intolerance or dairy allergies․ They are processed in facilities that handle soy, posing a risk for soy allergies․ The strips are not gluten-free or dairy-free, so those with celiac disease or lactose intolerance should avoid them․ For vegetarian or vegan diets, these strips are not suitable as they contain chicken․ However, they are a good option for meat-eaters seeking high-protein meals․ Always check the packaging for allergen warnings and ensure proper handling to avoid cross-contamination․ If you have severe allergies, consult the product label or contact the manufacturer for detailed information․

Cooking Methods

Great Value Chicken Strips can be cooked in various ways, including oven, skillet, air fryer, microwave, or deep frying, offering quick and customizable meal solutions for any preference․

Oven Cooking Instructions

To cook Great Value Chicken Strips in the oven, preheat to 400°F (200°C)․ Place the frozen strips on a baking sheet lined with parchment paper in a single layer․ Bake for 15-20 minutes, flipping halfway through, until crispy and golden brown․ Ensure the internal temperature reaches 165°F using a meat thermometer․ Avoid overcrowding the sheet for even cooking․ This method provides a crispy texture without added oil, making it a healthier option․ Let the strips cool slightly before serving․ Always cook from frozen for best results, as thawing can affect crispiness․ Follow these steps for perfectly cooked, oven-baked chicken strips every time․

Skillet Cooking Instructions

For skillet cooking, heat a small amount of oil over medium heat․ Add Great Value Chicken Strips in a single layer, ensuring they are not overcrowded․ Cook for 3-4 minutes per side, or until golden brown and crispy․ Adjust heat as needed to prevent burning․ The internal temperature should reach 165°F for food safety․ Stir occasionally to ensure even cooking․ This method allows for a crispy exterior while maintaining juicy chicken inside․ Serve hot and enjoy the perfectly cooked strips in your favorite dishes․ Skillet cooking offers a quick and flavorful way to prepare Great Value Chicken Strips, ideal for adding to meals like stir-fries or sandwiches․

Air Fryer Cooking Instructions

Preheat the air fryer to 400°F (200°C)․ Place Great Value Chicken Strips in a single layer, leaving space for even cooking․ Cook for 12-15 minutes, shaking halfway through․ The strips are fully cooked and can be heated directly from frozen․ Ensure the internal temperature reaches 165°F (74°C) for safety․ For crispier results, pat dry with a paper towel before cooking․ This method delivers a golden, crispy texture with minimal oil․ Perfect for a quick, healthy meal, air fryer cooking enhances flavor while maintaining juiciness․ Enjoy your perfectly cooked chicken strips in minutes, ideal for snacks, salads, or main dishes․

Microwave Cooking Instructions

For a quick and convenient option, microwave cooking is ideal․ Place Great Value Chicken Strips on a microwave-safe plate, leaving space between each strip for even heating․ Cook on high for 30-60 seconds per strip, depending on quantity and desired crispiness․ Check for an internal temperature of 165°F (74°C) using a food thermometer․ Cover with a paper towel to prevent splattering․ Note that microwave cooking may not yield the crispiest results compared to other methods․ Avoid overcrowding the plate to ensure even heating․ While not the crispiest method, microwaving provides a fast way to enjoy tender, flavorful chicken strips․ Perfect for a quick snack or meal addition․

Deep Frying Instructions

For crispy, golden Great Value Chicken Strips, deep frying is an excellent method․ Heat vegetable oil in a deep frying pan to 350°F (175°C)․ Carefully place the frozen strips in batches, avoiding overcrowding․ Fry for 3-4 minutes per side until golden brown․ Use a slotted spoon to remove and drain on paper towels․ Ensure the internal temperature reaches 165°F (74°C) for food safety․ Do not refry strips․ This method yields the crispiest texture and enhances flavor․ Always follow proper deep-frying safety precautions to avoid accidents․ Perfect for achieving restaurant-quality results at home․

Cooking Safety and Best Practices

Always cook Great Value Chicken Strips to an internal temperature of 165°F (74°C) to ensure food safety․ Handle frozen strips safely, avoiding cross-contamination․ Never overcrowd cooking surfaces for even heating․ Use a food thermometer for accuracy and follow proper hygiene practices to prevent foodborne illness․ These steps ensure a safe and enjoyable dining experience․

Internal Temperature Requirements

Cooking Great Value Chicken Strips to the correct internal temperature is essential for food safety․ The chicken must reach an internal temperature of 165°F (74°C) to ensure all harmful bacteria are eliminated․ Use a food thermometer to accurately measure the temperature, especially in the thickest part of the strip․ This step is critical whether you’re cooking in the oven, skillet, air fryer, or microwave․ Undercooking can lead to foodborne illness, while overcooking may result in dry, tough meat․ Always prioritize this temperature guideline to achieve a safe and enjoyable dining experience․ Proper temperature control ensures both safety and optimal flavor․ Never skip this step, as it is vital for consuming chicken products safely․

Handling and Thawing Tips

Great Value Chicken Strips are frozen to maintain freshness and should be stored at 0°F (-18°C) or below․ For safe handling, always keep the strips frozen until ready to cook․ To thaw, place the desired amount in a sealed container or plastic bag and refrigerate overnight․ Never thaw at room temperature, as this can promote bacterial growth․ Once thawed, cook immediately and do not refreeze․ Always handle the strips with clean utensils and wash hands before and after handling raw poultry․ Proper thawing and handling ensure food safety and maintain the quality of the product․ Follow these guidelines to enjoy your chicken strips safely and effectively;

Serving Suggestions

Great Value Chicken Strips are versatile and can be enjoyed in various dishes․ Add them to sandwiches, salads, or pastas for a quick meal․ They also pair well in stir-fries or casseroles, making them a convenient addition to any recipe․

Great Value Chicken Strips in Sandwiches

Great Value Chicken Strips are a perfect addition to sandwiches, offering a crispy, flavorful twist to your meal․ Simply place the strips on a bun, add your favorite sauces, and enjoy․ They can also be paired with lettuce, tomatoes, and mayo for a classic chicken sandwich․ For a quick meal, layer them in wraps or subs with cheese and veggies․ The strips are fully cooked, so they’re ready to use straight from the package, making them a convenient option for lunch or dinner․ Their versatility allows you to customize your sandwich to suit any taste, ensuring a satisfying and delicious meal every time․

Adding to Salads and Pastas

Great Value Chicken Strips are an excellent addition to salads and pastas, offering a protein-packed boost to your meals; Toss them with mixed greens, cherry tomatoes, and your favorite dressing for a quick salad․ For pastas, combine the strips with marinara or Alfredo sauce, along with vegetables like spinach or bell peppers, for a hearty dish․ Their crispy texture and savory flavor enhance any recipe, making them a versatile ingredient for meal prep or family dinners․ With minimal cooking required, they’re a convenient way to elevate your salads and pastas to the next level of deliciousness and satisfaction․

Stir-Fry and Casserole Ideas

Great Value Chicken Strips are a fantastic addition to stir-fries and casseroles, offering a quick and flavorful way to enhance your dishes․ For stir-fries, toss the strips with your favorite vegetables like broccoli, carrots, and bell peppers, and drizzle with soy sauce or oyster sauce for a savory twist․ In casseroles, layer the chicken strips with pasta, cheese, and cream of chicken soup for a creamy, satisfying meal․ You can also mix them with rice, beans, and spices for a hearty casserole․ The strips’ crispy texture and seasoned flavor make them a versatile ingredient for creating delicious, one-pot meals that are perfect for family dinners or meal prep․ Their convenience ensures you can whip up a tasty dish in no time, catering to various tastes and preferences․

Tips for Achieving the Best Results

For crispy results, thaw Great Value Chicken Strips first, pat dry, and cook in hot oil․ Avoid overcrowding the skillet or air fryer for even cooking․

Thawing and Preparation Tips

Great Value Chicken Strips are fully cooked and can be thawed for easier preparation․ For safe thawing, place them in the refrigerator overnight or submerge in cold water․ Pat dry with paper towels before cooking to remove excess moisture, ensuring crispier results․ Avoid thawing at room temperature to prevent bacterial growth․ If cooking from frozen, follow package instructions for proper heating․ Always ensure the internal temperature reaches 165°F for food safety․ Proper preparation enhances texture and flavor, making your dishes more enjoyable․ These tips help you achieve the best results when cooking Great Value Chicken Strips․

Enhancing Flavor and Crispiness

To enhance the flavor and crispiness of Great Value Chicken Strips, consider marinating them in your favorite seasonings before cooking․ For extra crunch, lightly spray with oil or dust with spices like paprika or garlic powder before cooking․ When pan-frying, use a small amount of oil over medium heat to achieve a golden-brown texture․ Air frying is another excellent method for crispiness without added oil․ For oven cooking, bake at a higher temperature (400°F) for a shorter time to crisp the breading․ Avoid overcrowding the pan or tray, as this can prevent even cooking․ Experiment with sauces or dips for added flavor․ Proper cooking techniques ensure your chicken strips are both delicious and satisfying․

Storage and Reheating

Store Great Value Chicken Strips in the freezer at 0°F (-18°C) or below․ Reheat cooked strips in the oven or microwave until hot and crispy․ Ensure internal temperature reaches 165°F for food safety․ Avoid refreezing thawed strips for optimal quality․

Freezing and Refrigeration Guidelines

Great Value Chicken Strips should be stored in the freezer at 0°F (-18°C) or below to maintain quality and safety․ Keep the product in its original packaging or a sealed, airtight container to prevent freezer burn․ Avoid frequent thawing and refreezing, as this can affect texture and flavor․ If thawing, place the strips in the refrigerator overnight or thaw in cold water, changing the water every 30 minutes․ Once thawed, cook immediately and do not refreeze․ For refrigeration, cooked strips can be stored for up to 3-4 days in a sealed container․ Always ensure the internal temperature reaches 165°F when reheating for food safety․

Reheating Cooked Chicken Strips

Reheating Great Value Chicken Strips requires attention to ensure crispiness and food safety․ For oven reheating, preheat to 400°F (200°C) and bake for 10-12 minutes, flipping halfway․ In a skillet, heat a small amount of oil over medium heat and cook for 3-4 minutes per side until golden․ Microwaving is quick—reheat on high for 20-30 seconds per strip, checking to avoid overcooking․ For air fryers, reheat at 350°F (175°C) for 4-5 minutes․ Always ensure the internal temperature reaches 165°F using a meat thermometer․ Avoid overcrowding the reheating surface for even cooking․ Pat dry excess moisture before reheating to maintain crispiness․ Never reheat more than once for optimal quality and safety․

Cooking Variations

Great Value Chicken Strips can be customized with spicy seasonings or sauces for added flavor․ For crispy breading, try air frying or skillet cooking with minimal oil․

Spicy Chicken Strips Variation

For a spicy twist, toss Great Value Chicken Strips with hot sauce or spicy seasonings before cooking․ Air frying or skillet methods work best to maintain crispiness while infusing heat․ Serve with ranch or blue cheese dressing for a balanced flavor․ This variation adds excitement to meals without extra prep time, making it ideal for those who enjoy bold flavors․ The spicy kick complements the strips’ natural taste, creating a delicious and satisfying dish perfect for snacks or main courses․ Experiment with different spice levels to suit your preference, ensuring a customizable meal every time․

Crispy Breading Hacks

Achieve the crispiest breading on Great Value Chicken Strips by patting them dry with a paper towel before cooking․ For skillet cooking, use a small amount of oil over medium heat to prevent the breading from becoming greasy․ Air frying is another excellent method, as it maintains crispiness without added oil․ To enhance crunch, lightly spray the strips with cooking spray before cooking․ Avoid overcrowding the pan or air fryer, as this can reduce breading crispiness․ For an extra crispy texture, cook at a slightly higher temperature toward the end of the cooking time․ These hacks ensure your chicken strips come out golden and satisfying every time, perfect for snacks or meals․

Great Value Chicken Strips offer a delicious, convenient meal solution with versatile cooking options, ensuring crispy, flavorful results every time for a satisfying dining experience․

Final Thoughts on Cooking Great Value Chicken Strips

Cooking Great Value Chicken Strips is a breeze, offering a delicious and convenient meal solution․ Whether baked, fried, or air-fried, they deliver crispy, flavorful results․ Always ensure the internal temperature reaches 165°F for safety․ Versatile and easy to incorporate into various dishes, they’re perfect for sandwiches, salads, or as a standalone snack․ For the best experience, follow the recommended cooking methods and experiment with seasonings to enhance flavor․ Proper storage and reheating techniques maintain their quality․ With high protein content and resealable packaging, they’re a practical choice for busy households․ Enjoy the perfect balance of taste and convenience with Great Value Chicken Strips!